Sometimes the sky is overcast, the light is dull, and there’s nothing you can do about getting a flat, low-contrast photo. Luminosity masks and other complex selection methods can’t help you because of the low dynamic range in the photo. Luckily, there’s another selection method, called Saturation Masks, that allows you to add selective contrast and color to certain parts of your photo, regardless of its contrast.
This photo of the Lofoten Islands in Norway is a good example of this technique. You can see that this photo has potential, but it’s flat and low-contrast in the before image, while in the after image, there’s extra lighting and contrast on only the buildings and grass on the right, while the rest of the photo is barely affected.
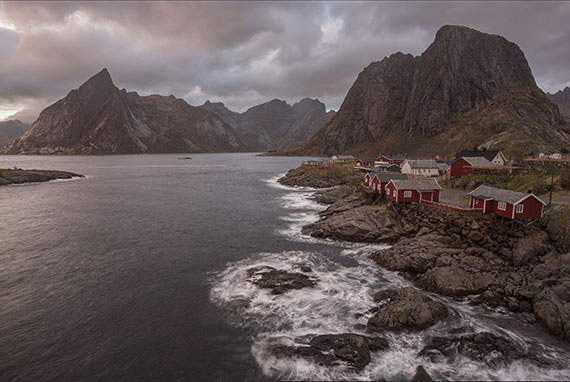
Before using saturation mask
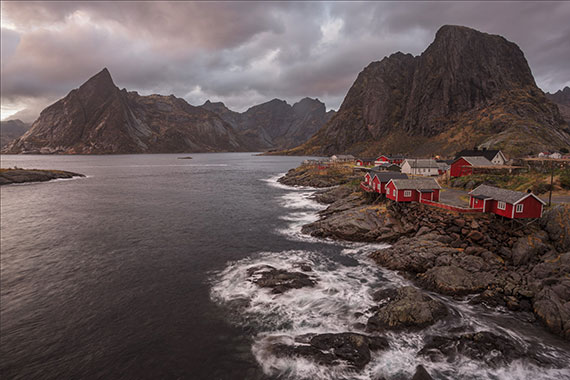
After using saturation mask
This tutorial will cover how to use saturation masks to create this effect, in a quick and replicable way. If you want to download the before photo to follow along, you can do that here.
Step 1 – Create Saturation Masks:
Creating saturation masks is a little beyond the scope of this tutorial. The easiest way is to download the totally free Photoshop Action Pack, which contains various actions to create saturation masks for you in Photoshop. If you would prefer to learn how to create saturation masks by hand yourself, take a look at the video below.
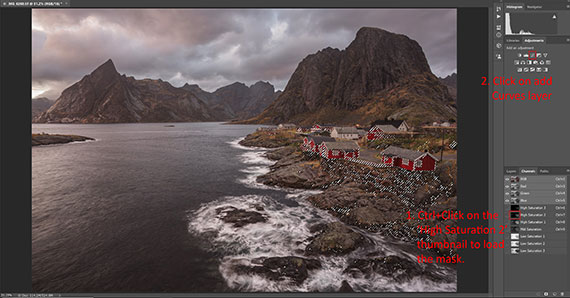
Once you’ve opened your photo in Photoshop and created the masks, you’ll find them in the Channels tab.
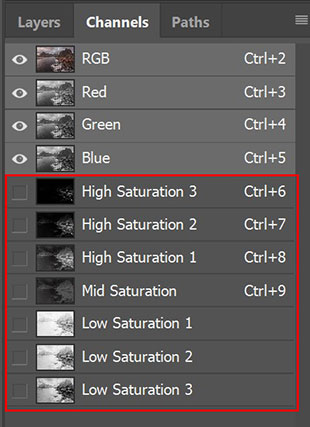
The high saturation masks contain only the most saturated pixels in the photo. The higher the number next to the mask, the more selective and constrained the mask is to only those highly saturated pixels.
The low saturation masks contain only the least saturated pixels. Again, the higher the number next to the mask, the more selective the mask is to only those least saturated of pixels.
Step 2 – Apply Curves with a High Saturation Mask:
Ctrl-Click (Cmd-Click on Mac) on the thumbnail for one of the high saturation masks. For this photo, we’ll use the High Saturation 2 mask, as a visual inspection of this mask shows that it contains the buildings and areas of grass that we’re most interested in selectively lighting. Everything white in the below mask will be selected by it, while everything black will be excluded.
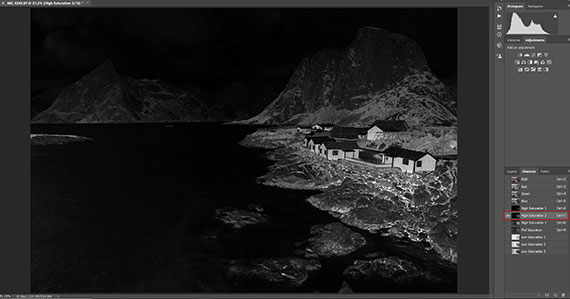
Selecting a saturation mask in photoshop
Then, with the mask selected, add a Curves layer to automatically apply the mask to the Curves layer. This means that any adjustments you now make to this Curves layer are restricted to only the buildings and areas of grass on the mountains.
Add a curves layer to automatically apply the saturation mask to that area.
Thanks to the saturation mask, you can make much larger adjustments than you normally would, with the mask largely protecting you from going too far. Look at the difference in the buildings and grass with the Curves layer switched on and off.
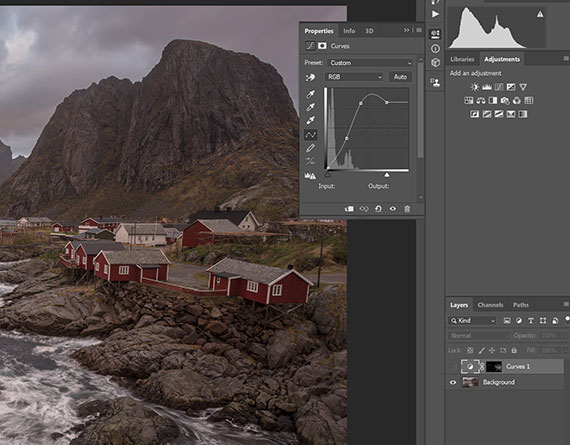
Photo with Curves layer switched off
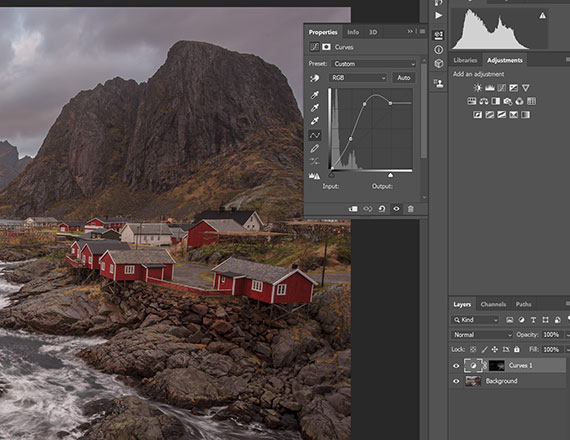
Photo with Curves layer turned on
Step 3 – Boost Low Saturated Colors:
The low saturation masks can be used to recover low saturated colors without over-saturating the highly saturated colors. Ctrl-clicking (or Cmd-clicking) on the Low Saturation 3 mask makes the selection as below. Note that the buildings, which are already highly saturated, are excluded from the mask.
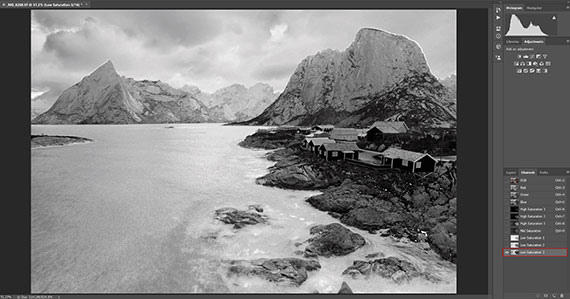
Using a low saturation mask in photoshop
With the selection made, apply a Hue/Saturation adjustment layer, set this to Reds, and boost the saturation.
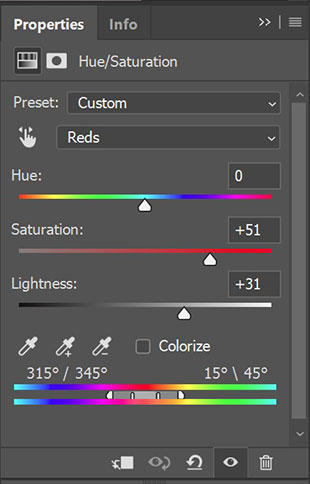
Apply a Hue/Saturation adjustment layer
Although this looks like it should have an extreme effect, it will only give a subtle boost to the reds in the clouds, without having any effect on the buildings, thanks to the mask.
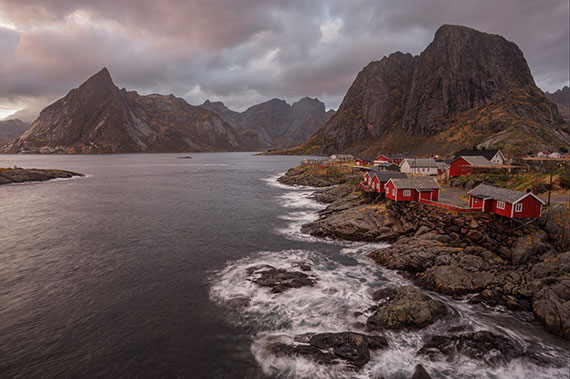
Photo with Hue/Saturation adjusted
Conclusion
This is the essence of the technique, with the contrast and lighting selectively increased on only the buildings and grass. But we can still take this further to perfect the photo by adding levels, layers and gradient maps to more precisely define the contrast. If you’d like to see examples of adjustments that you can make, take a look at the full video tutorial below.
About the author:
Tim Daniels is a photographer and photo trainer, and creator of the Lightroom Develop System, which has helped thousands of photographers gain mastery of Lightroom and unlock the full potential of their photos.
Like This Article?
Don't Miss The Next One!
Join over 100,000 photographers of all experience levels who receive our free photography tips and articles to stay current:


Thank you for sharing this valuable information with us. It’s really helpful and informative article.
Or, you could just use the adjustment brush in Lightroom and paint over the buildings and the same area without having to go through all the trouble of using masks, etc. It may not be as “exact” as your photo, but it would address most of the issue in the first file a heck of a lot quicker and easier…..
My major editing is done over the phone so can you help me make the editing and achieve such effects on the phone as well??