Here are ten ways you can improve your photography.
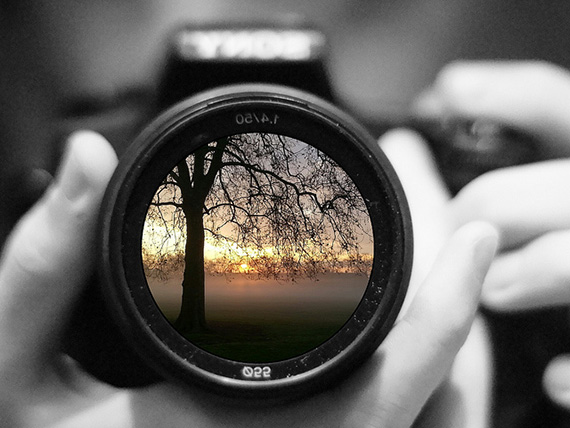
photo by Joel Goldstein
1. Select the Correct Lens and Use It Appropriately
Wide angle lenses, telephoto lenses, macro lenses, fish eye lenses; they all produce different results and impact differently on your image, particularly in relation to the proximity to your subject. For instance, wide angle lenses tend to distort features when close up to your subject; they’re not the most flattering to people. Unless you’re deliberately after a slightly warped look to your portrait photos, you’re going to create more flattering photos of people when using a longer focal length, such as 105mm to 200mm (that means choosing a telephoto lens).
Landscape photos generally appear better with wide angle lenses, as you’re taking advantage of the wide angle to capture as much of the scene as possible, and because you’re not physically close to the subjects in the frame (trees, rocks, rivers, etc.), they don’t take on that same warped effect that you’d typically see, if photographing close up to your subject, with a wide angle lens. While close-up portraits of people tend not to be most flattering with wide-angle lenses, you can take environmental portraits, where you photograph people outdoors, showing them in a more natural setting (than a room in a studio), but remembering not to get too close to them, so as not to distort their features with the wide angle lens.
Whatever lens you choose, be prepared to work the shot by playing about with different focal lengths and physically moving yourself closer to or further away from your subject.
2. Understand Depth of Field
There are three things that affect or control depth of field:
- Focal length (how zoomed in/out you are to your subject);
- The aperture you’re using (is it wide open, or have you closed down the aperture to let less light in?);
- The physical distance you are from your subject
When you’re wide open, at an aperture of, say, f/2.8, you will have less depth of field, and this causes things to become more blurred behind your target subject.

photo by Takashi Hososhima
When you stop down, you’re closing your aperture and letting less light in through your lens, and this gives you greater depth of field. A narrow aperture, of say, f/22, will let much less light in than at f/2.8, and this greater level of depth of field will cause almost everything in your scene to be in clear focus.
Landscape photos tend to benefit from a greater depth of field, because you want see everything in as much detail as possible. Conversely, portrait photographers will do better with less depth of field, as they can take advantage of blurring out background distractions to ensure their subject is the one in clear focus, and so will be the center of attention in the photograph.
It looks much more natural to have certain things in focus and other things out of focus. It’s in keeping with the way our eyes naturally work. You look directly at one thing and the rest of the things (in your peripheral vision) are out of focus. That is your visual system using selective depth of field. With the camera, you can make specific subjects the main object to look at by having them in clear focus while everything else is deliberately blurred and out of focus. Anyone looking at your photo will naturally be drawn to the subject in focus, and this makes it more compelling than if everything was in sharp focus.
3. Understand the Field of View
You can choose to go one of two ways when taking a photograph: you can take a wide angle shot in order to capture as much as possible in your scene, or you can use zoom lenses or macro lenses to focus on a narrow or small portion of the entire scene.

photo by Attila Hajdu
For instance, you could be at an event, such as the Geneva Motor Show (for argument’s sake). Inside the massive arena, you could go to one of the galleried landings and take a photograph that takes in a large portion of the arena with many different car stands and people milling about. Or, while up there, providing you’ve got a long enough zoom lens, you could zoom in on a specific aspect, such as a particular car.
With each photographic situation, you’re providing those who view your photos with a different perspective. You’re playing about with the field of view, either to show as much as possible of the environment you’re in or to exclude as much as possible in order to focus on a small selection of things or a specific detail.
4. Understand Composition
There are two techniques that can help you with improving how you compose your shots, which will go some way to improving your photographs.
The first technique is known as the rule of thirds. To understand this, imagine that the frame is split into nine rectangles, made by two sets of horizontal lines and two sets of vertical lines, evenly spaced across the frame. These lines will create four points where the horizontal and vertical lines cross paths, and the idea is that your images will look better if you place interesting or important subjects in your frame at one of these four points.

photo by Mobilus In Mobili
The other technique involves a similar process, but in this instance you’re splitting the frame into four boxes to create four quadrants, giving rise to the name of this technique: power quadrants. The idea here is that you place your key subject in one of the four quadrants, and for some reason, this can help to make a photo more interesting than if you were to try and center your subject within the frame. Try it.
5. Understand the Point of View
When you select a specific point of view, you’re playing about with the angle at which you’re taking the photograph, such as getting up high to take a bird’s eye shot of your surrounding scene or getting down low and shooting upward to get more of a worm’s eye view. Different positions or angles will also give a different feel or mood to the image and can also affect opinions about the subject.

photo by Brynn Tweeddale
For instance, you can make someone look important and powerful by taking the photo from a lower position and angling your lens up toward your subject. However, if you want to make a person or subject seem small or less powerful, you can photograph them from a higher angle with your lens pointing down at them. When you shoot someone with your lens at the same height, pointing directly at them without any angling up or down of the lens, it has the effect of humanizing them. It’s a good idea, therefore, if you want to humanize a child in a photo to get down to their level to take their picture.
6. Incorporate Leading Lines
In some cases, it can be helpful to those viewing your images to provide a subtle guide to help visually walk them through the photos. The classic leading line is a road that goes off into the frame, perhaps to guide the eye from the edge of the photo, in to a prominent tree or monument. If you had more than one interesting or important subjects in your shot, you might find a way of incorporating a leading line that takes the viewer from one subject to the other and then leads their eye back to the first subject. Fences, hands, fingers, arms, ropes, and pathways—these are all examples of objects that make for good leading lines to help move your viewer(s) through your photos, subtly enhancing the appeal of your images.

photo by Isalien Van Hoorebeke
7. Look For and Understand Light
A single light source, such as the sun, can create different photographs just by the angle at which you take the image in relation to that source of light. For instance, if you’re shooting with the sunlight coming from behind you or just off to the side, providing the light isn’t blocked on its path to your subject (e.g. by trees or buildings or clouds), this is going to help illuminate your subject. But, if you were to move around to the other side of your subject so that the sunlight is pointing directly at you/your camera with your subject in between, this is going to result in a silhouetting of your subject. Each photograph will convey a different mood. It’s the same light source, you’re just taking your camera to a different position to change how the source of light affects the resulting photo.

photo by Eric Huybrechts
Different types of light that can alter an image include the following:
- side light (e.g. sunlight coming at an angle to the left or right of your subject)
- filtered light (e.g. sunlight being diffused, and thus softened, as it passes through clouds, which act like a giant filter)
- direct light (e.g. use of an external flash, pointing directly at your subject)
- reflected light (e.g. use of of an external flash, pointing at a lightly colored wall, so that the wall acts as a giant surface to reflect the light back toward the subject, giving a more even spread of light, which tends to enhance the overall quality of light onto your subject)
8. Use the Correct Exposure
As you point your lens at something, such as a cityscape scene, the camera looks at all the tones, and then it makes an average exposure based on the light. It’s because of this averaging process—due to the limited range of light sensitivity of the sensor—that causes the camera to make certain areas of the image dark and make light other areas of the same scene, depending on the settings you choose (such as aperture and shutter speed). There is an exposure guide on most digital cameras that shows a “+/-0” symbol to tell you when the camera has calculated a correct exposure based on the settings of your camera, through a combination of aperture, shutter speed, and ISO settings. However, because of the camera’s limited ability to handle all the available light data, you may need to step in and compensate, either by boosting or decreasing the exposure by way of the exposure compensation dial. You’re likely going to need to overexpose the exposure compensation setting if you have a lot of white or light in your image. Conversely, you will likely need to underexpose if there are lots of dark things in your scene.
9. Get Things Right In Camera
With the introduction of sophisticated digital imaging software, such as Adobe Lightroom, it is possible in some situations to use the software in place of certain physical practices or tools, such as using filters to obtain a certain quality of light. Rather than using a graduated filter that you screw or slot over the front your camera’s lens, it’s possible to use the graduated filter tool in Lightroom to drag out a gradient over the desired area of your photo. However, there comes a point when sloppy or neglectful camera work isn’t so easily corrected in post-production, no matter how sophisticated the software. You will find your time is better spent getting things right in camera—that is, when you’re in the act of taking the photographs.
Having a tripod will allow you to take multiple images with different exposure settings so that you can compile them into a single, composite image later in Photoshop or a similar photo editor. It’s a lot harder to do this, if you were just trying to hand hold the camera, as it’s often next to impossible to keep the camera perfectly still, and you will have an infinitely harder time trying to blend your multiple exposures later on.

photo by Sascha Kohlmann
While you can use software to add motion blur to parts of your image, it can be much easier to use the correct shutter speed and capture the motion blur when you take the photograph. For instance, when photographing your child on a swing, you get on the swing and take the photo as the swing is moving, in order to keep your child nicely in focus, but adding an element of movement to the image, as everything else around the swing will be blurred in motion. Another example is when you pan the camera with a moving subject, such as a car, so you keep the car perfectly still, but the background adds the element of movement to an otherwise still image.
Be aware how shutter speed can affect movement. If you have a faster shutter speed, you’re able to freeze movement, such as a car moving on a race track, or a bird in flight. However, you may want the subject to be slightly blurred to show some movement, in which case you’d select a slower shutter speed. So, this is another thing that’s done in camera rather than trying to fix things or bodge things later in post-production.
10. Remember the You Factor
Be willing to experiment with the settings of your camera and with the tools at your disposal, such as filters and lenses. Through the process of trial and error, you will find things that don’t work, but then, by not restricting yourself to the tried and true methods, you may hit upon a technique that helps to produce spectacularly interesting results. A good example is in the realm of photographic light painting, where you take a light source, such as LED strip lights, and just play about moving them in different ways. For example, attaching them to radio controlled blimps or quadcopters and taking them out at night, moving them closer to objects and seeing how you can get the light to affect the image, all while you have the camera set taking a long exposure photograph (that is, longer than one second to take the exposure).
Another thing you can do to improve your photography is to create a single image series out of multiple photographs of similar subjects. For instance, over the year, photograph the same tree, maybe once a month, or at the turn of each season. Then, in Photoshop, create a large blank canvas and arrange all of the individual photographs into a single image, that documents the changes of the season. Keep coming up with different mini assignments that get you using your camera in a specific way and help you gradually build up your repertoire of skills over time and with dedicated practice. For instance, one week or month you could explore depth of field, shooting at different distances with different focal lengths, playing about with the aperture settings, to blur the background around your subjects to varying degrees.
Another thing you could do is choose specific themes for your mini assignments, such as only taking photos of a specific subject for a whole week. It could be animals or a specific animal; it could be cars, in general, or a specific type of car. Really, the scope for these assignments is only limited by your own imagination. But, each mini assignment gets you more practice time to learn the skills that will help you take better photos.
About the Author:
Graham Wadden created and maintains the Creative Commons photography website, WaddenCCPhotography, specializing in creating stock photography primarily for home educators and those in education.
Like This Article?
Don't Miss The Next One!
Join over 100,000 photographers of all experience levels who receive our free photography tips and articles to stay current:


I like the idea of the photo series…might try that this year!