Here are 10 features of your DSLR camera that you should know. They will help improve you as a photographer.
photo by Scott Symonds
1. Shooting Modes
Aperture Priority Mode
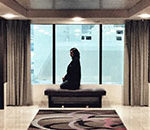
Aperture Priority Mode lets you control / adjust the aperture while the camera takes charge of determining the shutter speed, based upon the other settings (including the aperture). Adjusting the aperture causes background elements in your scene to become either crystal clear or blurred. The wider the aperture, the more the background elements will become blurred, as you focus on your main subject. Conversely, a narrower aperture enables you to include more things in your scene without them being lost to the blurring that occurs with the wider apertures.
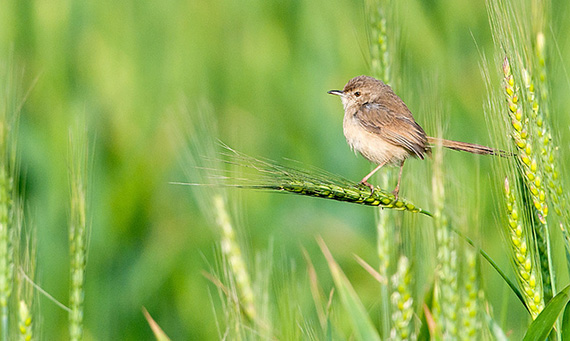
photo by Koshy Koshy
Another thing that aperture adjustment does is to allow more or less light to reach the sensor. With a wider aperture, you’re letting more light in through the lens and onto the camera’s sensor. Go the other way, and less light will come in as you narrow the aperture.
Shutter Priority Mode
Shutter Priority Mode lets you control / adjust the speed of the shutter while the camera takes charge of determining the aperture. Adjusting the shutter speed will let you freeze motion if you choose a faster shutter speed. A slower shutter speed will increase the amount of motion blur in your images. A good example would be including a subtle blurring of the wings of a kestrel, as it hovers in the sky. You capture this activity with a slower shutter speed. Adjusting the shutter speed also affects light reaching the sensor in a similar way as adjusting the aperture. If you select a faster shutter speed, you’re reducing the time that the shutter is held open, which lets less light into the camera’s sensor.. Conversely, more light will come in as you slow down the shutter speed, as you’re causing the camera to hold the shutter open for slightly longer.

Manual Mode
Manual Mode lets you control / adjust both shutter speed and the aperture. Choose this option if you want total control over determining these two settings rather than letter the camera’s algorithms calculate the most appropriate settings. You may be fine with that; but, then again, taking manual control will allow you absolute control over the artistic process and outcome with your photography.
2. ISO
This feature is pronounced “EYE-so”—unless you want to wind-up nerdy-types who get a bit manic over such mispronunciations, in which case treat it as an acronym; call it “I.S.O.”, then enjoy their fit of apoplexy. As for what this feature does, it allows you to control the camera’s light sensitivity based on a numerical system. The lower the ISO number (e.g. 100, 125, 200, 400), the less sensitive the camera will be to light, typically resulting in darker images (unless you have a sufficiently bright light source to compensate, such as an external flash unit). The higher the ISO numbers (e.g. 800, 1600, 2000, and beyond), the more sensitive the camera’s sensor, with lighter images being the result. But, you need to know that this light-enhancing wizardry comes at a cost, and that cost is a reduction in the overall quality of the image as a result of bumping up the ISO setting, particularly above the 1600 level.
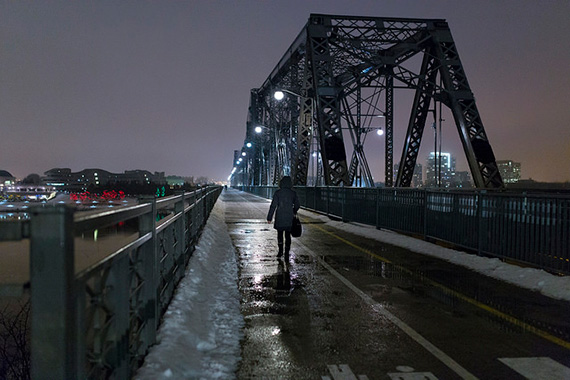
photo by Dave Doe
Camera technology is improving all the time, and every generation of camera gets slightly better at processing images with slightly higher ISO settings. In some cases, it can be better to sacrifice overall image quality in order to get a “once in a lifetime shot” (I’m not sure that many complained about the relatively low quality of images from the first moon landings, did they?). However, in general, if you’re in pursuit of quality, then it’s often best to go for the lower ISO values, specifically, the lowest “native” ISO setting your camera lets you select. What I mean by this is that some digital cameras allow you to set the camera into “Extended ISO” mode, which opens up additional ISO settings. For instance, on the Panasonic GH4, the Extended ISO feature lets you drop down to either 80 or 100. Turn off the Extended ISO feature and whatever the lowest value you see is the camera’s true lowest “native” ISO setting. On the Panasonic GH4, this happens to be ISO 200. That’s just how this camera is designed and the engineers felt this camera worked at its most optimum levels with a minimum native ISO setting of 200. Some cameras have 100 as their native setting; others, such as the Panasonic FZ1000, begin at 125.
3. Focusing Modes (Single Point vs. Spectrum)
This relates to how the autofocus system works. You may have the experience of turning on a DSLR camera and, when you go to focus the camera, in order to take a test shot, a bunch of different indicators flash upon the LCD or Electronic Viewfinder (EVF). These indicators are the different points of the spectrum that have been activated and the camera calculates that certain areas are the ones that you may want in focus, and these are typically represented by red or green boxes over different parts of the image. What typically works better (and by that, I mean, is more reliable and less annoying), is to go into your camera’s menu system, turn off the spectrum focusing option, and switch your camera so that it focuses just on a single point (typically in the center of the frame, although you can adjust this, such as placing the single focusing point over the point where a key subject is or will be in your image so that you get that subject in focus).
4. Back Focus
It seems that a lot of DSLR cameras are set up by their manufacturers so that the shutter button handles both the focusing part AND the exposure part of taking a photo. This can be fine, for a while, and you can get pretty adept at subtly pressing the shutter button half way to focus on your target subject before applying a bit more pressure on the same button to take the photo. However, there may come a time when this system ends up costing you valuable photo opportunities. For instance, when doing light painting photography, you’ll be working in relative darkness, taking time to set up your camera and focusing on just the right point in the image where you want tack-sharp clarity. Then comes the moment when you’ll press the shutter button to begin the long exposure so that you can walk out in front of the camera to wave your torch around, to capture the spectacular movements of light. However, just as you go to press the shutter button, you fail to put the right amount of pressure through the button, and the camera treats it like you’ve requested a change of focus, and the autofocus system kicks in, taking the camera out of the perfectly adjusted focus point.
On the more sophisticated DSLRs, you can save yourself this sort of aggravation by decoupling the autofocus feature from the shutter button and assigning the autofocus to one of the other option buttons. The reason why this method is called “Back Focusing” is because the button that is usually selected for the job of focusing is typically on the back of the camera, but in close-enough proximity to the shutter button so that you can easily engage the newly assigned autofocus button with your thumb while your forefinger remains the trigger finger to engage the shutter button. It does take a little getting used to, but it does enhance your workflow and the way in which you operate your camera.
5. Exposure Compensation
You may not use this feature all of the time, but there are certainly occasions when you’ll want to take advantage of the exposure compensation setting to help improve the overall quality of your image. The exposure compensation settings are measured in values, with zero in the middle, then you either go to the plus values, to brighten the image, or into the minus values, to darken the image. Why would you want to do this, when you’ve already adjusted the brightness with either the aperture, shutter speed, and/or ISO settings? The problem is, with modern DSLR cameras, the algorithms they use tend to result in overcompensation of light quality with the resulting image. If you’re photographing in dark conditions, such as at night or in the evening (when you get those darker blues, for instance), without using exposure compensation, the camera will calculate that any source of light, such as street lights, lanterns, etc., will be rendered extremely bright, as the DSLR overcompensates to make sure the light can be seen in the dark environment. Professional photographers will often deal with this by using the exposure compensation feature, and dialing down into the minus values, typically going to -1 of exposure compensation, in order to tone down those light sources in the resulting image. Conversely, when out in a really bright environment, such as in snow, an exposure compensation value of +1, or even +2, will help to combat the camera’s tendency to overcompensate in the other way. What you’ll typically find is that without adjusting the exposure compensation settings, anything that’s white in your scene will most likely be rendered a really ugly grey color. By adding a value of +1 or +2 of exposure compensation, you’re able to bring back that brilliant white.
6. Custom White Balance
I know of some professional photographers who will typically shoot in auto white balance mode, most of the time. However, there are times when they won’t do that, such as at an indoor ice rink, where the indoor light can render the white of the ice rink a different color to what you actually see. So, to combat this, they will instead prefer to dictate to the camera what “white” actually looks like. This generally involves you going into the white balance menu system, selecting a custom preset option, and then you will take a photo of how you want the white to be in all of your photos. For example, you’d point the camera at a bank of snow, or the white of a wedding dress; fill the frame with that color, and take the photo. The camera will then treat that as white, and balance all the other colors in the scene accordingly, until you reshoot with a different custom white balance, or return it to one of the preset white balance modes, such as AWB (Auto White Balance), or the Cloudy or Sunny settings.
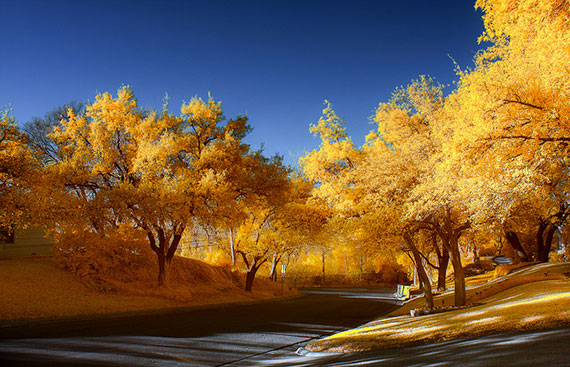
photo by greg westfall
7. Highlight Control (The Blinkies)
Some DSLRs allow you to turn on a highlighting feature that is often referred to as “The Blinkies” (because when you go to take a photo and have the camera’s settings such that it might result in part or all of the image being washed out or lost in brightness, the LCD screen will “blink” at the areas that will become overexposed). This is something you wouldn’t want if, say, you were photographing a bride on her wedding day. If you overexpose the wedding dress, you are likely to lose any subtle detail, and you most likely won’t be able to recover the detail in post-production (e.g. Lightroom), because the software won’t have any data for those overexposed parts of the image. So, Highlight Control is often a good warning indicator to have turned on.
8. Metering Modes
Your DSLR will probably allow you to change to one of three different metering modes, depending on what you intend to photograph:
Evaluative Metering (also known as Multiple Metering)
Evaluative Metering gets the camera to measure the most suitable exposure by determining the levels of brightness in the entire frame. This is generally the one you will want to use—most of the time.
Center Weighted Metering
This method is used to focus on the subject in the center of the frame in order to measure the whole screen evenly.

photo by Nathan Siemers
Spot Metering
This is going to get the camera to meter in just one area of the frame.
In certain situations, such as music concert settings, if you were to select Evaluative Metering, you will run into problems because the light typically changes every couple of seconds—either different colors, or sometimes the light will shine on the artist, other times the light will shine elsewhere, leaving the artist’s face in more darkness; sometimes the light will shine on one band member and not another… and all of these light variations gives your camera a really hard job of trying to calculate how to measure the light to help create a really nice image. When you go to photograph music concerts, Spot Metering is generally the option you want to go with, because you’re going to be targeting the musician’s face. That’s who you’ve come to see, so you want to make it clear in your photograph who the artist is, and that means capturing them in the best possible light by using the most appropriate metering mode—Spot Metering, in this case.
9. External Flash Control (From Your Camera)
Some of the more modern DSLRs, typically at the higher price range, allow you to operate the functions of a compatible external flash unit right from the menu system of your camera. This is a really great feature, especially if you’ve got multiple flash units set up all over the place, or you set your single flash unit up in a perfect, but awkward-to-reach spot, where it’s difficult to see the LCD display and buttons on the flash in order to adjust the settings. Rather than going back to each individual flash unit and having to fiddle about with the settings, which might be troublesome if they’re in a typically high-up, awkward position, you are able to turn your flash unit(s) on or off, raise or lower the power setting, or change how the flash responds, all from the menu system of your DSLR. Both the Panasonic FZ1000 and GH4 cameras have this wireless feature, but you need their compatible wireless external flash units in order to take advantage of this—it is definitely worth the investment.
10. The Beep
If you want to make yourself really unpopular, go into any quiet setting and start taking photos with your camera’s system of beeps fully audible. Don’t do this; it can become a really irritating and off-putting sound. It’s not necessary to have the camera audibly tell you when it has something targeted with its Autofocus system, so it’s best for everyone if you find out where the sound controls are located in your camera’s menu system and turn it off (or, at the very least, as low as possible, if there’s such a volume control option on your camera).
So, those are ten features of your DSLR camera that will help you improve as a photographer.
About the Author:
Graham Wadden created and maintains the Creative Commons photography website, WaddenCCPhotography, specializing in creating stock photography primarily for home educators and those in education.
Like This Article?
Don't Miss The Next One!
Join over 100,000 photographers of all experience levels who receive our free photography tips and articles to stay current:


Very helpful article I really like it thanks for sharing it, but I want to buy canon camera for my wife but didn’t find any link in this article please some one give me a idea from where I buy a best Camera.
I think Nikon is the best Dslr camera because I tried a lot cameras but find Nikon perfect for me
good info without fertilizer – nicely worded. Once I clear the IRS, I will have to go for your PDF
I think you need to change back focus (number 4) to back button focus. Back focus is something completely different.
I tried many DSLR cameras but the last find Canon PowerShot SX420 Digital Camera perfect for me I think canon company cameras are the best cameras in the world
There is so much wrong with this article. The author points out the main controls of the camera but shows little understanding of how they really work.
ISO stands for International Standards Organisation (the body that set the standard for, originally, film sensitivity). Digital systems have adopted the term. Surely he knows that and should realise that it is correctly called eye, ess, oh and not eyeso!
“Back focus” is different from “back button focus.”
I was a little surprised to find no mention of Auto or Program modes here. I personally always shoot in S mode to avoid any chance of blurry photos, even though I know most other pros prefer A mode. JMHO….
I am going to be buying a new camera in the near future. I am wondering whether you can publish/let us know when you are having sales. I am specifically interested in Nikon and the Sony mirrorless. Not the bundles, since I want at least slightly better lenses. Is this possible?
I like these tips, especially #4: What I usually do to make sure focus doesn’t change is turn off auto-focusing. Problem is, I’ve forgotten to turn it back on a couple times and got some blurry messes instead of the nice shots I thought I was taking.