Learning how to use shutter speed effectively can create lively pictures and give motion to your subject without blurring your picture. Let’s define what it is and how it is measured, followed by some real world examples.
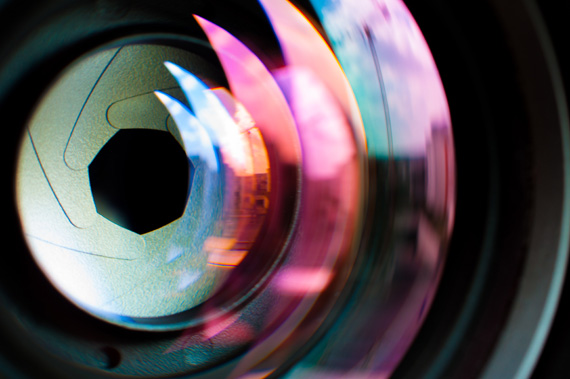
Photo by Agence Olloweb
Shutter speed refers to the length of time your camera’s shutter remains open to allow light to enter and hit the camera’s image sensor. The shutter is a component in your camera body that opens when the shutter release button is depresesed. It will then close automatically after the duration you set for your shutter to be opened had elapsed. If you set it in bulb mode, the shutter will remain open for as long as the shutter release button remains depressed.
Shutter speed is typically displayed on your camera in whole numbers. For example, if your camera displays 500, it actually means that the shutter will be opened for 1/500 of a second. Your camera might also display the shutter speed in quotation marks, which represents seconds. For example, if your camera displays 5″, it actually means that the shutter will be open for 5 seconds. Another mode of display is the bulb mode. When displayed as “bulb”, it means that the shutter will remain open until the shutter release button is released. You can control your shutter using shutter priority mode. Faster shutter speed (e.g. 1/4000 of a second) requires more light for proper exposure. You can widen the aperture or bump up your ISO to compensate. The exact opposite applies when you are using slower shutter speed (e.g., 1/10 of a second).
Fast shutter speed is typically used in the following situations:
- You wish to capture a moving subject and freeze it in action. You might be at a F1 Grand Prix circuit and wish to capture the fast F1 cars. However, as the F1 cars are moving at speeds of up to 350km per hour, you would want to use the fastest shutter speed possible to freeze the F1 car in action, so that the picture captured is not blurred due to subject motion.
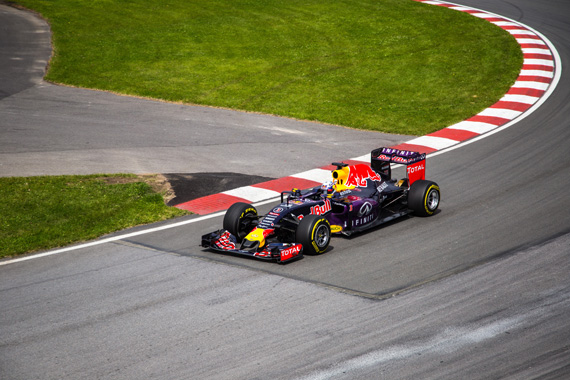
Photo by Jp Valery
- You are in a low light area and wish to take a shot of the scene but find that your pictures are blurry due to hand motion. You can increase your shutter speed to overcome this problem and bump up your ISO or widen your aperture to compensate.
Slow shutter speed is typically used in the following situations:
- Based on the previous example of the F1 car, we can turn the situation around and use a slow shutter speed to show how fast the F1 car is moving in the picture. You set your camera’s shutter to open for about 1/30 of a second or slower. You wait for your favorite car to come along the track. When you see it coming, prepare and aim your camera at the F1 car. When it is close enough, depress your shutter release button and at the same time, pan along with the car as it comes racing toward and away from you. The key here is to pan along with your moving subject, always maintaining your focus on your subject while panning along with it. This will capture the motion of the F1 car, where the foreground and background are blurred, but the subject remains clear and in focus.
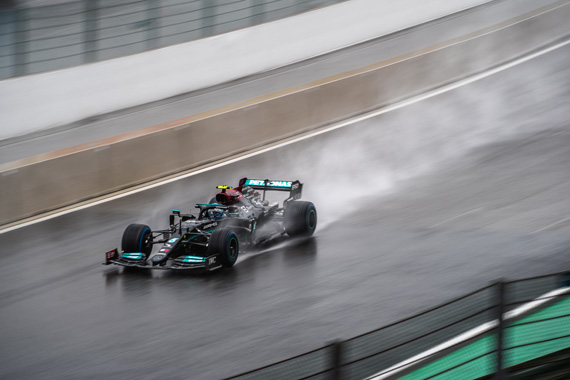
Photo by Sebastian Pociecha
- From the previous example on low light area, you can also turn the situation around using a slower shutter speed instead. Bring along your tripod and mount your camera aiming at the low light area you wish to capture. Set your shutter to open for about 1/10 of a second or slower and narrow your aperture down to about f/11 or smaller for longer exposure, keeping your ISO as low as possible. Depress your shutter release button and wait for your camera to complete the shot. What you get is a very sharp picture which is properly exposed with no motion blur.
- You wish to capture the motion of flowing waterfall or river. Using a fast shutter speed will freeze the water and make it look static and not lively. Instead, you can apply the same concept of setting a slow shutter speed and small aperture, using your tripod for stability. This will allow you to capture the motion of flowing waterfall or river, giving a lively feel to your picture.
Based on the tips and examples above, you should have a good idea of how to use shutter speed effectively to prevent motion blur or create motion in your subjects and bring them to life.
About the Author:
Roy Lee is a freelance photographer residing in Malaysia. He specializes in wedding, portrait, and landscape photography.
© Copyright – Roy Lee. All Rights Reserved.
Like This Article?
Don't Miss The Next One!
Join over 100,000 photographers of all experience levels who receive our free photography tips and articles to stay current:


It is a fantastic information for novices as well as people like us who are in the filed for a long time. Actualy it refreshes the essential rules which we had to practice when we first hold and aimed the camera to a subject. I hope this will be of much help to all, every body should go through it.