In this video, Manni shows us how to apply a Nashville effect using Photoshop. Basically, the effect gives a bit of a faded, burnt out or retro effect to your images. If you’re an Instagram junkie you may have already used it using one of the preset tools. Manni’s method gives you a bit more creative control over the effect:
Record a New Action
If you want to record the whole effect as an action, there is an easy way to achieve that in Photoshop. Simply bring up the Action Panel, click on Pro Actions Folder, and create a new action. Name it and click on Record. Photoshop will now record everything that you do under the given action name.
Create the Effect
Before you can jump into the process, one small piece of advice. This effect works great with black and white images. If your image isn’t a B&W one already or you forgot to convert to B&W in Camera Raw, you can simply create a new B&W adjustment layer in Photoshop before moving forward.
Adjust the Levels
Levels Adjustment Layer
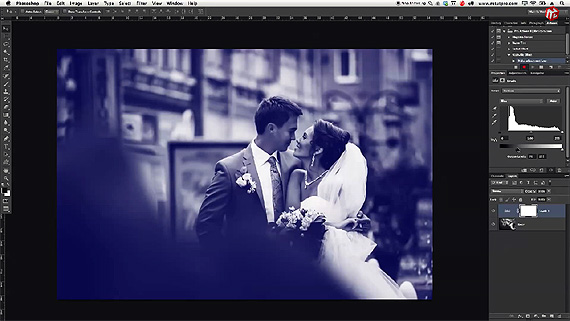
First up is the shadow areas, and Manni advises to select a new Levels Adjustment Layer to work on them. Click on the Levels Channel and select the Blue channel from the three. Grab the slider and drag it up to about 70 percent. The beauty of the levels adjustment layer is that you have the option to tweak the slider back and forth again to readjust if you find the result too punchy for comfort.
Blend a New Solid Color Layer
blending a new solid color adjustment layer
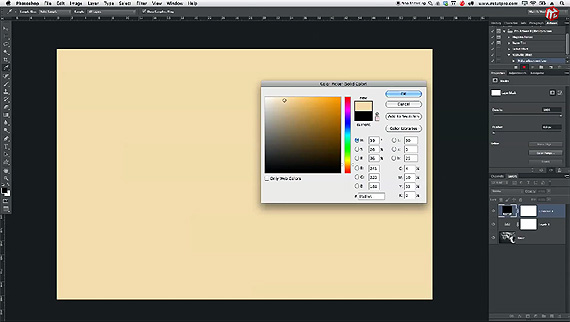
Now click on the new adjustment layer option and create a new solid color adjustment layer. Manni had a number written down previously for the precise color that he wanted. You can experiment here by choosing a different color, or for practice purposes, copy the exact number: #f5dfb5.
The next step is to change the blending option to Multiply. The two layers now blend together to make the image appear closer to what we are looking for. For more blending options tinker with Color Burn, Sepia, or other effects here.
Tinker with the Curves Adjustment Layer

Curves Adjustment Layer
The next step is to create a new curves adjustment layer. The aim is to fine tune the faded effect. So off to ‘Adjustments’ and this time select a curves adjustment layer. Again, start out from the shadow areas, tweak them up a bit. Manni keeps an output to about 36-40%. The second anchor point brings down the contrast. This time the output is at about 60-70% (feel free to experiment). The results of the edit may just be around the point where most editors would say that’s fine. Manni, however, wants to tweak the highlights as well. So, grab the highlight anchor point and push it up a bit so that the output is about 200. Again, you are free to experiment and play around to see what works with your specific image.
Combine the Layers
To conclude press hold Shift and select the last three layers that were created. Now click on the arrow at the top right of the panel and click on New Group from Layers. Name it, and group the layers together.
If you initiated the recording option in Photoshop at the start, you can now click on Stop Recording. You should now have a new action named “Nashville Effect.”
Next time you need to edit an image and render this effect all you need to do is bring that effect up, hit play, and Photoshop magically applies the effect to your image. How cool is that?
Like This Article?
Don't Miss The Next One!
Join over 100,000 photographers of all experience levels who receive our free photography tips and articles to stay current:


Manni, great tutorial! Thanks for sharing this excellent example of the action recording in Photoshop too. This should be a nice time saver for post processing and a quick way to apply the Nashville Effect and others. I look forward to your future photoshop tutorials. Thanks!