For landscape photographers, sharpening is a touchy subject. It has its benefits as well as its pitfalls. For example, sharpening without introducing black and or white edges around a subject can be a real challenge. In this video, Jimmy McIntyre demonstrates a workflow to sharpen your images without adding unsavory edges:
When we sharpen our images we basically add a bit of contrast. The result of that contrast addition affects the whole of the image, including the areas where contrasting tones are present. Therein lies the problem.
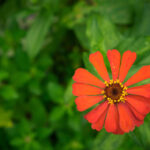
Here’s a classic example:
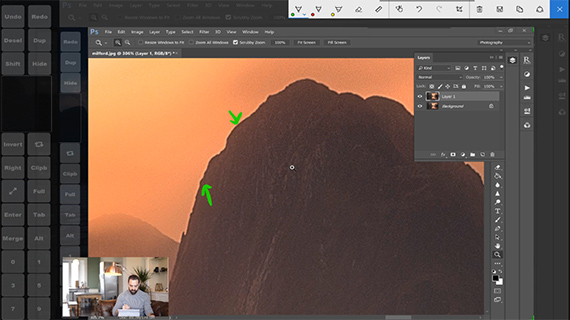
As you can see above, the inside of the mountain in the zoomed in section of the image shows black edging and the outside shows white edging. McIntyre’s approach is to create a mask that targets those non-conforming outlines and leaves them out of the process of sharpening.
The easiest way to select an outline for these edges in your images is to repeat these steps:
- Create a duplicate of the background layer using Command / Control + J.
- Turn the duplicate layer into a smart object. To do this go to Layer > Smart Objects > Convert to Smart Object.
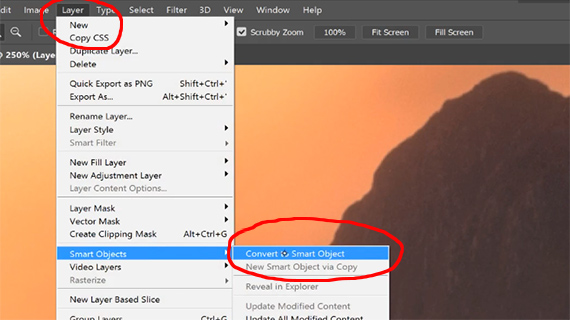
Convert the layer into a Smart Object.
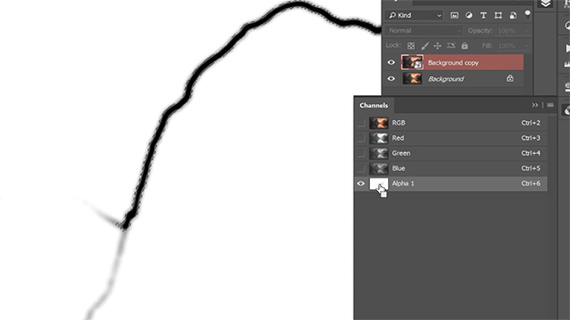
- Go to your Channels palette and create a new Alpha 1 channel. Make a selection using Command / Control + A to make a selection, followed by Command / Control + C to copy the selection. Next, click this icon to create a new Alpha channel.
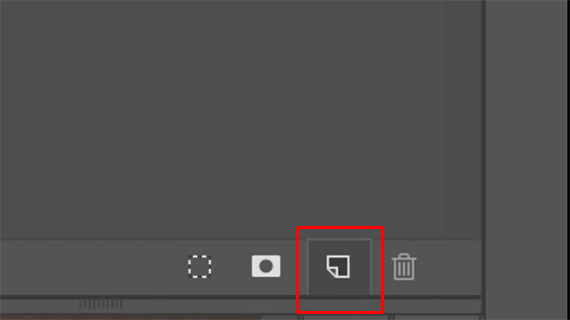
Create the new Alpha channel.
- Press Command / Control + V to paste the selection. You will have a black and white version reflecting as the Alpha 1 channel.
- Find the edges in the image. To do this go to Filter > Stylize > Find Edges.
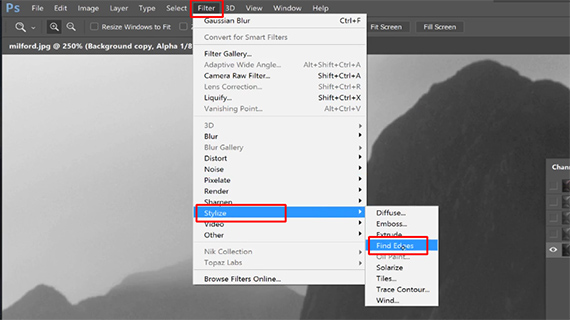
Find the edges in your image.
- As you can see in the demonstration, the edges aren’t too thick. There needs to be a bit more gap between the contrasting colors along the edge line. To do this go to Image > Adjustments > Levels to open up Levels. Adjust the levels until you see that the edges are more clearly defined.
- Next, you also need to slightly blur the edge line so that the sharpening effect is more natural: Filter > Blur > Gaussian Blur.
- Adjust the contrast in case the adjustments above take away the contrast of the edge line. So, the first step is to make the edge line thicker and the next step is to make the line slightly blurred. You need a thick, contrasty yet blurred edge line.
- Hold down Command / Control + Click the Alpha channel to make your selection.
Make a selection of the edge line.
- Now select the background copy layer to activate the RGB channel. Create a mask. This mask excludes the edge line from any sharpening / other changes that you would do next.
- This part is easy. Just select the layer, go to Filter > Sharpen > Unsharp Mask and click OK. This will sharpen the rest of the image without affecting the edge line you masked out.
Here’s the before and after comparison:

Before and After comparison
Do you have another technique for clean sharpening? Leave a comment to let us know about it!
Like This Article?
Don't Miss The Next One!
Join over 100,000 photographers of all experience levels who receive our free photography tips and articles to stay current:


Leave a Reply