You captured a great composition, the lighting looked perfect, and everything seemed fine on your camera’s screen. But when you opened the photo on your computer, the details looked soft or blurry.
Before blaming your camera or investing in a new lens, check these 12 common causes of unsharp photos. Most are surprisingly easy to fix.
Related note: offer ending soon for the new Tack Sharp Photography Guide at 70% Off

1. Your Shutter Speed Is Too Slow
Even tiny camera movements can create blur. A useful starting point for handheld photography is the 1/focal length rule: with a 100mm lens, use at least 1/100 second. Account for crop factor on smaller sensors, and use faster speeds when necessary.
Quick fix: Double your shutter speed and compare the results.
2. Your Subject Is Moving
A perfectly steady camera won’t prevent blur if your subject moves during the exposure. Children, pets, wildlife, and even leaves blowing in the wind may require faster shutter speeds.
Quick fix: Try 1/500 second for moderate movement or 1/1000 second and faster for action.
3. Your Camera Focused on the Wrong Spot
Autofocus can accidentally lock onto the background, foreground, or another object instead of your intended subject.
Quick fix: Select your autofocus point manually or enable eye detection for portraits. Zoom in during playback to confirm what’s actually sharp.
4. Your Aperture Is Too Wide
Shooting at f/1.4 or f/1.8 creates beautiful background blur but leaves very little depth of field. Even a slight focusing error becomes noticeable.
Quick fix: Try f/2.8 or f/4 to give yourself more room for accurate focus.
5. Your Aperture Is Too Small
At very small apertures such as f/16 or f/22, diffraction can reduce fine detail, making the entire image appear slightly softer.
Quick fix: Try f/5.6 to f/8, where many lenses perform particularly well, unless you need greater depth of field.
6. You’re Using the Wrong Autofocus Mode
Single autofocus (AF-S) works well for stationary subjects, but moving subjects often require continuous autofocus (AF-C) to maintain focus.
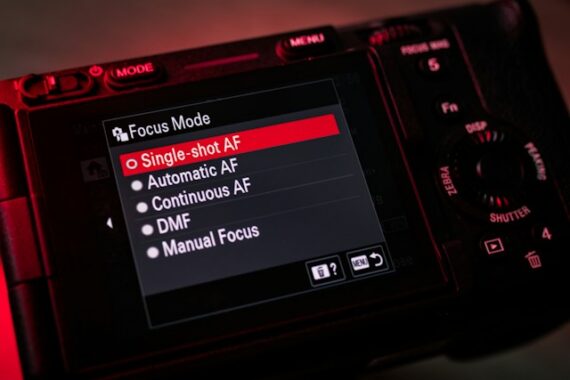
Quick fix: Switch to continuous autofocus when photographing children, pets, sports, or wildlife.
7. Your Image Stabilization Settings Aren’t Ideal
Image stabilization helps reduce handheld camera shake, but it cannot freeze a moving subject. Some older stabilization systems may also introduce problems when used on a tripod.
Quick fix: Enable stabilization when shooting handheld and check your camera’s recommendations for tripod use.
8. You’re Shaking the Camera When Taking the Shot
Pressing the shutter button can introduce vibration, especially during longer exposures. Even a tripod won’t completely eliminate this possibility.
Quick fix: Use a two-second self-timer or remote shutter release when photographing stationary subjects.
9. Your ISO Is Too High
High ISO introduces noise, and aggressive noise reduction can smooth away important textures like hair, feathers, and foliage.
Quick fix: Use the lowest practical ISO without sacrificing the shutter speed needed for a sharp image.
10. Your Lens or Filter Is Dirty
Fingerprints, condensation, and oily smudges can reduce contrast and create hazy-looking photographs. Poor-quality protective filters may also affect image quality.
Quick fix: Clean your lens properly and try removing your protective filter to see whether sharpness improves.
11. Your Lens Has Sharpness Limitations
Not every lens performs equally well at every aperture or focal length. Some are softer when used wide open, particularly toward the corners.
Quick fix: Test your lens at different apertures. Stopping down one or two stops often improves sharpness.
12. Your Editing Is Making Photos Look Soft
Excessive noise reduction can erase fine detail, while insufficient sharpening may leave an otherwise sharp photograph looking flat. Too much sharpening creates unnatural edges and halos.
Quick fix: Evaluate sharpening at 100% magnification. Adjust Amount, Radius, and Masking carefully to preserve natural-looking detail.
A Quick Sharpness Test
If you’re unsure what’s causing the problem, photograph a detailed, stationary subject in good light. Use a tripod, f/5.6, a low ISO, careful focus, and a two-second timer.
Then take the same photograph handheld.
Compare the images at 100% magnification. If the tripod version is noticeably sharper, camera movement or technique may be responsible. If both look soft, investigate focus, aperture, or lens performance.
Final Thoughts
Sharp photographs aren’t necessarily the result of expensive equipment. They’re usually the result of good technique, accurate focus, and appropriate camera settings.
The next time your images look soft, don’t immediately blame your lens. Work through these 12 checks, change one thing at a time, and discover what’s really causing the problem.
A small adjustment might be all you need to make your next photograph noticeably sharper.
Want Consistently Tack-Sharp Photos?
Getting perfectly sharp images involves much more than simply using a tripod. Focus technique, shutter speed, aperture, camera stability, lens performance, and post-processing all play important roles.
Our new Tack Sharp Photography Guide walks you through a complete system for capturing consistently crisp, professional-looking photos in virtually any situation (currently 70% off today for a 🍂 Fall Focus Event).
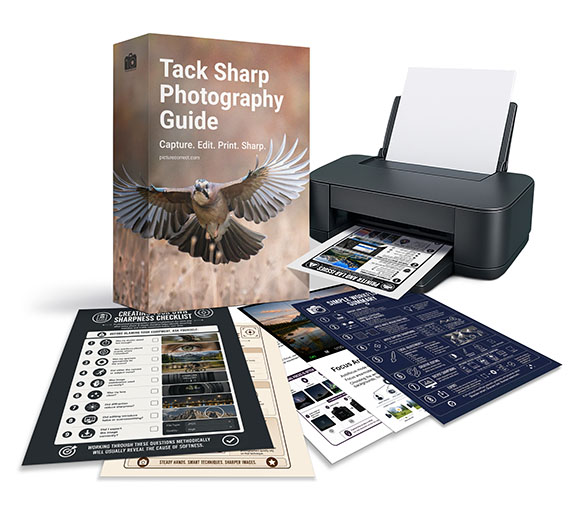
Inside, you’ll learn how to choose the right camera settings, master autofocus, eliminate camera shake, maximize lens sharpness, develop an efficient editing workflow, and prepare your photos for stunning prints. Whether you shoot landscapes, wildlife, travel, portraits, macro, or sports, the techniques apply to virtually every style of photography.
Deal ending soon: The Tack Sharp Photography Guide at 70% Off
Like This Article?
Don't Miss The Next One!
Join over 100,000 photographers of all experience levels who receive our free photography tips and articles to stay current:






Leave a Reply