Polyboards are large sheets of foam that are traditionally used as insulation in building construction. As most studio photographers know, they are also great as light modifiers. Most photographers use white and black polyboards to reflect light and create shadows. They are lightweight, cheap, and have a large surface area. For my studio, I decided I wanted many polyboards of different colours to use as backdrops and reflectors.
Polyboards can be painted any color.
To create coloured backgrounds in studios, photographers often use gels on speedlites and strobes to light up a white background. I have found this can work fine, but it can also take a bit of stuffing about getting an even and consistent spread of colour. The advantage of using gels is that you can get a larger spread of colour than a polyboard provides. But a polyboard will have a more consistent, richer colour.
There are several companies around any major city where you can find polyboards. The standard studio photography size of these is 2400mm by 1200mm and a 50mm thickness. I went for 75mm thick, as I wanted something a little more rigid. Keep in mind that the size you choose will determine the size of stands you need to construct.
If you are having the boards delivered, I recommend you make a special note to the provider to deliver them mark and dent free. Since they are usually used in construction, care is not usually taken with them, and I had to have some replaced.
Painting

Most colours require two coats of paint.
Each side of a polyboard uses between 350 and 500mL of paint—you will generally need two coats, but it depends on the colour. Most paint retailers will mix up a one litre tin of an endless array of colours for about $30. To get the best finish, I found a grey undercoat makes for a much better end result. Adding an undercoat additive to white paint will give you undercoat. A small roller works better than a brush. Not all colours are available in a matte paint, but low sheen works just as good. I used outdoor paint, which is a few dollars cheaper and works fine.
Make sure you reserve a board and paint for black and white reversible colours on the same polyboard (one side black, one side white). This will allow you to quickly reverse them without grabbing another board, as is often needed. Black and white are used most as light modifiers.
Stands
It’s best to have your stands specially welded and powder coated. I got mine without a powder coat—but I found the raw steel not only looks ugly but marks the polyboards, so I got a panel beater to powder coat them for me.

Raw steel leaves marks on polyboards.
Shooting and Practice
I have tried many lenses and lighting setups using our polyboards and I have found a long lens works best—this will give the maximum amount of subject viewable on the polyboard without the frame extending beyond the edges of the board. This means that the more space you have in your studio and the further away from you subject you can get, the better. Having my studio in an open grey concrete slab warehouse, the coloured polyboards also give the studio a lot of life.
Whilst the coloured polyboards give a fabulous rich coloured background, I am finding the black polyboards absolutely indispensable for creating shadow and deadening light. I seem to rarely take a shot without surrounding my subject with these.
I have also found the slightly rough bubbled surface of foam can show up too much in a shot depending on your lighting. It’s generally a quick fix in post to smooth and blur these out. Overall, my polyboards have been a well worthy investment and have given my studio a unique feature.

Use a long lens for best results.
Cost
- Polyboards (2400mm x 1200mm & 75mm thick): $45 + delivery
- Paint: approximately $30 per litre
- Stands (with white powder coating): approximately $85 each
- Models: priceless
So the total cost of each polyboard with different coloured paint on each side is about $165.

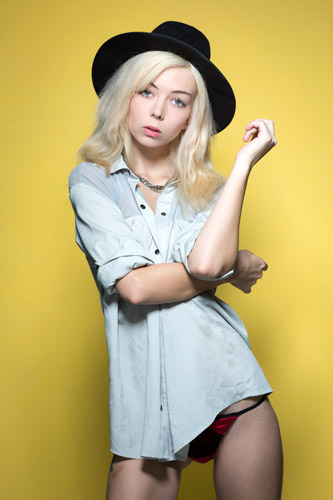
Polyboards make versatile portrait backdrops.
About the Author:
John McKay is the owner of Teardrop Studio in Melbourne, Australia. Having a background in education, John has been a professional photographer for a couple of years with a focus on people, portraits, and training. All images courtesy of John McKay.
Like This Article?
Don't Miss The Next One!
Join over 100,000 photographers of all experience levels who receive our free photography tips and articles to stay current:


Great tips John,
Of course, white polyboards are fantastic for using as reflectors to bounce lights off giving a nice diffuse light and for flagging lights from hitting the camera.
Not sure who kicked the girl in the last photo in the chest but why publish it. Not impressed!
This is a nice article, but photos of setting up the board and using the stand would have helped. Just by looking at that stand, I have no idea how you are using it.