There are some days when you can’t go outside to shoot. Or maybe you just want to limit yourself to the confinement of your house and challenge your own creativity. Photographer Lee Morris from Fstoppers takes up the indoor photography challenge by taking photographs of a toy car and making it look real:
Preparation
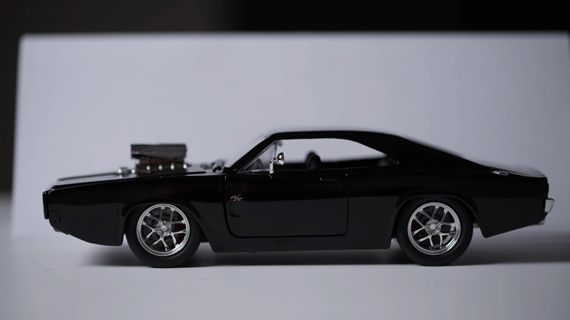
Morris places the toy car on plain white foam core. This will later make the post-processing easier. Just by changing the blend mode, the toy car will blend into any background perfectly. He also places a white sheet of paper behind the car so that he can define the edges of the car prominently in Photoshop.
Gear and Camera Settings
Morris uses his Nikon D750 with the Tamron 90mm f/2.8 macro lens. He suggests that you use a macro lens for miniature shoots, as it will allow you to shoot from a close distance without any issues. Also, a macro lens will help you capture greater details.
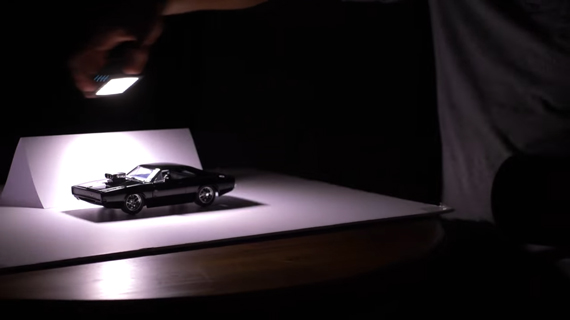
At an aperture of f/2.8, the image has a very shallow depth of field, which looks very unnatural for a car photo. And although it’s not ideal to shoot at a very narrow aperture, Morris uses an aperture of f/32 to have the toy camera in focus from front to back. Also, he sets his shutter speed to 1 second. The full second exposure allows Morris to sweep the portable Litra Pro lighting across the top of the car and around the side. This action replicates the gigantic softboxes used by professionals to shoot real cars.
Angle of View
While taking the photograph, think of the toy car as a real one. This means that the height you maintain should be realistic. You cannot get a little bit above the car. That will seem unnatural. But if you’re shooting from way above, it will give a feel as if you are shooting from the top of a building looking down.
“Just imagine that you were a person the size of the car. Where would you be photographing this car? If I want this to appear like a real car, I need to shoot it like I would with a real car.”
Taking Images of Toy Cars
Once everything is set up, Morris chooses the interval timer option in his camera and sets it up to take a 1 second exposure every second. While the camera is taking photos, he moves the light over and around the car in different ways to get as many lighting effects as possible to ensure he has many options to work with during post-processing.
Editing Toy Car Images in Photoshop
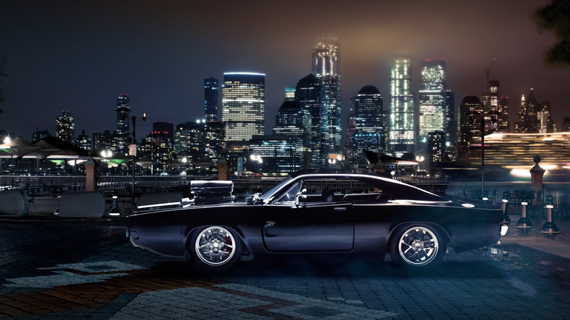
In Photoshop, Morris first uses the pen tool to remove the background from the image. He then uses the bottom half of the car with its shadow on the white paper base as a second layer. This second layer is used to anchor the car with the shadow, giving it a realistic feeling. Finally, as the background, he uses an image of New York city that his friend took.
While placing the car in the city, Morris ensures that the car does not appear to be of abnormal size. By using different blending techniques and layer masks, he creates a reflection of the ground and the city lighting on the car. This adds a touch of reality to the image and takes the image to the next level. Further, to make it feel like the car is really a part of the image, he color grades the image and adds some smoke.
Final Image
What you choose to shoot and what kind of image you end up with all depends on your creativity!
Like This Article?
Don't Miss The Next One!
Join over 100,000 photographers of all experience levels who receive our free photography tips and articles to stay current:


Leave a Reply