Splash photography might seem complicated, but you can get started with a few simple tools that you might already have lying around your house. Dustin Dolby from workphlo shares his technique:
Dolby recommends using a piece of black or gray Plexiglass as a platform for product shots. In this case, he placed the Plexiglass on top of a metal plate welded to a stand.
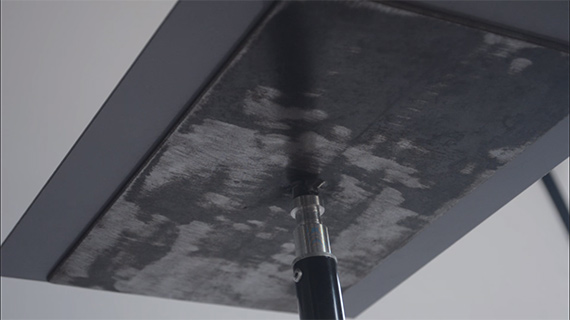
Plexiglass Platform
For the first test shot, he used a strip box with a speedlight fired through a single diffuser, which resulted in an undesirable white rectangle in the middle of the frame.
A second diffuser smoothed things out. You can also use a thicker diffuser for the same effect. Watch out for the exposure, as the twin diffuser setup eats away a lot of light.
Next, Dolby brought in a second speedlight. In the previous two shots the garnish was underexposed. A lower flash power (1/128, in this case) ensures that your flash fires for a brief moment of time. Essentially, that helps in freezing the moment. Keep the ISO high so that you can compensate for the lower intensity light.
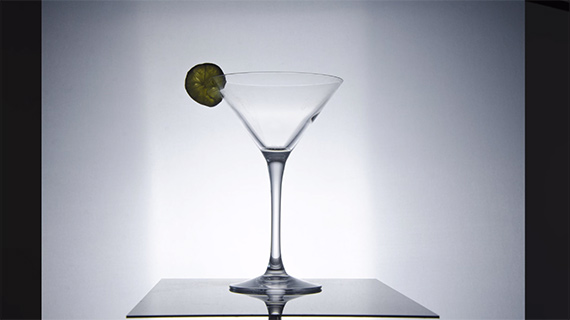
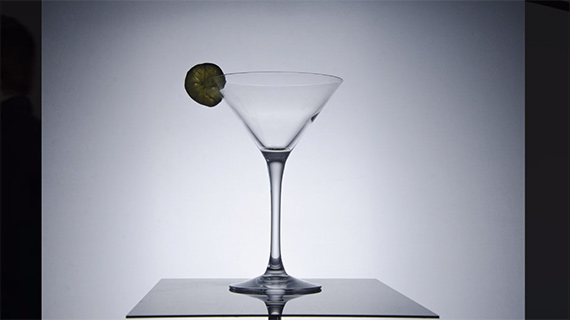
But the positioning of the light is important. A frontally lit shot will appear flat and boring. Plus, the shadow of the glass made things even worse.

With the light now placed on a side the results immediately looked a lot better.
Now that the basic setup is ready, experiment by splashing and firing at the same time until you get things perfect.

An advantage of having a neutral background and a stable setup is that you can experiment with the splashes as much as you want and then composite several shots into a final image.
Splash photography is a matter of trial and error. It takes a lot of patience!
Like This Article?
Don't Miss The Next One!
Join over 100,000 photographers of all experience levels who receive our free photography tips and articles to stay current:


Very cool.