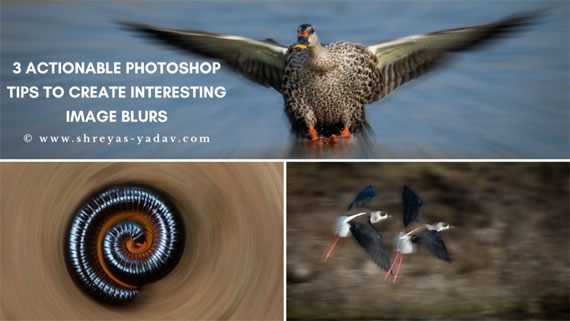
Adobe Photoshop tools to create Image Blurs: In this step-by-step guide you will learn how to use 3 actionable tools to create beautiful image blurs.
I think you will agree with me when I say: it’s hard to photograph interesting image blurs while there is a lot of action going around you.
Well, it turns out, you can create interesting images with creative blurs later using a few simple photoshop tips.
Tip # 1: Add Motion Blur to create a beautiful sense of Motion
You can add a smooth and beautiful sense of Motion using the Motion blur tool. You can use motion blur with objects moving in front of you.
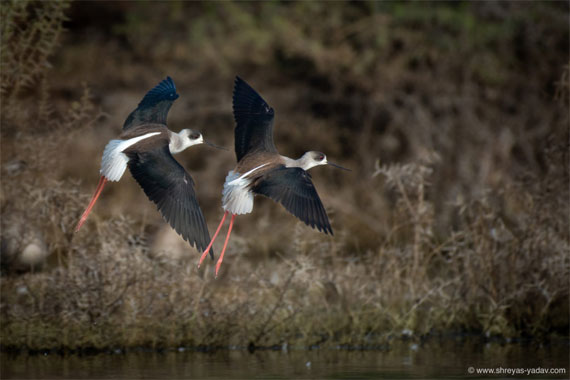
Typically things moving in front of you from Left to Right or Vice-Versa work great to add motion blur. Some of the images where you can use the Motion blur tool are – cars moving on the road, kids/people running or walking, running animals, flying birds, airplanes, etc.
The only thing to remember while you apply Motion blur is that the subject should move in front of you from your Left to Right or from your Right to left.
This is how you will use the Motion Blur Tool in Adobe Photoshop:
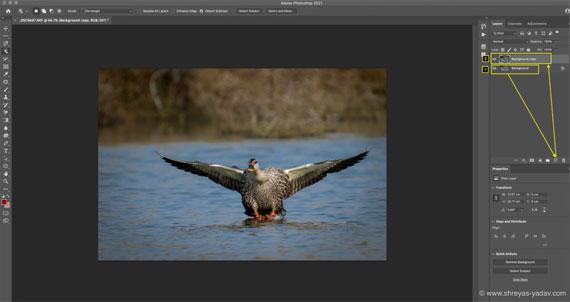
- Create a Background Copy Layer by Selecting the background layer and dragging at Create New Layer Icon ( + symbol)

- With a Copy of the background layer selected, make the selection where you want to apply the Motion Blur.
Here is a reference guide on How to Make Selections in Photoshop
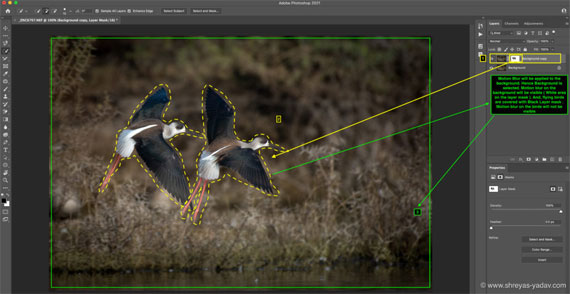
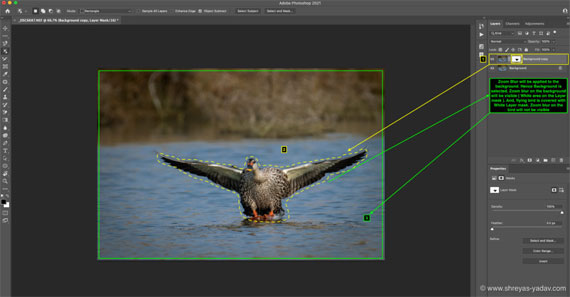
- Once the selection is made, click on the image in Background Copy.
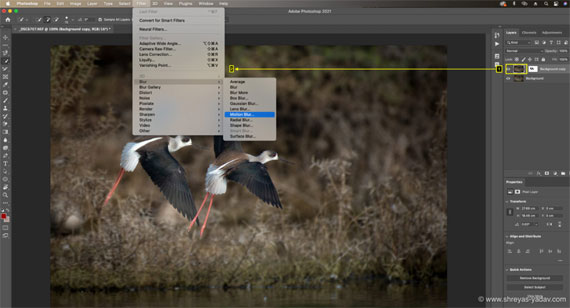
Select : Filter > Blur > Motion Blur. Motion blur window will pop up
- Angle controls the direction of the Blur. For applying horizontal Blur, use a 0 deg or 180 deg angle. If you want to apply vertical Blur, then use 90 deg or 270 deg.
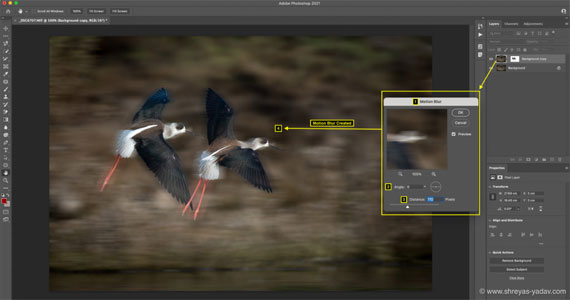
- The distance option controls the intensity of the motion blur. A high value of Distance will make the Blur look artificial. Hence Use a moderate number. Every image will demand a different Distance. Generally, I find the Distance option in the range of 50 to 115 pixels to be good enough.

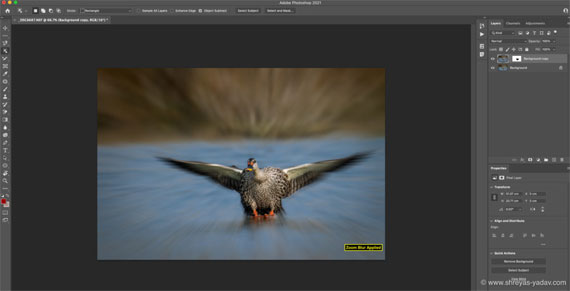
Tip # 2: Use Zoom Blur to show the Motion of the object coming towards or leaving away from you
You can emphasize the object coming towards you or leaving away from you using Zoom Blur. You can create stunning image blurs If the Subject is coming towards you or going away from you (from your lens).
Some interesting objects to try adding Zoom blur are people or kids running towards you, automobiles, wildlife, birds, etc. Zoom blurs can become very interesting and dynamic if the objects coming towards / leaving away from you are in motion.
Here is how you can create Zoom Blur in Adobe Photoshop
- Create a Background Copy Layer by Selecting the background layer and dragging at Create New Layer Icon ( + symbol)
- With a Copy of the background layer selected, make the selection where you want to apply the Motion Blur.
Here is a reference guide on How to Make Selections in Photoshop
- Once the selection is made, click on the image in Background Copy.
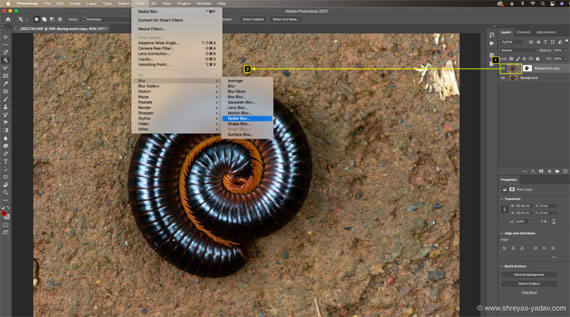
Select : Filter > Blur > Radial Blur. Radial blur window will pop up
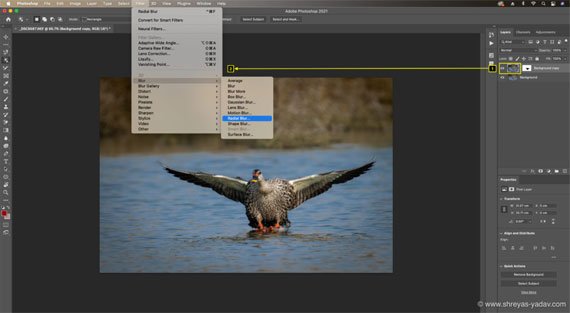
- Select Blur method as Zoom. Select the Center of Blur using the Blur Center option. Click and drag the blur center as required.
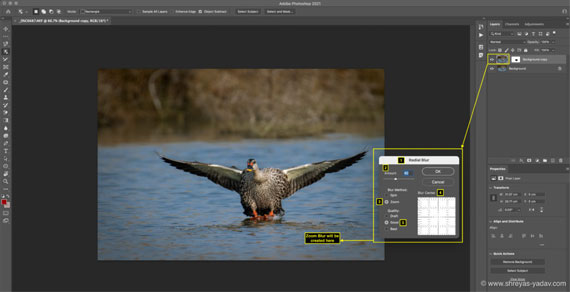
- The Amount option controls the intensity of the Blur. If there is fast Motion, then select a slightly higher number. For most situations, a moderate number between 25 to 50 is good enough. Try different numbers and see which works best for your image. Quality of the Blur you can select as Good.

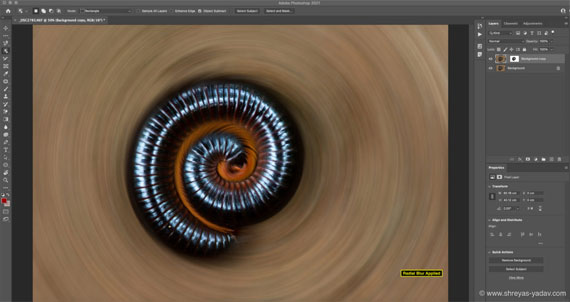
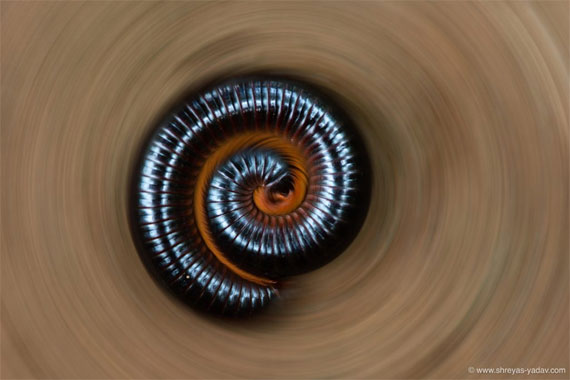
Tip # 3: Enhance the circular shapes and Motion with Spin Blur
You can create beautiful and circular blur motions using the Spin Blur tool. Spin Blur will help you to amplify the circular Motion and circular objects. Here are some of the photography subjects to try adding Spin Blur – bicycles, cars with an emphasis on wheels, merry go rounds, and anything that moves in a circular motion.
Steps to Create Spin Blur is almost the same as Zoom blur. Below are the steps
- Create a Background Copy Layer by Selecting the background layer and dragging at Create New Layer Icon ( + symbol)
- With a Copy of the background layer selected, make the selection where you want to apply the Spin Blur.
Here is a reference guide on How to Make Selections in Photoshop

- Once the selection is made, click on the image in Background Copy.
Select : Filter > Blur > Radial Blur. Radial blur window will pop up
- Select Blur method as Spin. Select the Center of Blur using the Blur Center option. Click and drag the blur center as required.
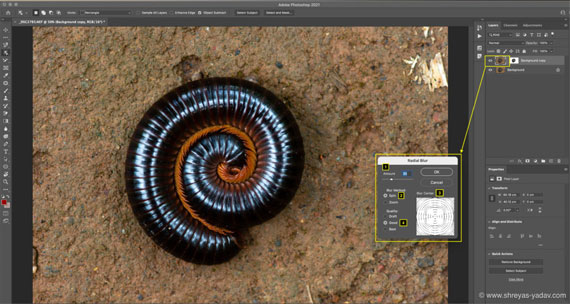
- Amount option controls the intensity of the Blur. If there is fast circular Motion, then select a slightly higher number. For most situations, a moderate number between 15 to 40 is good enough. Try different numbers and see which works best for your image. Quality of the Blur you can select as Good.

Now it’s your turn!
Which of the Image Blur Techniques are you going to try first – Motion blur or a Radial blur? Either way, Let us know by leaving a comment below.
About the Author:
Shreyas S. Yadav is an engineer and photographer of wildlife and nature. He is also a writer and lifelong adventure explorer. Through his writings, he teaches about digital post-processing and nature photography. Shreyas shares field techniques about nature photography, post-processing and wildlife photo stories on his website.
Like This Article?
Don't Miss The Next One!
Join over 100,000 photographers of all experience levels who receive our free photography tips and articles to stay current:


Leave a Reply