Whether it’s an error of judgement, a momentary brain lapse, or some crazy lighting, an underexposed photo of a great moment is a reality in every photographer’s life. Whatever the reason, there is a way to salvage the image. Aaron Nace from Phlearn shares how:
Before you get started, understand that when you start to brighten up the dark areas in an underexposed photo, you’ll need to watch out for the shadows. Shadow areas often become less saturated in the process. Your approach should be to simultaneously bring up the saturation of these areas as you bring up the brightness.
The bright side (no pun intended) is that you’re probably working with a 16 bit RAW file, and that gives you a lot of information to work with. But don’t fret if you’re using an older camera. Just to demonstrate that this technique is not dependent on the best camera systems, Nace worked with an 8-bit file for this tutorial.
How to Fix an Underexposed Photo with Photoshop
Open a new adjustment layer and go to Curves.
If you’re replicating the steps in the downloaded file (link in the video) you will immediately notice that the histogram is skewed toward the left. That means a majority of the information is stuck in the shadow areas.
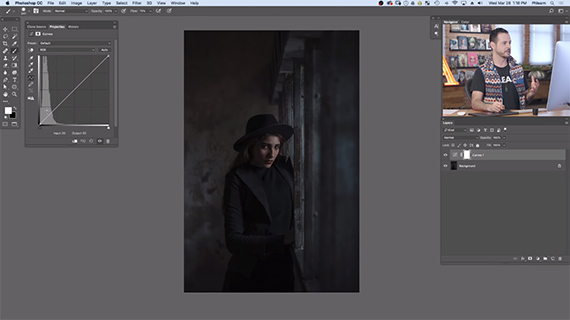
Hold the center part of the curve and drag it to the right. You will notice that the shadows get brighter.
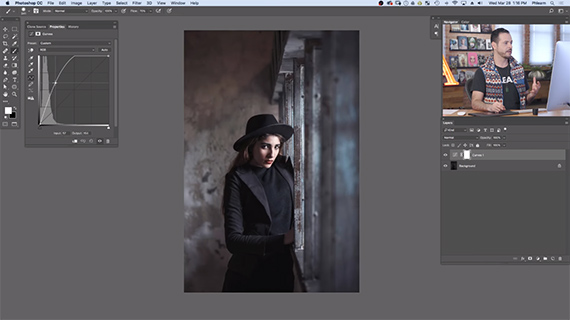
One problem with using the Curves adjustment layer and bringing the shadows up is that it also affects the highlights. The result is loss of details in the highlight areas. The trick is in only applying this effect to the shadow areas. In other words, use Apply Image.
You might be wondering what the point of using a snapshot on a different layer is. Because evidently that’s what Apply Image does. But Apply Image can be applied to a layer mask.
In this case, Apply Image hides the effects of the Curves adjustment layer from the shadows while keeping them in place in the highlights (the reverse of what is needed).
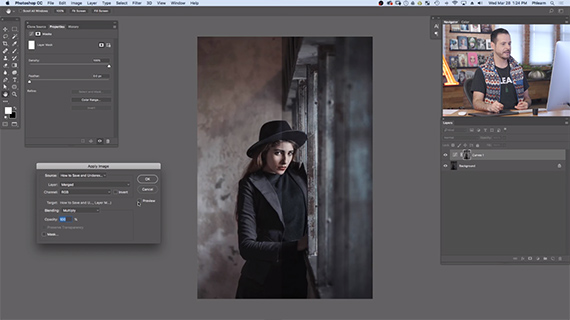
To rectify the situation, click the Inverse checkbox in the prompt window. Here is the image after the Inverse checkbox is checked.
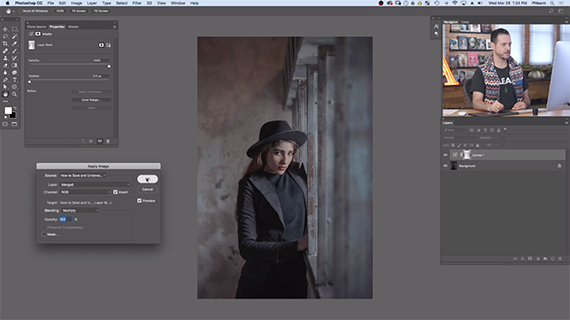
As you can see the effect is now applied only to the shadows and not the highlights.
The next step is to bring the saturation up in the shadow areas.
Create another adjustment layer (Hue/Saturation). Copy the previous layer mask in the Curves adjustment layer to the new Hue/Saturation adjustment layer to ensure that any changes in saturation affect only the shadows and not the whole image.
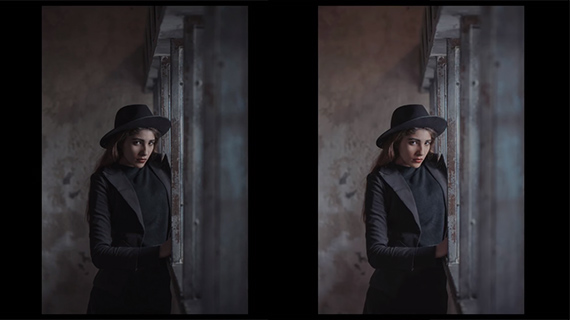
Here is a before and after.
Have you tried this method? What is your favorite technique for rescuing an underexposed photo?
Like This Article?
Don't Miss The Next One!
Join over 100,000 photographers of all experience levels who receive our free photography tips and articles to stay current:


Leave a Reply