Photographers have been dodging and burning since the age of film photography. When using this technique, you brighten certain highlights and darken certain shadows. This effectively adds depth and dimension to the image. Photoshop expert Aaron Nace from Phlearn guides you through this technique by using curves adjustment layers:
While you could use the dodge and burn tools in Photoshop for the process, Nace teaches you how you can do it with curves adjustment layers in a non-destructive way.
“It uses the lights and darks of your photograph to determine where to dodge and burn.”
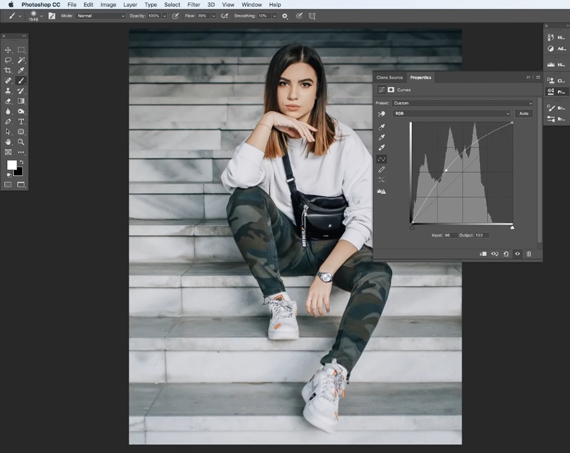
Nace uses the following image for demonstration purposes:

Before
How to Dodge and Burn with the Curves Adjustment Layer
Start with the dodging process:
- Open the image in Photoshop.
- Go to Layer > New Adjustment Layer > Curves.
- Make the image brighter by moving the mid-point of the curve upward.
- Press Ctrl/Cmd + I to invert the layer mask.
- Select a soft brush and paint over the areas you want to brighten with white. This will perform the dodge function.
- To make the effect blend properly with the image, click on the layer mask and go to Image > Apply Image and click OK.
Once done, go on with the burning process:
- Go to Layer > New Adjustment Layer > Curves.
- Make the image darker by moving the mid-point of the curve slightly downward.
- Press Ctrl/Cmd + I to invert the layer mask.
- Using a soft brush, paint over the areas you want to make darker with white. This will perform the burn function.
- To make the effect blend properly with the image, click on the layer mask and go to Image > Apply Image. This time, make sure that the Invert box is checked and click OK.
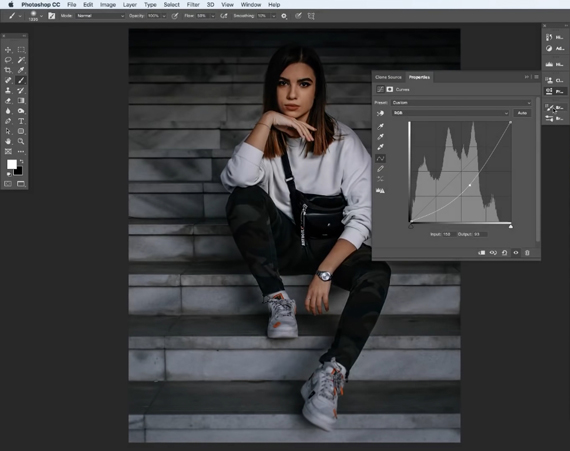
“The best thing about this technique is I can always adjust my dodge and burn levels afterwards.”
To make any adjustments to the dodge or burn levels, double-click on the curves adjustment layer. This will make the curve appear wherein you can make your required adjustments.
You can see the final image below. It looks much punchier than the original, right?

Give this technique a shot and I’m sure you’ll see an instant improvement.
Like This Article?
Don't Miss The Next One!
Join over 100,000 photographers of all experience levels who receive our free photography tips and articles to stay current:


thanks for helping me