Practice makes perfect. Consider football players practicing before a game. While practicing, they do all kinds of things that they wouldn’t do during an actual game. In practice sessions, they push themselves and their skills to their limits, because they want to improve their skills, agility, strength, and decision making. As a photographer, you should do the same. In the following video, photographer Mark Wallace from Adorama takes you through an exercise to help you stay on top of your photography game:
To understand how to have better control over lighting as a photographer, Wallace takes you through an exercise similar to what classic painters used: a still life. By shooting still life, you will have a better understanding of how to control specular highlights, shadows, and the direction of light. So follow along and start practicing.
Setup for Still Life Photography Practice
For the practice session, Wallace has the following setup:
- Leica M10 camera with a 50mm lens, set at f/8 for greater depth of field
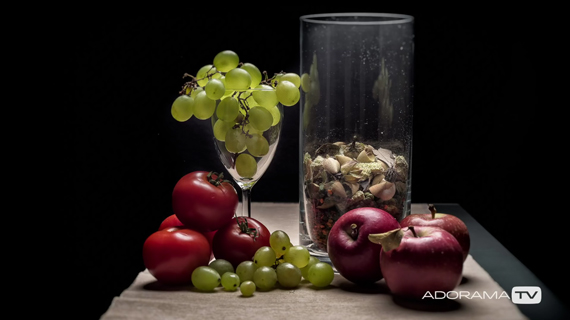
- At the other end of the camera, he has some tomatoes, apples, grapes, and a glass pitcher with potpourri. Note that the fruits, vegetables and the glass pitcher are shiny and have specular highlights.
- The setup is lit with big windows on the side, and one incandescent light on the top.
Exercise to Control Specular Highlights
Since the items that Wallace has chosen are very shiny, they show off reflections of the light source (specular highlights). The first exercise is to control those specular highlights, as they can be very distracting and difficult to deal with even in post. Here’s what Wallace does to control the specular highlights:
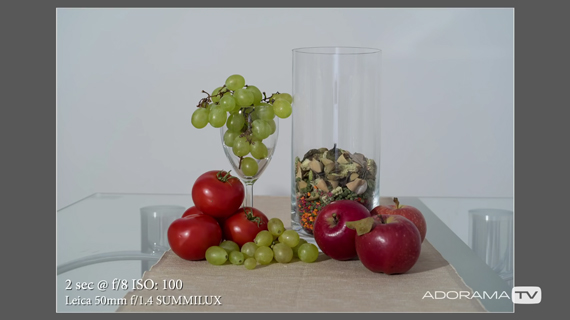
- First off, he starts by taking a photo of the fruit and vegetable setup just using the ambient light. This gives him an idea of how the specular highlights appear in the image.
- Taking inspiration from the classic master painters, he approaches the situation with the idea of getting rid of ambient light by closing the windows.
- He uses a Profoto B2 with a soft box to light the subject. To avoid specular highlights, he places the light setup close to and behind the subject, also making sure that some amount of light is spilled in front of the subject.
- He then meters the light by pointing the light meters toward the light (and not the camera) and takes the photo as per the reading to get the following result:
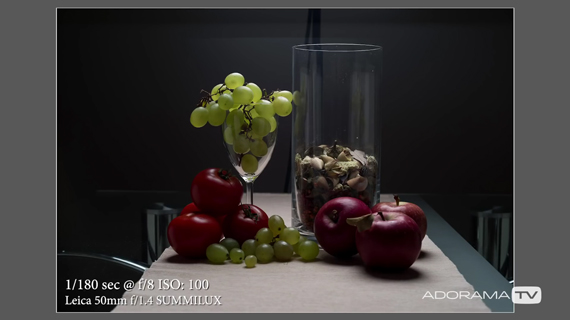
Notice the reflection of chairs on the edges of the glass.
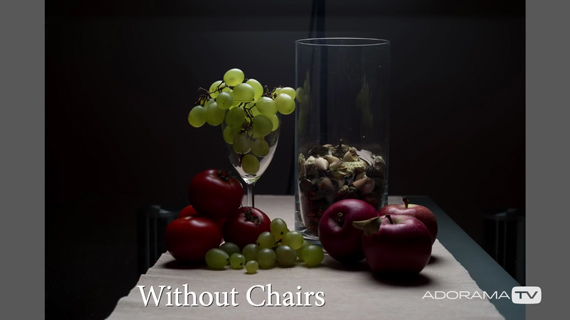
The image looks a lot better. However, there are still specular highlights on the glass due to the reflection of the chairs. By getting rid of the chairs, the result is further improved. Notice how being aware of your surroundings can help you in figuring out issues with your photos.
If you look closely, you can still see the light stand behind the subject. Wallace uses a black cloth to cover it up while using a 12 second timer to delay the shutter release.
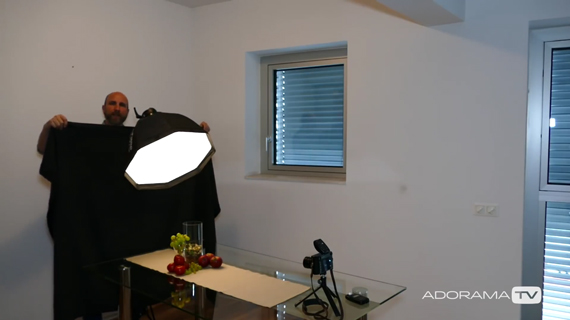
Using a black cloth to get rid of the light stand

The light stand is not visible anymore.
Retouching Still Life Images
Once satisfied with the image, Wallace opens it up in Adobe Lightroom and makes use of adjustment brushes to make local corrections. Here is what he does in post:
- Add some front light to the underexposed areas (tomatoes, grapes, and apples).
- Make the background more seamless by reducing the exposure on the edge of the cloth.
- Get rid of the table legs by reducing the exposure.
- Add some clarity.
- Experiment with vibrance.
Once happy with the adjustments in Lightroom, he opens up the image in Adobe Photoshop. In Photoshop, using the Analog Efex plug-in, he experiments with various presets until he’s happy.
While retouching, don’t over stress yourself. Feel free to experiment and play around until you’re happy with the end result. Remember that you’re practicing and learning skills that you will use next time you’re on an actual photo shoot.
Like This Article?
Don't Miss The Next One!
Join over 100,000 photographers of all experience levels who receive our free photography tips and articles to stay current:


Leave a Reply