What do Sugru, a picture frame, desk lamps, parchment paper, and colored notebook dividers all have in common? According to our friends at the Cooperative of Photography (COOPH), they can all be magically transformed into light modifiers for DIY home studio shots. Take a look:
COOPH delights in showing its viewers that you don’t have to have access to expensive gear or a photography studio to get great shots, and this video is no exception. No matter what the object size, there’s always some way to get the things you need to get a great product shot. All you need are creativity and a fair amount of knowledge of how your camera works.
But don’t be disappointed if you’re not able to get the quality of images they did right away. They make it look easy, but their final images took some real photography know-how and a lot of practice. (The same is true when working in a studio–good photography takes work.) Also, the camera they were working with wasn’t cheap.
Camera Gear Used
- Camera: Sony A7s
- Lens: Sony SEL 24-70mm/f4.0
- Tripod: SIRUI N-1204X
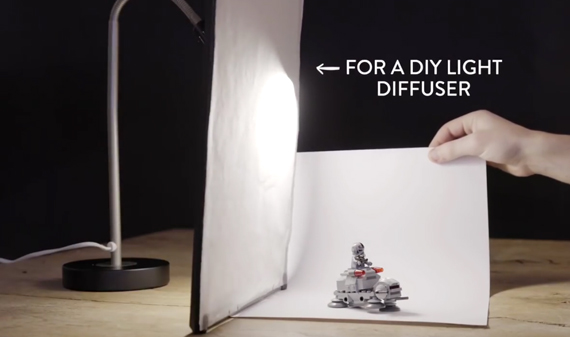
Another thing to take note of is that the DIY softbox is a potential fire hazard. To be on the safe side, use LEDs. They don’t put out as much light as incandescent bulbs, but they put out far less heat. Either way, you’ll want to make sure that there’s as much space between the parchment paper and the light bulb as possible—and turn off the light between shots.
But whether you choose to use these DIY hacks or not, just remember: creativity can be a magical elixir that makes many things that seem impossible without money not only doable, but also enjoyable.
Like This Article?
Don't Miss The Next One!
Join over 100,000 photographers of all experience levels who receive our free photography tips and articles to stay current:


Leave a Reply