Most tips relating to exposure advocate the use of the aperture priority mode, and with good reason. The aperture priority mode allows you to control the shutter speed through the aperture settings, which are responsible for crucial picture dynamics that include depth of field, motion blur and freezing action.
Understanding how the aperture and aperture priority work, will help you as a photographer gain control over exposure and these critical picture dynamics.
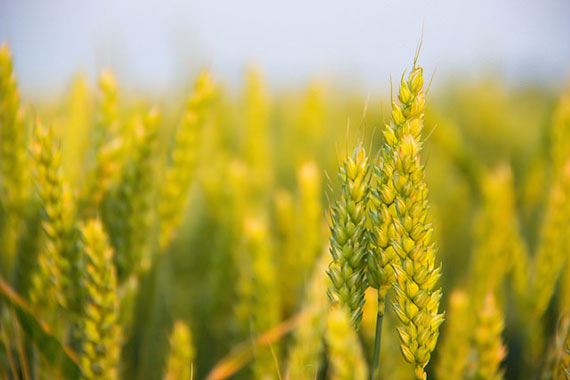
Photo by Susanne Nilsson; ISO 800, f/5.6, 1/250-second exposure.
Setting the camera mode dial to aperture priority puts the camera into a semi automatic mode, which means that you will have to take care of other crucial setting such as white balance, metering and ISO. In this mode the shutter automatically changes to compensate for the different aperture settings.
Aperture and F-Numbers
The aperture is basically a hole behind the lens which allows the light to pass through the lens to the image sensor located within the body of the DSLR. The aperture uses numbers (F-Stops) corresponding to the different sizes of the aperture (or hole if you like).
The F-Stop is derived from the mathematical relationship between the aperture diameter and the focal length of the lens.
A typical range of F-Numbers or F-Stops is:
F 3.5, F4, F4.5, F5, F5.6, F6.3, F7.1, F8, F9, F10, F11, F13, F14, F16, F18, F20, F22
These numbers are the range available when using the 18-105mm AF-S NIKKOR lens, with the lens set to 18mm.When set to the other extreme of the lens (105mm) the F-Stop range changes from F5.6 to F36, and so it will change for each focal length. For example at 50mm the range will be from F5 to F32.
The increment value between F-Stops can be changed on many DSLR cameras. Typically the light is halved or doubled for each F-Stop increment.
Picture dynamics
So what’s the big deal about using Aperture Priority? In most cases the beginner accepts the exposure set by the camera’s choice of shutter and aperture combinations. This still gives a good picture, but does not take into account the look of the picture in terms of depth of field, movement and frozen frames. The aperture setting can be used to control all these dynamics.
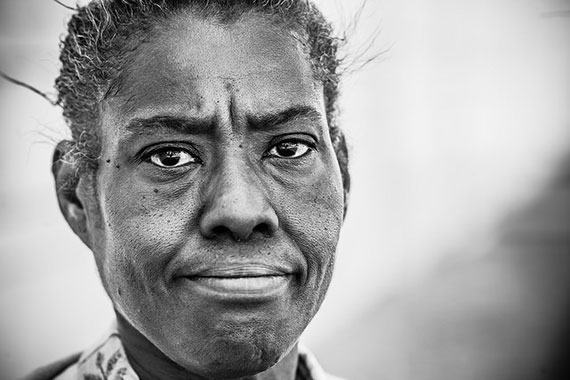
Photo by Thomas Hawk; ISO 250, f/4.5, 1/200-second exposure.
Given factors
A wide Aperture (small F-Number):
- Narrow depth of field
- Fast shutter speed
A small aperture (High F-Number)
- Wide depth of field
- Slow shutter speed
Taking into account the factors above one can see how the three picture dynamics can be controlled.
Depth of field: This is the area in front and behind the subject that is in focus. A small F-Number results in a very narrow depth of field, so the background and often the foreground is out of focus. This is great for portrait photography where the attention is focused on the subject. Because the shutter speed is normally high in this mode it is easier to shoot without blurring the picture.
Movement through blur: Using a high f-number will force a slow shutter speed when the camera is set to aperture priority. This is great when you want your picture to show movement. A typical scenario is when shooting a waterfall. The water is blurred through movement while the rest of the picture remains sharp. A tripod is essential for this type of shot. The camera can be panned swiftly to follow a moving subject, keeping the subject sharp but blurring the background.
Freezing the subject: This of course depends on the shot you are attempting. Anytime you want to avoid blurry pictures, a faster shutter will become your best friend. The snag here is that the higher the shutter speed you use the more light you will need. A small F-number (large aperture) will give a fast shutter speed when in aperture priority mode.
When you need a really fast shutter, keep an eye on the warning light in your viewfinder which indicates the shutter speed is cutting off too much light and the aperture range for that lens has been exceeded. This is a common problem.
A good example is when photographing birds. The best time of day to shoot is often when the light is low. A necessary compromise in these poor lighting conditions is to increase the ISO. Why compromise? Well too high an ISO introduces noise into the picture, influenced largely by the quality of camera model. This can be a nuisance when enlarging photos in post production.
Increasing the ISO increases the shutter speed, so one need to make a choice between capturing a great photo that is hard to repeat, or risk introducing noise.
Practice
Practice in manual mode and play with the shutter, aperture and ISO. Some cameras offer an anti blur feature which in essence is automatically creating the fastest shutter speed with the right combinations of the three (aperture, shutter and ISO).
Next time you are photographing the kids indoors, try getting the fastest shutter speed before resorting to your flash, which sometimes is the only way to avoid blurry shots.

Photo by Kris Kesiak; ISO 800, f/1.8, 1/250-second exposure.
Flexible solution
In summary, aperture priority mode offers the most flexible exposure control when striving to create certain picture dynamics on demand. Experience will teach you when to use another mode such as Shutter Priority, Program Mode or Manual. The ultimate goal is to go manual and take full control of exposure and other features.
About the Author:
Rob Gray brings to the table over forty years of experience in the television and photographic production industry. Visit the Facet Visual & Sound web site (facetmedia dot co dot za) and share your experiences with us, get free photographic tips watch out for Photoshop and Photographic workshops on e-book.
Like This Article?
Don't Miss The Next One!
Join over 100,000 photographers of all experience levels who receive our free photography tips and articles to stay current:


have just discovered this wonderful web site after going on a photography course with Iain green at London wet land centre ,the problem I had I was using my Nikon D7500 in auto all the time and didn’t understand why my photos weren’t that good after yesterday and your web site i now have started using aperture mode and it feels like my camera has been upgraded thanks
What a fantastic article, thank you!! I use Av for most of my shots and do use the other settings at times but I haven’t always understood these settings as clearly before. Where were you hiding? Just kidding. I’m so glad I found this. :)
Hi,
There are LOTS of articles on aperture settings, including this one which is succinct, but they all seem to focus (sorry) on the differences between extreme aperture settings e.g. landscape photography (high f stop no.) and close up with blurred background (low f stop no.).
These explanations do help us mortals to understand the point of different settings, but nowhere can I find any explanation as to how to choose the in-between settings; as you list above, there are lots of different f stop numbers.
I tend to shoot with Auto Exposure on, so how/why/when do I choose different Aperture settings in different settings other than the extremes?
Thanks in advance!
Amazing explanantion, and greatly explained. Definitely shed more light upon this subject even after reading a million articles about it.! thanks !!! And good job. :)
Hello Rob,
You gave a great explanation on how aperture controls the dynamics when it comes to depth of field, movement and frozen frames. So, for in-demand dynamics we use Aperture. Time to get my old Canon and practice with the manual ISO and Aperture.
in the section, Freezing the subject, it says :high F-Number will give a fast shutter speed when in aperture priority mode. But I thought a high f number in AP mode (AV on Canon) means a small aperture so will mean slow shutter speed. Have I got that wrong?
Fab article – and the best one I’ve read so far about aperture! It’s all making much more sense now. Many thanks!