Learning photography is a difficult process that requires a lot of patience and practice. This photography lesson concentrates on the basics of exposure, its definition, its importance, and finally, its implementation.
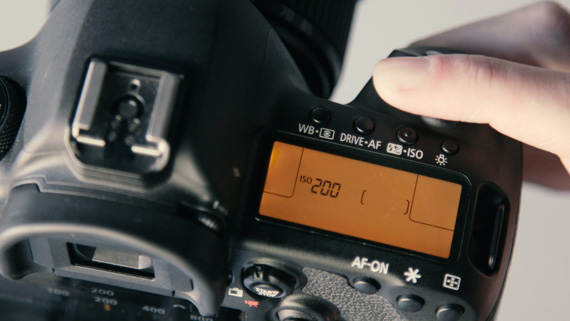
Photo by ShareGrid
Light is the most important criteria in learning photography. Light creates the texture around you. It defines the composition of not only the object but also its surroundings. The whole idea of photography revolves around light and its laws of reflection and refraction. Exposure means the amount of light that your camera gathers while taking a photograph. It’s the foundation of digital photography.
One of the most important exposure parameters is called ISO, and it’s truly the key to solving some difficult exposure problems. But it is very important that you have this aperture and shutter speed thing under your belt before you move on to ISO.
ISO is a measure of the sensitivity of your image sensor. If you have a film background, then you are probably already familiar with ISO as a measure of film sensitivity–sometimes referred to as film speed–and you may even remember ISO being referred to as ASA. ISO is the same thing. By default, your camera is probably set to an ISO of 100 or 200.
For the sake of example, I am going to say that I don’t have a tripod here. Let’s say I stumbled into this scene while I was out walking around shooting hand-held, and I’m ready to take a shot of it. I’m lining up my shot, and I’m half-pressing my shutter button to meter. But when I look down at my shutter speed, it’s saying 1/15 of a second. That’s way too slow for hand-held shooting. Now, there are times when you can stabilize your camera, but 1/15 of a second is too slow.
So what I am going to do is increase the ISO on my camera. I’m going to dial it up from 100 to 200, and now when I meter, I see I’m at 1/30 of a second. Then, at ISO 400, I’m at 1/60 of a second. I’m going to dial it up a little farther. I’m going to go to ISO 800, and now I’m at 1/125 of a second. That’s plenty for hand-held shooting. I can take my shot. As ISO increases, it takes your camera less time to gather light. This means that you can get away with shorter shutter speeds, which is what just happened here.
Now, the question is how does it work? When data is first read off of your camera’s image sensor, it’s in the form of tiny, little electrical charges. Before those charges can be analyzed, they have to be amplified, because they are very minute signals. When you increase the ISO setting on your camera, all you are doing is turning up that amplification. Now, because it is more amplified, weaker light levels are more significant, so you can get away with less light, which means shorter exposure times or smaller apertures.

Photo by Wesley Armstrong
Think about what happens when you turn up the volume on your stereo. As you amplify the sound more, it gets louder, but you’ll also hear more noise–a hissy sound. Electrical components in your amplifier, other gizmos in your house, cosmic rays passing through the room–these all generate electrical noise, and as you amplify your sound, you also amplify that noise. You hear a noisy hiss as your volume gets louder. Your image sensor works exactly the same way. As you increase the amplification of the signals that come off the sensor, you exaggerate any noise that the sensor might have recorded from the other electrical components in the camera or those cosmic rays that might be passing by. And you’ll find that that noise will appear in your image as speckled patterns that look like this. How much noise is generated will depend on your camera.
Obviously, you’d prefer not to have noise in your images, so you should always try to keep ISO as low as possible. That said, the ability to change ISO from shot to shot is one of the great advantages of digital over film photography. Here is why. First of all, as you have seen, when I’m trying to shoot hand-held but the light is too low and my images will be shaky, all I have to do is turn up my ISO.
Now, take a look at standard ISO numbers. Each one is double the previous. You should know by now that what that means is each one is one stop apart. If I meter a scene at ISO 100, and my camera recommends a shutter speed of 1/30th of a second–a speed that’s a little too low for hand-held shooting–then I can turn my ISO from 100 to 200, which is a difference of one stop. One stop is a doubling of light, and that means my sensor is now twice as sensitive to light, so when I meter now, my camera chooses 1/60 of a second. With that single shift, I am back in the realm of safe hand-held shooting.
Now let’s say my subject is moving, and I am afraid that 1/60 of a second is too slow to freeze its action. I can dial from 200 to 400, and my shutter speed will go from 1/60 to 1/125. I know 60 times 2 is actually 120, but 1/125 is a kind of standard shutter speed that got established long ago, and that’s what we use. Raising from 400 to 800 will get me to 1/250 of a second, and so on.
In other words, ISO has a reciprocal relationship with your other exposure parameters, so you can use it to buy yourself more exposure latitude. This is great for low-light shooting, but not just because it simply lets you shoot in the dark. Say you are shooting at dusk, and you really want deep depth of field. Unfortunately, it’s just dark enough that when you close your aperture down to get that deep depth of field, your shutter speed then slows down to something too low for hand-held shooting.
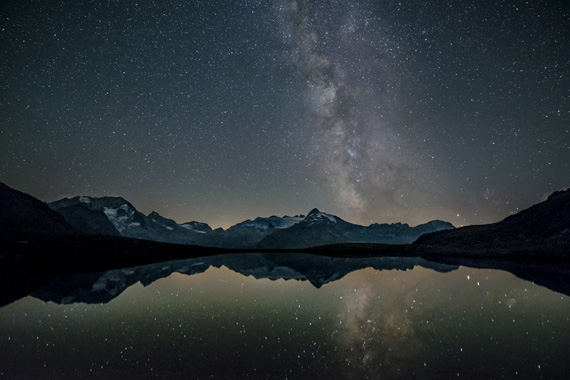
Photo by eberhard grossgasteiger; ISO 800, f/2.8, 20-second exposure.
Raise your ISO and you get your shutter speed back so you can shoot with the shallow depth of field that you want. Your camera probably has an ISO range that goes from 100 to 1600, but it may go further. It may also be divided into fractional ISOs. These are one-third-stop interval ISOs. Your camera may also have an auto ISO feature.
When ISO is set to auto, your camera is free to make ISO adjustments when it’s making other exposure calculations. And sometimes you’ll find that your camera, rather than slowing down the shutter speed, will increase ISO instead. This is your camera trying to protect you from getting too slow a shutter speed.
Your auto ISO mechanism will not necessarily use the full ISO range of your camera, so if you are going into a low light situation, and you know your camera can do well at ISO 1600, you may need to set it specifically to 1600, since the auto mechanism may not be willing to go that high. But what you really need to know next is how far you can push ISO before you get an image that’s unacceptably noisy.
About the Author:
Usama Nasir from photoaffiliates is a professional photographer, medical student, and writer.
Like This Article?
Don't Miss The Next One!
Join over 100,000 photographers of all experience levels who receive our free photography tips and articles to stay current:


Leave a Reply