Adobe Photoshop is undoubtedly the most popular and powerful photo editing software. It has so many tools in its arsenal that it might be virtually impossible to master it. No matter how experienced you are, there can still be features you don’t know about. In the following video, Blake Rudis with CreativeLive presents five hidden gems in Photoshop that can help you tremendously in your workflow:
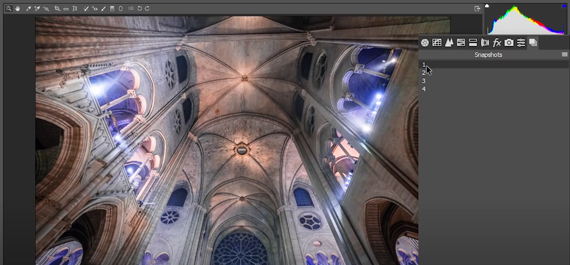
1. Snapshots in Adobe Camera Raw
Adobe Camera Raw is a plugin for Photoshop that allows you to make adjustments in your RAW files. Consider that you are almost done editing a photo but want to try out a different editing style. Wouldn’t it be handy if you could have something like a checkpoint where you could come back later and have the file just like you left it before? This is exactly what the snapshot feature in Camera Raw allows you to do.
“Snapshots give you the opportunity to edit your image in multiple different ways, save it as a snapshot and refer to it whenever you want and all your settings go back to the way they were with that snapshot.”
In Adobe Camera Raw, you can find the snapshots tab at the very right hand side of the working area. Once you are done editing an image and want to try out some different look, go to the snapshots tab and click the button at the bottom right that looks like a “page being flipped/torn.” It will then let you name the snapshot and save it instantaneously. You can then go back to any snapshot that you like and use it for your image.
Also, since these snapshots are saved in the xmp files, your snapshots become available every time you open the file in Adobe Camera Raw.
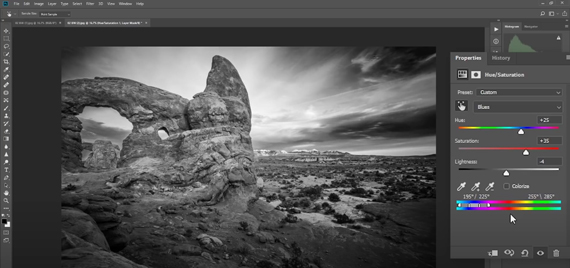
2. Gradient Map Adjustment Layer
This technique comes in handy for black and white images. If you’re familiar with Ansel Adams’s work, you’ll notice that the sky goes almost black with white clouds puffing out. This kind of editing is not achievable with traditional black and white editing techniques. Here’s how to achieve the look:
- Create an Adjustment Layer and select Gradient Map.
- Add another Adjustment Layer called the Hue/Saturation adjustment layer below the Gradient Map adjustment layer.
- Then use the targeted adjustment tool to select any of the color in your image and manipulate it using the hue, saturation and lightness sliders.
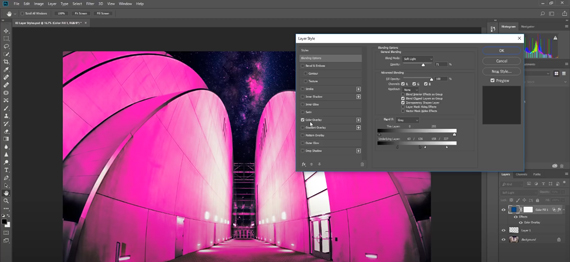
3. Layer Styles
Typically, layer styles are used with shapes and texts. However, they can be very powerful when used with adjustment layers. Consider a scenario where you’re using a color fill layer to color grade your images using the soft light blend mode. But what if you want to protect your highlights or shadows in the process? Here’s what you can do:
- Double click on the fill layer. Notice the Underlying Layer slider. This helps in protecting anything that is underneath the active layer.
- By sliding the slider from the shadow region towards the right, you can protect the shadows. And by sliding the slider from the highlight region towards the left, you can protect the highlights.
- To have a better control on what you want to protect, click on Color Overlay and select a color that does not appear naturally in your image. You can then slide the slider while pressing the Alt (Option) key to have a smooth transition.
- Turn the Color Overlay off once you are done.
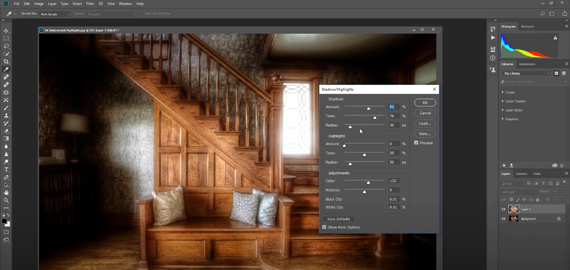
4. Highlights & Shadows Adjustments
If you want better control over the bright (highlights) and dark (shadows) areas in your photograph, you can head over to Image > Adjustments > Shadows/Highlights… By default you will only be greeted with two sliders: Shadows and Highlights. For better control over the dark and bright spots of your image, click on “Show more options.” You will be presented with options to control the tone, radius, color, and clipping threshold of the current layer.
Actions
If you find yourself in a situation where you do the same thing over and over again, you will love how actions can make your life easier.
“An action is basically like a VCR that records something for you so that you can always go back and press play whenever you want on any of your other photographs.”
Follow these steps to make use of actions:
- Go to Window > Actions.
- Click on the “New Action” button in the Actions window and give it a name.
- After you hit OK, any changes that you make to the image will be recorded.
- Once you’re done making changes to your image, click on Stop.
- If you want to use that action on any other image, simply select that action and hit “Play”. It will do the exact same thing that you did previously, but faster.
There are thousands of such hidden gems in Photoshop. Make an effort to dig down and discover some of those gems on your own. Besides making you proficient, they’ll also help you in getting extraordinary results more efficiently.
Like This Article?
Don't Miss The Next One!
Join over 100,000 photographers of all experience levels who receive our free photography tips and articles to stay current:


Leave a Reply