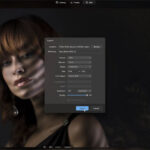
When it comes to dodging and burning, everyone has their own technique. Some take a little more time than others, but the results will ultimately be better. Fashion, beauty, and portrait photographer Michael Woloszynowicz shows us four different approaches to dodging and burning in Photoshop and explains when you can use each—and what limitations to expect:
1. Dodging and Burning on a 50% Neutral Grade Layer
Create two new layers—one Dodge, one Burn—and group them together. When creating a new layer, choose your preferred blend mode; you have two options: Overlay and Soft Light. Overlay will be a little more punchy and gets you to the dodged or burned effect much quicker, whereas Soft Light will be more of a gradual buildup. It’s your choice. Check the Fill with Overlay-neutral Color (50% gray) box.
Start with burning because once you define your shadows it will be easier to see how much you have to brighten the highlights. Select the Burn Tool and make sure the brush is at 0% Hardness, Exposure around 5%, and set the Range to Midtones. Then brush the areas of the photo that you want to darken and bring out definition.
Switch to the Dodge Tool to fill in the highlights and even out skin tones.
This approach is probably the most commonly used, but it has some limitations. It is best to use if you’re just working on existing highlights and shadows. If you want to change midtones and make them into deeper shadows or brighter highlights, this isn’t the best method because it will change the hue and saturation of the skin if you go further with it.
2. Using Curves Adjustments to Dodge and Burn
First, create a Curves Adjustment Layer for your burn—Go to Curves and bring the midtones down to darken the entire image. Then change the blend mode of that layer to Luminosity, which will preserve the overall tones.
Create another Curves Adjustment Layer for dodging. This time, move the midtones up to brighten the image. Again, change the blend mode to Luminosity. Then, invert each of the layer masks and group them together.
Start with the Burn Layer, select your brush at a Hardness of 0% and Flow of 3-4% and brush in the shadows. Repeat the process on the Dodge Layer.
One of the advantages to this approach is that the curves adjustment basically serves as a limit to how far you can dodge and burn.
3. Dodging and Burning Directly on a Particular Layer
The only time you ever really want to dodge and burn directly on a layer is if the image only needs a minor touch-up.
Duplicate the layer so you can modify the amount of effect you’re going to be applying. Make sure the Protect Tones box is checked—this will make a difference if you’ve increased the exposure too much. Paint the areas you want to darken and lighten.
If, at any time, you find the effect is too strong, you can just reduce the opacity.
4. Using a Frequency Separation Technique Coupled with a Light and Dark Layer
This is a different approach, probably something you’ve never seen before.
To get started, create two copies of the Background Layer—one for Low Frequency, one for High Frequency.
Disable the top layer and start with the Low Layer. Go to Filter > Blur > Gaussian Blur and modify the Radius so it takes out any detail and leaves you with mostly skin texture.
Check the High Layer back on and modify the blend mode to Linear Light. Go to Image > Apply Image > Make sure the Source Layer is the Low Layer, the Invert box is checked, Blending is on Add, and the Scale is 2 (these settings only work if you have a 16-bit image). Group the frequency layers together.
Next, select the Low Layer and create two blank layers above that. Fill the first new layer (Dodge Layer) with white (opt + del to fill with foreground color) and the second new layer (Burn Layer) with black (cmd + del to fill with background color). Add a Layer Mask to both.
Working on the Layer Masks, you can then paint in the shadows and highlights.
The great thing about this technique is that instead of brightening or darkening existing colors, you’re overlaying a certain amount of black or white over top of the image, so you’re not being as destructive to the original tones.
Of course, with all of these techniques, you have to take your time and make sure the blending is even and nice. Depending on what your image is going to be used for or who you’re selling it to, you need to invest some time to make it look great.
Like This Article?
Don't Miss The Next One!
Join over 100,000 photographers of all experience levels who receive our free photography tips and articles to stay current:


Leave a Reply