In this video, Daniel Norton from Adorama demonstrates four different ways of photographing a face. Just changing the position of the lights can completely change the way your model looks in an image. For this experiment, Norton sets up four Profoto B1 lights: one each on camera right and left, one above the model’s face, and one just below. These lights are fired in a sequence, one after the other:
Norton sets up a PocketWizard MultiMax on speedcycler mode to cycle between the four lights in a quick burst. During the quick burst shoot, the model keeps moving her face and changing her expressions to ensure that the frames are different.
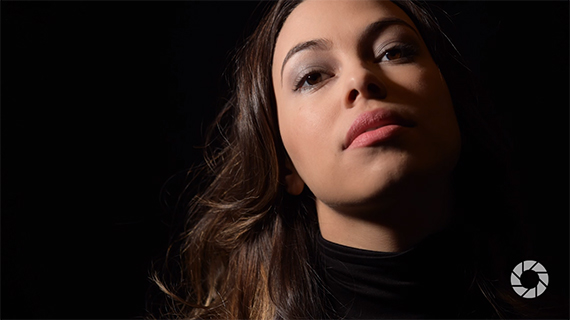
The light on camera right, as you can see from this image, is slightly below the eyeline and casts a shadow up into her eye.
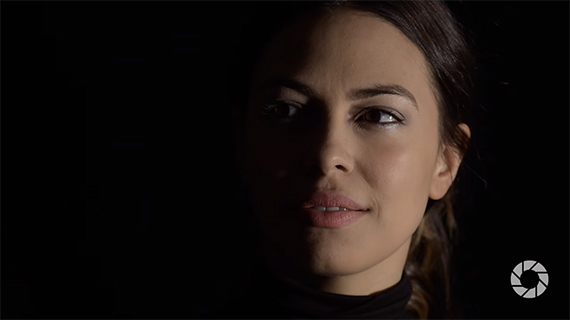
The light on camera right below the eyeline
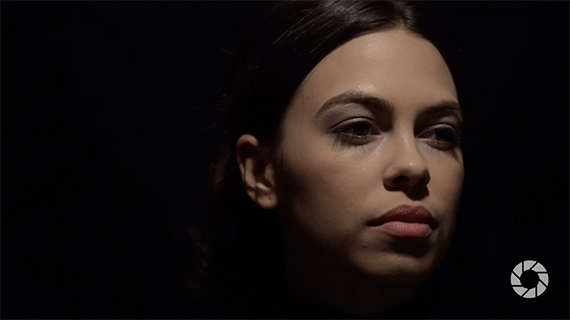
The light on camera left is higher than the model’s eyeline at about 45 degrees:

Light on camera left above the eye line
If the light is shooting straight down and very close to the model’s face, as in this case, it doesn’t flatter the model. It may work if the light is directed slightly away creating an interesting toplight inside the eyes.
Light above the model’s face
Under-lighting, as in the image below, is probably the most difficult to work with. You have to be really precise and use additional tools to make good images with this lighting.
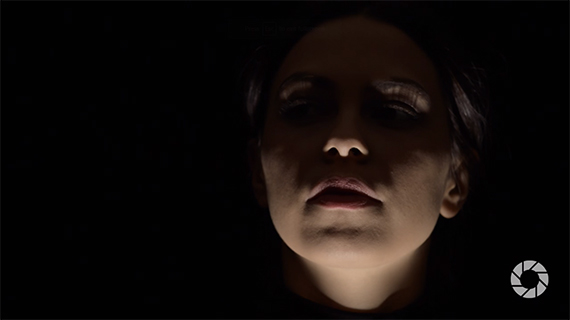
The more sinister looking under lighting
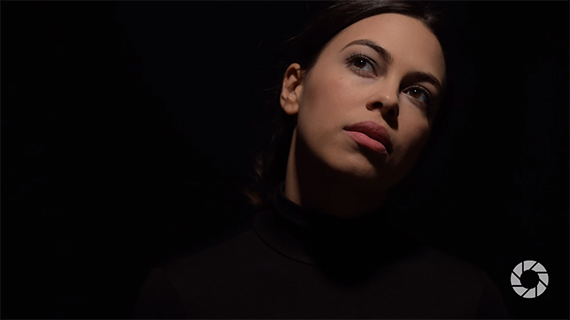
Now is the time to use each of these lights in the best way possible. The light on the right is a little bit lower. Instead of asking the model to look straight at it, thereby avoiding a deep shadow coming up her nose, Norton asks the model to look away.
Portrait shot with light on camera right
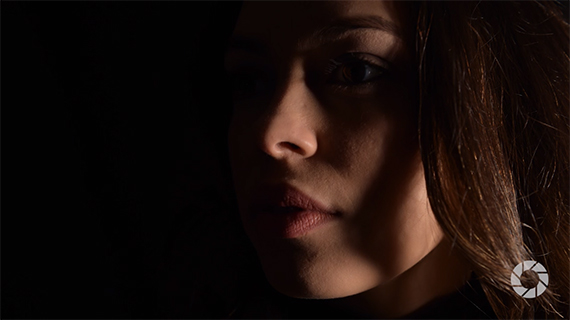
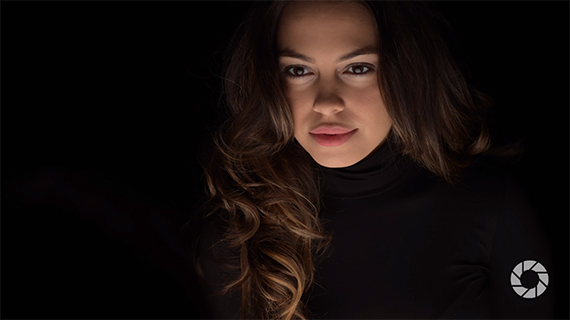
The light on camera left is more traditionally placed, slightly higher than the eyeline, ideal for a portrait shot. The model looks toward the light. The positioning of the light, together with the smallness of it, makes it more conducive as a portrait light, creating depth and dimension.
Portrait lighting with the light on camera right
For the light that is positioned directly above, Norton repositions the model a step back. That way the light becomes a lot more suitable for a beauty shot.
This one was shot with the top light after the model took a step back
For the more difficult light source – the one that shoots straight up, Norton had to use a softbox to make the light larger and softer, and that’s what made it wrap around the model’s face.
Finally, a shot with the most difficult under-lighting setup
Try experimenting with light positions. You can create completely different moods just by redirecting the light.
Like This Article?
Don't Miss The Next One!
Join over 100,000 photographers of all experience levels who receive our free photography tips and articles to stay current:


Leave a Reply