Ready for a crash course in art history? Believe it or not, knowing a thing or two about the sculptors and painters of the past often proves to be helpful for modern photographers striving to make stunning shots. In the following short, photographer Jay P. Morgan channels Renaissance master Rembrandt for inspiration while explaining to viewers just how to bring about classic, painterly effects effortlessly in the studio:
To this day, Rembrandt is most famous for his commanding and consistent use of low key light. Characterized by dark tones, heavy shadows, and high contrast, the dramatic look is evocative and demands attention.
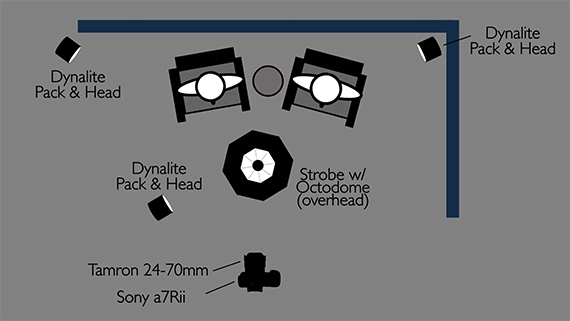
Surprisingly enough, attaining beautiful Rembrandt light in studio isn’t all that difficult. The most important aspect is a diffused key light; in this case, Morgan uses an overhead octodome equipped with a grid. This allows the light source to pool onto a subject’s face, creating a gradient of darks and lights rather than harsh edges between shadows and highlights. The other major component necessary is some sort of rim light to give your subject a bit of separation from the background and increase the sense of depth present in the composition.
And that’s all there is to it!
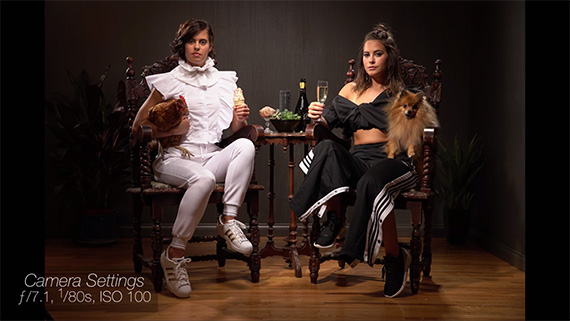
Whether you’re looking to add some tension into your images or you simply want a setup that makes a still life or model look good, Rembrandt light is worth giving a shot. With a few well placed strobes and a little creativity, you can impress your viewers with gorgeous photographs reminiscent of the Dutch paintings of yesteryear.
Like This Article?
Don't Miss The Next One!
Join over 100,000 photographers of all experience levels who receive our free photography tips and articles to stay current:


Leave a Reply