Whether it’s a slightly blurry portrait, a soft landscape, or motion blur from an unsteady hand, image sharpness is often the difference between a good photo and a great one. Fortunately, you don’t have to settle for soft shots anymore.
Photo AI takes sharpening to the next level—beyond basic edge detection—using restorative AI that intelligently reconstructs lost details across the entire image. The result? Sharper, clearer photos that still look natural.
Here’s how you can sharpen your photos using Photo AI Version 3.6:
🛠 Step-by-Step: Sharpening Images with Photo AI
1. Launch Photo AI
Start by opening Photo AI on your device. If you don’t have it installed yet, download the latest version to access the latest sharpening models and enhancements.
📥 Pro Tip: The newest version (v3.6) includes Super Focus v2—500% faster sharpening with improved clarity.
2. Import Your Image
Drag and drop an image that needs help—perhaps it’s slightly out of focus, suffers from camera shake, or just feels a bit too soft.
Once loaded, Photo AI automatically analyzes the image and provides intelligent enhancement suggestions.
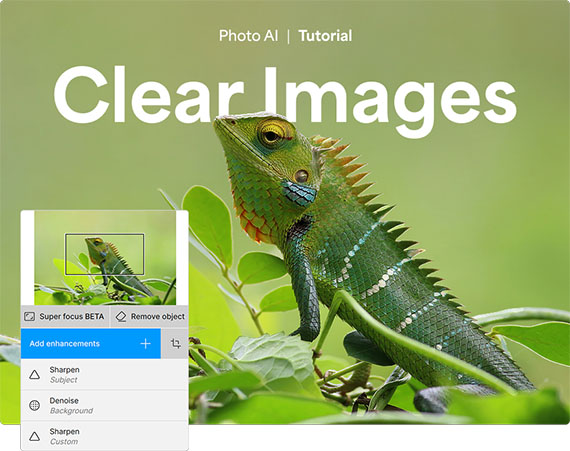
3. Use the Sharpen Tool
Click the Sharpen enhancement from the right-hand panel. This tool does more than traditional pixel-edge sharpening—it analyzes the structure of your image and reconstructs missing details using deep learning.
You’ll immediately see a preview of the improvement—edges become crisper, details more defined, and textures more lifelike.
4. Edit Selection to Target Specific Areas
Sometimes you only want to sharpen part of an image—like a face or a product—but leave the background smooth and soft. That’s where Edit Selection comes in.
Use it to paint over or erase areas of your photo. You can isolate your subject for sharpening while keeping the background untouched.
🎯 Use this for portraits, wildlife, or product photos where subject clarity matters most.
5. Fine-Tune with Models and Sliders
Photo AI includes several AI-powered sharpening models. Choose the one that best suits your photo:
- Sharpen Motion – Best for fixing motion blur.
- Sharpen Focus – Great for correcting minor out-of-focus issues.
- Sharpen Standard – A balanced choice for general use.
Then adjust the Strength slider to control how much sharpening is applied. Subtle tweaks often produce the most natural results.

6. Stack Enhancements for Even Better Results
Want even more control?
You can combine enhancements:
- Use Sharpen Natural on your subject for gentle clarity without artifacts.
- Add Denoise Standard to the background for a smoother look.
This approach lets you selectively enhance detail while maintaining a polished, professional finish.
✅ Final Tips for Sharpening Success
- Zoom in to 100% when evaluating sharpness.
- Don’t overdo it. Oversharpening can introduce halos or artifacts.
- Try before/after comparisons to see the true impact.
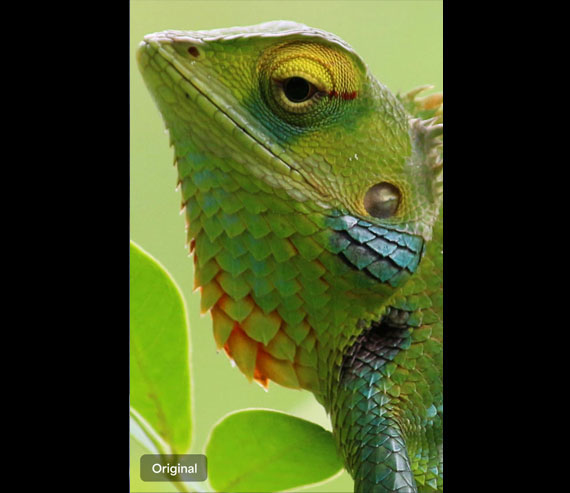
🖼️ Before and After: Seeing is Believing
Take a look at your edited image side by side with the original. The restored clarity, subtle edge detail, and enhanced textures will speak for themselves.
Photo AI gives you powerful, precise control over image sharpness with AI-driven tools that go far beyond traditional methods. Whether you’re rescuing a soft photo or simply refining a sharp shot to perfection, this tutorial will help you get the clarity your images deserve.
Try it on one of your photos: Topaz Photo AI 3.6
Like This Article?
Don't Miss The Next One!
Join over 100,000 photographers of all experience levels who receive our free photography tips and articles to stay current:


Leave a Reply