This article is based on concepts from Collier’s Guide to Night Photography. Our readers can get a discount by using the promo code picturecorrect at checkout.
In July 2020, Comet NEOWISE put on a remarkable show in the night sky. This was the first comet that was bright enough to photograph with a standard lens in the northern hemisphere in over 20 years. Since comets can be difficult to photograph and sometimes only appear in the sky for a short time, it’s important to learn how to shoot them before they actually appear.
On average, a major comet that is easy to photograph is visible every five to seven years. On top of that, a lot of comets are only visible in either the Southern Hemisphere or Northern Hemisphere. So a major comet that is visible where you live might show up once a decade.
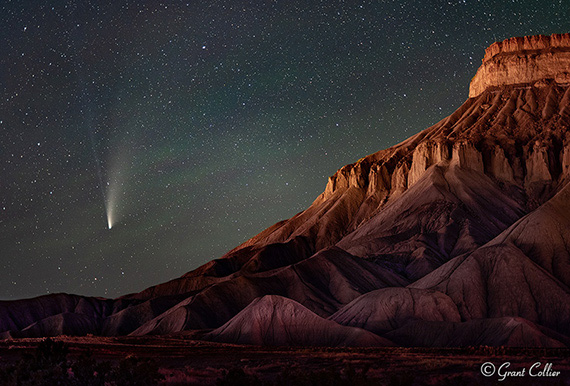
Mt. Garfield, Grand Junction, CO, 50mm, f/1.4, 5 seconds, ISO 1600. (Photo by Grant Collier)
Even if the next major comet doesn’t appear for a very long time, the effort you spend learning to shoot it will not be wasted. Techniques for photographing comets can be used for nearly every other night sky phenomenon. The only significant difference is that you will usually use a longer lens and shorter exposure for all but the brightest comets.
On Lenses & Aperture
The lens you will need to use to shoot a major comet depends mostly on the length of the comet’s tail and can vary from 14mm to 100mm or longer. For Comet NEOWISE, I found that a 50mm lens was the right choice for most images. The comet appeared big in the images, while still allowing room to include foreground objects.
The most important thing you need when shooting with any lens at night is a wide aperture, like f/2.8 or f/1.8. A wide aperture can let a lot of light into the camera, which can significantly improve the quality of images taken in low light. A list of lenses with wide apertures that I recommend for night photography can be found at my website.
No matter what lens you use, you will almost always want to use the widest aperture on that lens at night.
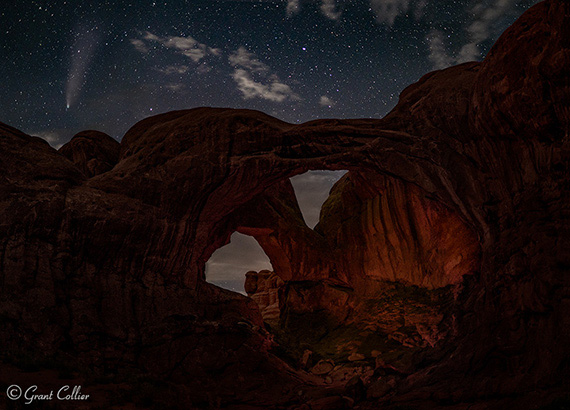
Double Arch, Arches National Park, Utah, 50mm, f/1.4, 5 seconds, ISO 6400. (Photo by Grant Collier)
How Fast to Make Your Shutter Speed
A one-minute exposure will yield better-quality images at night than a six-second exposure, because you are letting more light into the camera and therefore increasing the signal-to-noise ratio. However, during the course of a one-minute exposure, the stars will move across the sky and create small star trails in your image. This is not ideal if you are trying to capture stars that appear as round points of light, like you see them with the naked eye.
You need to find a way to get exposures that are as long as possible without producing noticeable star trails. To do this, you can use something known as the Rule of 500. Simply take 500 divided by the focal length of your lens to get the shutter speed. For example, If you use a 50mm lens, take 500 / 50 = 10. So, 10 seconds would be your shutter speed.
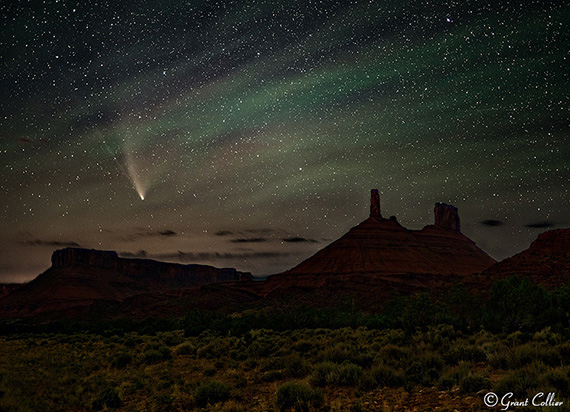
Castleton Tower, Utah, 50mm, f/1.4, 5 seconds, ISO 3200. (Photo by Grant Collier)
The Rule of 500 will still produce some elongation of the stars in your image. If you want to avoid any noticeable elongation, you can instead use the NPF Rule. This rule uses a complex set of calculations, but there is an app known as PhotoPills that will do the calculations for you. Or, to approximate the NPF Rule, just use a shutter speed that is about half the length of what you would use with the Rule of 500. Then zoom in on your image to see if there is any elongation in the stars and adjust the shutter speed as necessary.
Since the NPF Rule usually results in shorter exposures than the Rule of 500, you will get lower-quality images at night. I therefore only recommend using this rule if you are stacking multiple images to improve quality, as I will describe later.
Choosing an ISO
Determining the optimal ISO to use at night is tricky, as it can vary depending on the camera you use. In general, though, I recommend using the highest native ISO that doesn’t cause any highlights to be blown out. A native ISO is represented by a number, like 6400, as opposed to extended ISOs, which are usually represented by both letters and numbers, such as H1.
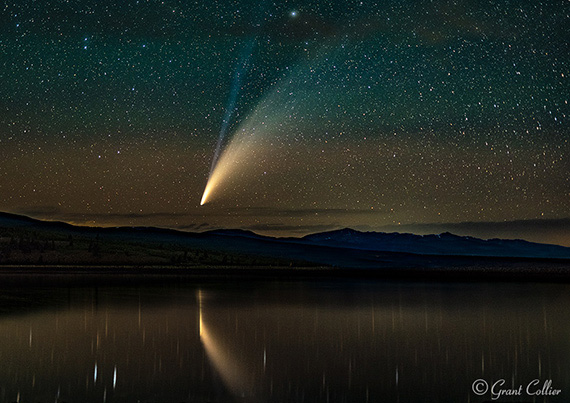
Reservoir near Leadville, CO at peak brightness, 50mm, f/1.4, 5 seconds, ISO 4000. (Photo by Grant Collier)
If you have the highlight alert enabled on your camera, any blown-out highlights will blink when you view the image on your LCD screen. Alternatively, if there is a spike at the very right edge of your histogram, you will know that highlights are blown out. If this occurs, make sure to lower the ISO until you are not overexposing any highlights.
Focusing
The easiest way to get a night photo in focus is to set your camera up during the day and get your focus right before it even gets dark. However, if you can’t do this or you need to change your focus during the course of the night, there are many ways to do this.
If you don’t have a close foreground object in your image, you can simply focus at infinity. If there is a moon out, you can do this by using autofocus and focusing on the moon. If there is no moon out, you can zoom in on a bright star using the live view on your LCD screen. Then manually adjust the focus until the star appears as a small, sharp point of light.
If you have a close foreground object in your shot, you’ll need to focus at twice the distance of the nearest object. One way to do this is to place a flashlight at that distance and autofocus on the flashlight.
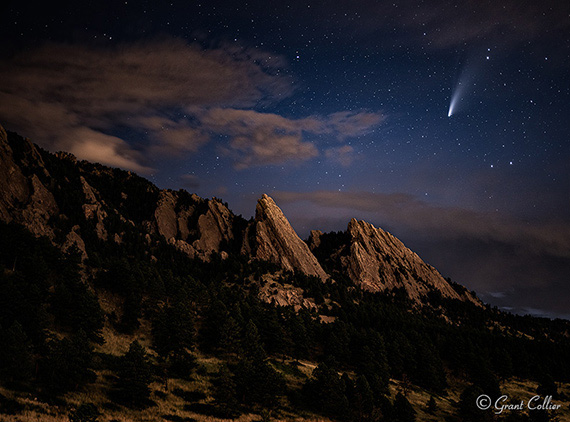
Boulder Flatirons, Colorado, 50mm, f/1.4, 5 seconds, ISO 800. (Photo by Grant Collier)
After you take a shot, make sure and zoom in all the way on the image on your LCD screen to ensure that everything in your shot is in focus. Sometimes, if the foreground object is too close, it will be impossible to get everything in focus in a single shot using a wide aperture. In this case, you’ll need to use a technique called focus stacking, where you blending multiple shots taken with different focus points.
Stacking Images
Unless you’re photographing a comet with a very long tail, you will usually need to shoot with a longer lens than you normally use at night. Since longer lenses require shorter exposures to avoid elongation of stars, this can result in lower-quality images. To get higher-quality images, you can take repeated exposures of the scene and then stack them in post-processing. How to do this is beyond the scope of this article, but I discuss it in detail in my book (see below).
Every image shown in this article is a stacked image. I stacked up to 100 images of the land and up to 17 images of the sky in each photo. As a result, these images could be printed quite large before seeing too much noise.
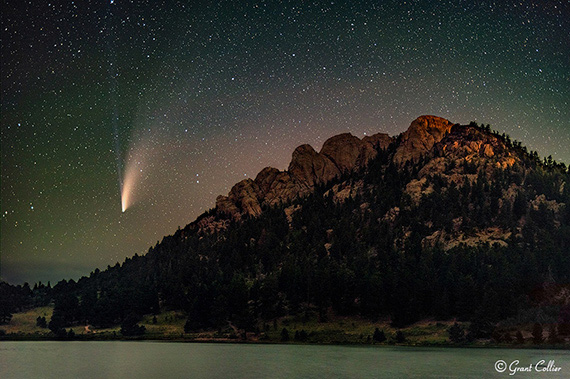
Lily Lake, Rocky Mountain National Park, CO, 50mm, f/1.4, 5 seconds, ISO 1000. (Photo by Grant Collier)
Foreground
To get a great image of a major comet, or really anything at night, you will usually want to find an interesting foreground to include in the image. It’s easier to include a foreground when the comet is low in the sky. So you should learn exactly where and when the comet will be close to the horizon. Then try to find an interesting composition that faces in that direction. Comet NEOWISE was in the northwest part of the sky, so I tried to think of any photo that would look good facing northwest. I scoured Google Earth and found three locations along Colorado’s Front Range: one in Leadville, CO; one in Grand Junction, CO; and three more near Moab, Utah. I then traveled to all of these locations over 11 days, as I knew it might be my last chance to shoot a comet for a while. I also kept a close eye on the weather forecast, so that I could change my plans if it appeared it would be too cloudy at any location.
I hope this article has inspired you to learn more about night photography. If you spend a lot of nights shooting, you’ll be ready when the next comet comes along—whenever that may be. While Comet NEOWISE was impressive, it wasn’t anywhere near as bright as a great comet, which is one that appears brighter than Venus. A comet this bright would be a truly phenomenal sight and would likely have a huge tail. Unfortunately, no great comet has appeared in the Northern Hemisphere since the advent of digital cameras. Even Hale-Bopp in 1997 wasn’t quite considered a great comet. The last great comet visible from the Northern Hemisphere was Comet West in 1976. On average, a great comet appears in the Northern Hemisphere once every 30 or 40 years. We’re past due for one, so if we’re lucky, perhaps we’ll see one in the coming years.
For Further Training:
In this fully-updated 2nd edition, Grant Collier sheds light on how to capture these otherworldly images by sharing secrets he has learned over the past 17 years. He explains how to take photos of the Milky Way, northern lights, meteors, eclipses, lightning, and much more.
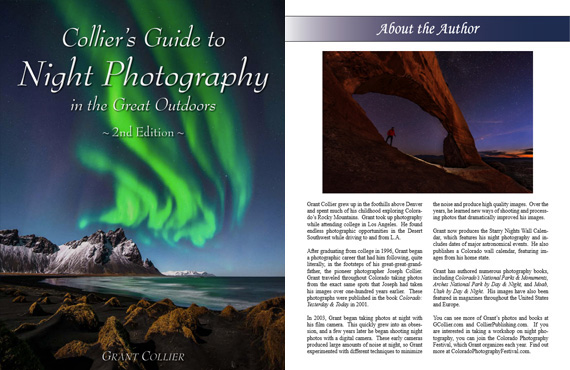
New: Night Photography Guide 2nd Edition
Our readers can get a discount by using the promo code picturecorrect at checkout which ends soon.
Found here: Night Photography Guide 2nd Edition
Like This Article?
Don't Miss The Next One!
Join over 100,000 photographers of all experience levels who receive our free photography tips and articles to stay current:


Leave a Reply