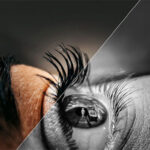
The human body has been a common subject of photography since the 19th century, when boudoir “artist studies” first served as substitutes for live models. Over time, boudoir photography progressed into its own art form. Today, fine art photographers continue to look for novel, eye-catching ways to create art from the human body. Access to sophisticated lighting equipment and post-production tools like Photoshop and Lightroom has expanded photographers’ creative options for representing the human form.
Michael Zelbel, an artistic intimate photographer who operates a studio in Duesseldorf, Germany, takes us through his photo shoot and post-production process to demonstrate how to elicit a surreal porcelain sculpture effect:
Zelbel’s shooting method utilizes a white background and a table with a white reflector cover placed over it to fill in shadows. This white studio in combination with models with light hair and light complexions is ideal for the look this photographer is after. He asks his models to sit on a step stool behind the table. Having the subject start from a seated position accentuates the upper body and gives the model more freedom of movement.
The main light, a strobe shot through a white umbrella, is at a steep angle about two meters above the model. This lighting setup makes for deep, typically unflattering, shadows on the model, but this is Zelbel’s desired effect. Sculptures on display are generally lit in a similar fashion, and Zelbel does not want his models to look real once he’s finished with post-production.
During the shoot, Zelbel is careful to have his models look away from the camera to avoid a more creepy image with the “sculpture” looking into the viewer’s eyes. Eyes that look away from the lens more readily simulate a sculpture or wax figure.
Once Zelbel is content with his poses, he uses Lightroom to make the models in the images look like porcelain sculptures.
Zelbel’s step-by-step processing involves the following adjustments:
- Bump up the exposure by one f-stop. It’s okay to burn out some of the highlights.
- Reduce contrast. For these images, he reduces it down to -80.
- Drive down the clarity to -90.
- Reduce the vibrance to -80 to get rid of any natural skin color.
Though Lightroom presets are available to reproduce Michael Zelbel’s porcelain style, achieving the look by hand is fairly simple as long as you follow his guidelines for lighting and shooting. Trying out drastic post-production techniques like the one outlined here can give your fine art intimate photography a an attention-grabbing appearance.
Like This Article?
Don't Miss The Next One!
Join over 100,000 photographers of all experience levels who receive our free photography tips and articles to stay current:


Leave a Reply