The folks over at B&H Photography have teamed up with professional wildlife photographer, Andy Biggs, to give aspiring photographers a few pointers on improving their game. The two-hour long seminar, Perfect Wildlife Photography and Post Editing with Adobe Lightroom 4 and Nik Software, has recently been made available to the public shown here:
The first half of the seminar is chock full of good tips to use when you are in the field shooting, which is, as Biggs would suggest, where all the magic really happens. This is where a good wildlife photograph is truly made—not in the digital darkroom. Much like any type of photography, the goal is to get the image as close to perfect in camera as possible. Here are a few key points Biggs brings up:
- Pre-think your shot. When possible, take the time to think about what you are about to shoot. Consider the composition, angle, focal length, etc, beforehand. It will help you get the image you want without having to fire off tons of memory hogging images.
- Shoot in full manual mode and always shoot RAW. These two tidbits come up often in many photography tutorials which should help you to fully appreciate their importance, especially the latter of the two.
- Carry as much focal length as you can afford to buy and are able-bodied enough to carry around with you. That’s not to say you should overdo it, but a good quality, long lens will be helpful. And by all means, don’t be afraid to use wide lenses as well.
“Wildlife photographers tend to throw on the biggest lens they can, fill the frame, and they’re done. That’s not always the most compelling image.”
- Shoot an image from more than just one angle and focal length. You don’t need to go crazy shooting from every possible angle, just don’t be afraid to give yourself a little variety.
- Last but not least, don’t use a flash. It will scare off animals and will give your wildlife photography an artificial feel, which isn’t very wild.

Don’t be afraid to isolate certain areas of an image, when lighting is poor.
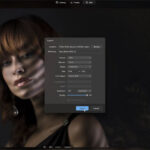
Once you’ve got yourself some good photographs, Biggs suggests you fine-tune them in Adobe Lightroom, with the help of Nik Software’s, Viveza. Get those images imported into Lightroom and try out the following workflow:
- First things first, crop your images as needed to get rid of any unwanted portions.
- Next, play around with the lens correction.
- This is a good point to make any necessary white balance corrections. Biggs make his initial adjustments in Lightroom before opening up Viveza to make the majority of the white balance corrections.
- Remember, when working in Lightroom or Viveza, all the adjustments you make to things will change the entire image unless you use control points. Group multiple control points together to create custom editing zones.
- Use, but don’t rely on, the auto-mask feature when using the brush tool–it will essentially help you “paint” inside the lines by detecting edges.
Hopefully, you can find time to watch the entire seminar. Biggs is not only an excellent photographer with a ton of insight and experience, he’s also a decent instructor. We’ve only scratched the surface of all the sage advice he shares in this video. Enjoy!
Like This Article?
Don't Miss The Next One!
Join over 100,000 photographers of all experience levels who receive our free photography tips and articles to stay current:


mind blowing images…… suparb
The video you link in this article is not viewable…says it’s private. Not sure why it’s included and written about?