Acne, pimples, and blemishes begone! Follow Aaron Nace as he demonstrates this super easy and very effective way to remove acne in Photoshop:
How to Remove Acne in Photoshop
1. Create a Hue/Saturation adjustment layer.
2. In the properties panel, select the Red color range in order to target the redness of the acne or blemishes.
3. Greatly increase the hue and saturation amounts. This is to help easily identify the problem areas. The image should turn a bright green or bluish hue.

4. The color slider at the bottom of the panel shows the selected color on top versus the color it will turn into. Pull the slider to the right, just until the problem areas are highlighted in green. (It will highlight the redness in the lips as well.)

5. When the pimples are targeted, bring down the saturation and hue to 0.
6. Readjust the hue slider to about +20, or until the target areas become a natural skin tone color.
7. Increase the lightness to about +40 to create an even better looking skin tone color.

8. Pull up the saturation slightly to add a touch more color.
9. Next, bring back the color to the lips. Select your hue/saturation mask layer and paint with a black paintbrush over the lips.

10. Use the Spot Healing Brush to remove the pimples or bumps and smooth out the skin. Be sure to set the brush type to Content Aware and click the option for Sample All Layers.
11. Use a similar brush size to the actual pimple or blemish you are trying to remove. Click on your blemishes and watch them disappear!

For best results, do a detailed sweep of every small spot and pimple, then do larger texture areas for skin smoothing.
How to Bring Back Natural Skin Tone
What’s left is a smooth face, but a single skin tone looks unnatural. Normally, natural looking skin has some color variations—oranges, reds, or browns.
- To create some natural looking skin tone variations, add a new layer.
- Select the brush tool, and sample the color from the lips.
- Paint over the cheeks and nose.
- Change the layer to Soft Light and pull down the opacity.
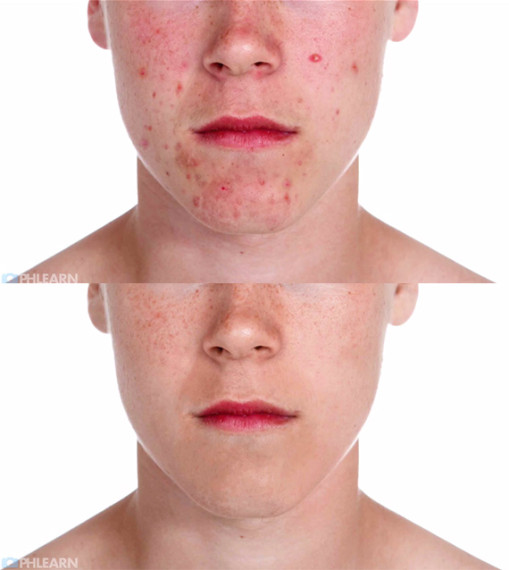
Before / After
The resulting image should exhibit nice natural color tones, but most importantly, a smooth acne-free face!
Like This Article?
Don't Miss The Next One!
Join over 100,000 photographers of all experience levels who receive our free photography tips and articles to stay current:


I love your tutorial.. thank you so much for sharing your thoughts. :)