The Sky Replacement feature in Adobe Photoshop will help you to make skies in your images dramatic and surreal. In this step-by-step guide, you will learn how to use the Sky Replacement tool. You will also learn various settings in the Sky Replacement interface to make your skies beautiful.
Are you looking for beautiful skies in your images?
Or do you want to add stunning skies to your architecture, portrait, wildlife or landscape images?
If so, you are in the right place.
In this article, we will discuss Photoshop’s unique feature, Sky Replacement. This tool helps you to transform ordinary skies into beautiful ones. Whenever a photo of mine has an unfortunate flat sky, I use this technique.
Best of all, the Sky Replacement tool is easy to use and produces great results.
Let’s dive right in.
What you’ll learn
- Sky replacement tool box
- Sky adjustments
- Foreground adjustments
- Sky replacement for sample image
Step-by-step guide to Sky Replacement in Adobe Photoshop
Open the image in Adobe Photoshop. I’m using the latest version from 2021, but the general rules should apply regardless of which version you have.
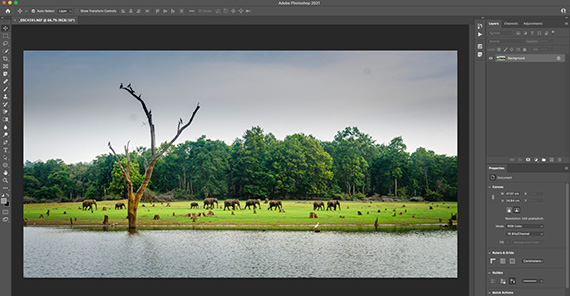
Image opened in Photoshop 2021
Go to Edit > Sky Replacement.
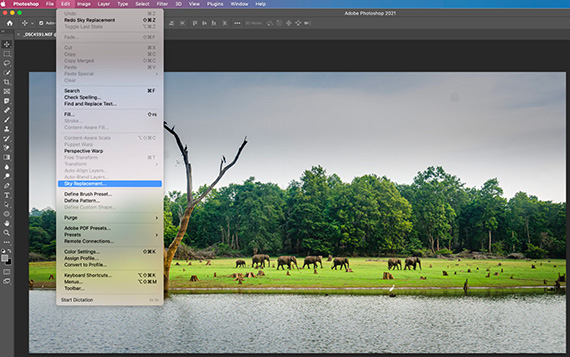
Edit dropdown menu
The Sky Replacement window will pop up.
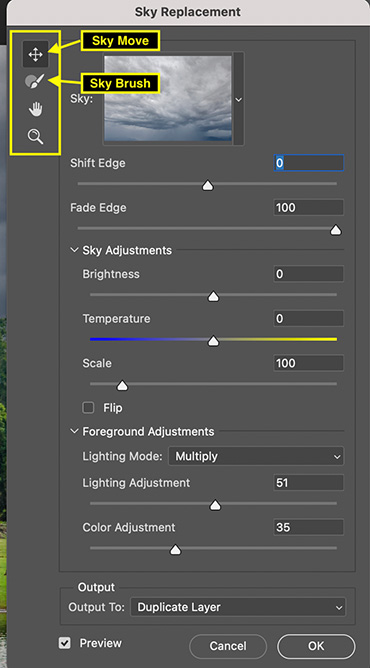
Sky Replacement Toolbox
There are several options in the top-left window. We will mainly use the top two, Sky Move and Sky Brush.
Click on the drop-down menu beside the image preview. Photoshop offers multiple default options, and you can add your own sky images to this bank.
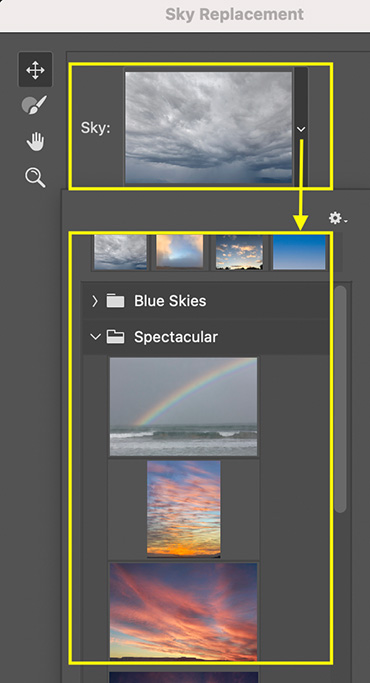
Default sky options available
Once you have selected which sky you want, you can see a preview of that sky in your image.
Shift Edge will help you define the boundary between sky and foreground. If you drag the Shift Edge slider toward the left (a negative number), the boundary, or sky, will shift away from the foreground.
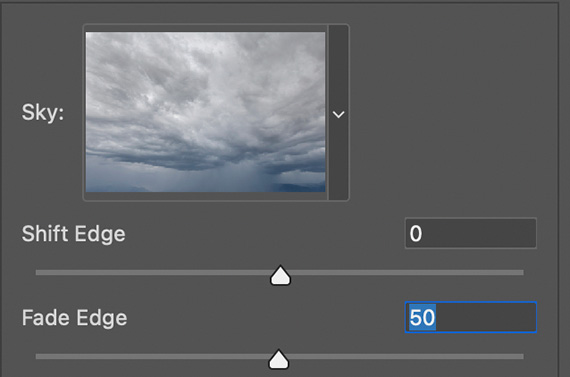
Sky edge adjustments
Similarly, if you drag the Shift Edge slider rightward (toward a positive number), the boundary or sky will shift toward the foreground. The Fade Edge slider will help you to make a smooth transition between sky and foreground.
Next up are Sky Adjustments, Brightness and Temperature. Brightness is self-explanatory: it controls how bright your sky looks. Generally, I will keep it to its default zero value or slightly reduce the brightness.
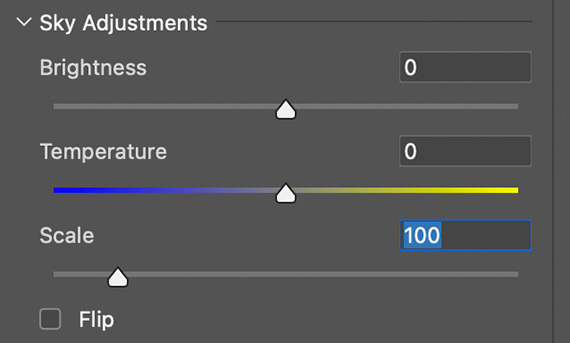
Brightness and temperature adjustment for sky
Use the Temperature slider to warm up or cool down the sky temperature, and use the Scale slider to scale up or down the sky part of your image. Next to the Scale slider, the Flip option will be helpful to flip the sky horizontally.
Once you make finish with Sky Adjustments, the next option is Foreground Adjustments. Foreground Adjustments help adjust Lighting Mode, Lighting Adjustment and Color Adjustment. You can make foreground adjustments using these three options, and they will help you to blend the foreground along with the newly replaced sky effectively.
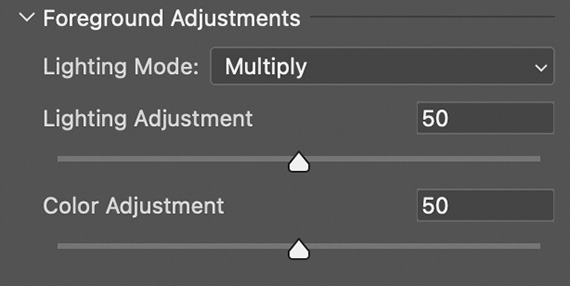
Light levels and color adjustment for the foreground
Here’s a rundown of the Lighting Modes: Multiply darkens the image, whereas Screen Blending brightens it. Below that, the lighting and color adjustments control the intensity of foreground adjustments for overall light and color. Increasing these sliders will increase the opacity.
The last option is Output. You can either select Output to New Layers or Duplicate Layers.

Output Option
I recommend you select New Layers. With New Layers, you can see all the layers that Photoshop has applied during this sky replacement process. You can also make some finer adjustments if necessary.

Multiple layers are created after applying Sky Replacement.
Duplicate Layers will create one single image. Similar to Flatten Image in Photoshop, all the layers get merged to create one single image.
Compare the before and after:
Before
Above is the image with a flat and dull sky.
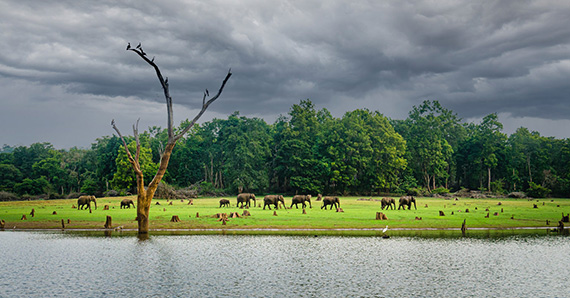
After
Here is a final image with an overcast sky, replaced using Sky Replacement.
A few things to consider when using Sky Replacement
- Select a photo that is suitable for Sky replacement, because not every photo will work well.
- When you replace the sky, keep an eye on the overall colors and temperatures of the image subject. Choose a sky that matches in terms of light levels, color temperatures and reflections.
- As with any other feature, moderation is key. Use Sky Replacement feature when necessary, and do not try to rely too heavily on it.
Now it’s your turn!
I hope you enjoyed these tips on how to use the Sky Replacement tool in Photoshop.
Want to share your thoughts or responses? Let me know by leaving the comment below.
About the Author:
Shreyas S. Yadav is an engineer and photographer of wildlife and nature. He is also a writer and lifelong adventure explorer. Through his writings, he teaches about digital post-processing and nature photography. Shreyas shares field techniques about nature photography, post-processing and wildlife photo stories on his website.
Like This Article?
Don't Miss The Next One!
Join over 100,000 photographers of all experience levels who receive our free photography tips and articles to stay current:


Leave a Reply