Want to bring out the best in your photographs? Offering a little TLC to the tiniest details hidden within the darkest portions of a composition can make a substantial difference in the look and feel of a photograph.
The question is, how do you “open up” an image while retaining a natural appearance? Phlearn founder Aaron Nace offers a quick two minute solution:
As always, the first step is to create a duplicate of your base background. That way, if you want to completely rework the shot, the original file is easily accessible.
Highlights and Shadows
From there, head to the Adjustments menu and begin playing around with the Highlight and Shadow slider set. Generally, you’ll want to avoid making too many changes to the highlights, as any major shifts can quickly create a somewhat artificial look. The shadow adjustments, on the other hand, can be used to effortlessly bump up the darkest portions of an image.

Color Corrections
Once you’re satisfied with the dark tones, it’s important to go in and make color corrections. Anything that was once shrouded in shadow is going to be nearly devoid of color. Within the Highlight/Shadow menu, there is a slider that allows you to adjust the hue and saturation of the specific adjusted areas.
Curve Adjustment
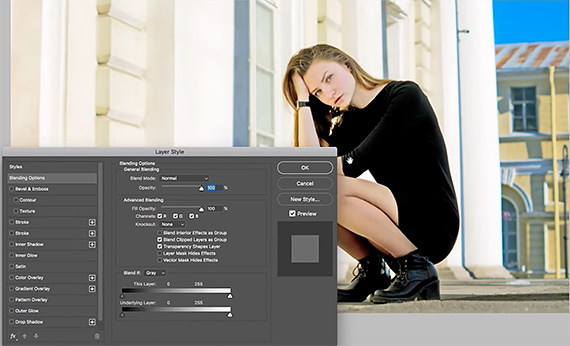
For highlight adjustments, a curve adjustment will likely be a photographer’s best bet. Bring up the whites, invert the layer mask, then use a paintbrush to paint lightness into the areas that need to be brightened up. To retain some of the shadows and maintain a sense of realism, press the Alt or Option key while the layer is selected. This will bring up a slider to adjust which tones bleed into the layer below.
Skin Tone
For portrait subjects, getting the skin tone just right will likely require a bit of extra work. Once you’ve added a Hue and Saturation layer, explore the Adjustment layer options and choose Selective Color. There, it’s possible to hone in on specific shades within an image. In Nace’s example, the model’s skin tones primarily fall in the reds. Using the selective coloring option, he’s able to tone down the yellow shades within the reds while simultaneously bringing out more of the cyan and magenta shades already present.

Voila! By stacking those techniques back to back, you’ll see some immediate changes for the better. In just a matter of minutes, it’s possible to give your photos a makeover and get more professional looking end results with half the effort.
Like This Article?
Don't Miss The Next One!
Join over 100,000 photographers of all experience levels who receive our free photography tips and articles to stay current:


Leave a Reply