Just how do professional product photographers get their amazing results? Maybe you’ve been thinking about doing your own product photography or learning how to do it on something other than the standard white background. If so, then this video from Phlearn will certainly give you some things to think about:
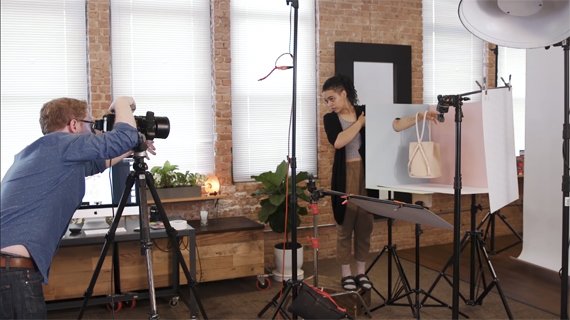
Excellent product photography is all about getting the details right, and this really shows in both Floyd’s approach to the lighting and in Aaron Nace’s retouching. On the photography side, everything from exactly how many baffles to use in the softbox (and why) to exactly how much the fingers of the model extend is carefully considered.
Their setup is quite simple: a homemade cut-out box with flat colors, one softbox, and a couple of bounce cards (one for side sill and one facing up from the bottom to remove the color cast). Beyond that, it’s just the model and the bag. If just goes to show–you don’t need a lot of fancy lighting gear to get pro-level images.
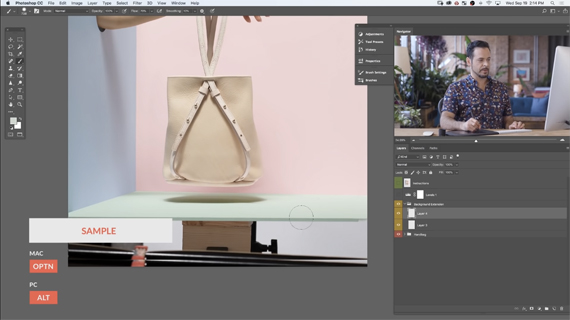
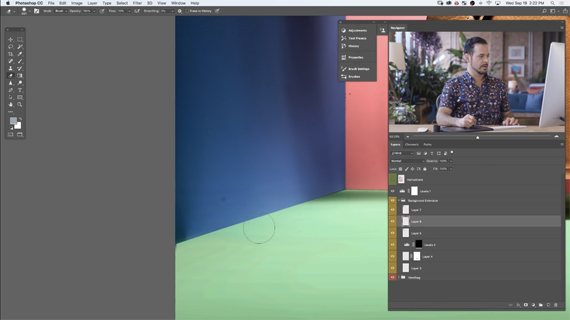
Once they get an image that works for them, Nace takes the image to Photoshop to extend the background. To most Photoshop users, it may seem like a simple process, but Nace shows how there’s really more to it than simply cloning and stamping (though he does plenty of that as well.) Still, creating a new layer and then extending the pink and green is his starting place.
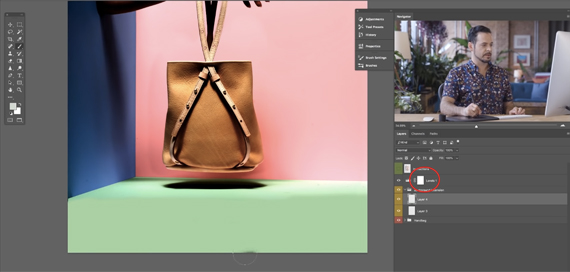
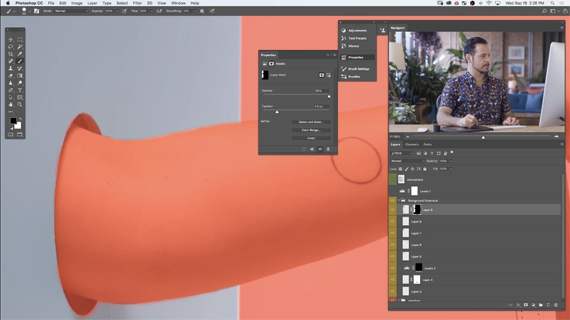
Perhaps the most time-consuming aspect of this post-processing is correcting the color inconsistencies. You’d think it’d be easy with solid colors, but shadows can be tricky business. In this tutorial, one of the key things Nace uses to check his work is a level adjustment layer. Unfortunately, he doesn’t tell us what this levels adjustment is set at, but it clearly shows him the different color variations he can’t see with the naked eye.
Another key aspect to extending the bottom green color is that it needs to have a shadow gradient to make the “floor” look more realistic. If it’s on the same plane as the camera sensor, there doesn’t tend to be a light gradation. But if it’s coming towards or away from the sensor, the light changes and you’ll need to make sure there’s enough shadow to create a sense of 3-dimensionality. So Nace used another levels adjustment and the gradient tool to add that in.
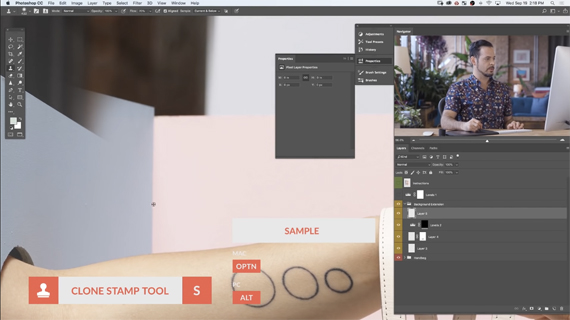
Once Nace is happy with the floor gradient, he extends the left corner with the clone/stamp tool. In this case, it’s helpful to have the “show overlay” option checked so you can see exactly what you’re getting. Here it helps Nace line up the lines for the corner exactly.
The most time-consuming aspect is correcting the color inconsistencies. You’d think it’d be easy with solid colors, but shadows can be tricky business. Nace returns to his levels adjustment to check the gradients multiple times and makes minute adjustments to make sure everything looks as realistic as possible.
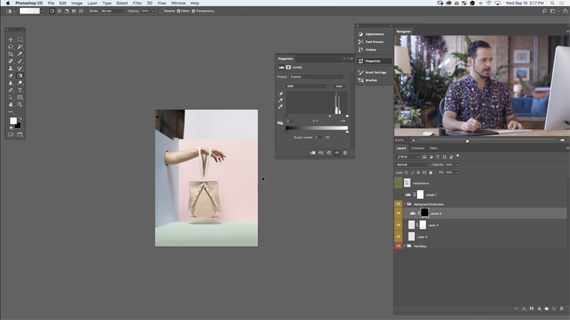
At one point he ends up painting more of the blue over the green and pink than he intends to. To get rid of the excess, he uses the pen tool to carve out the space and transfer it to a layer mask. He then adjusts the layer mask properties to get just the right amount of feathering. The slash key will show you the mask. (Right above the enter/return key on your keyboard.)
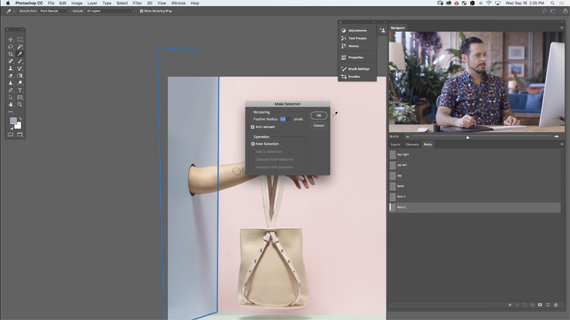
While he could have used the pen tool to go around the arm, Nace chooses instead to remove the blue covering the arm by painting in a layer mask. (You can see how the pen tool above covers a bit of the arm.) One handy tip is knowing the quick keys in Photoshop. Here, hitting the slash key that’s right above your return/enter key will show you the layer mask.
The finished product has plenty of negative space for text or other web content and can easily be cropped down as well.

One of the curious things about this tutorial is that the lighting and shooting process is pretty simple and straightforward, but the post-production is pretty involved. Nace does go through the process pretty quickly, so don’t feel bad if you need to watch the tutorial a few times. If these techniques are new to you, I’d suggest practicing them right away on a sample image.
Like This Article?
Don't Miss The Next One!
Join over 100,000 photographers of all experience levels who receive our free photography tips and articles to stay current:


Leave a Reply