Interested in improving your portrait photography skills? How about a character shoot? How about some indoor snow? Gavin Hoey demonstrates a tutorial for a little red riding hood themed photo shoot in the following video:
Hoey starts with a test shot with his basic setup. He’s shooting with a Canon EOS 5D Mark II equipped with a Canon 50mm f/1.8 lens, which he explains is ideal for this sort of shoot due to its fantastic depth of field. He has a Flashpoint Streaklight 360 set up overhead, outfitted with a beauty dish to diffuse the light.
He begins by taking a reading with his Sekonic L-308S Flashmate light meter. After taking an initial reading, Hoey determines that the model is too far back and instructs her to take a step forward.

Hoey taking a light reading at the model’s chin.
A second light reading shows that one step forward has yielded an additional f-stop worth of light, and he proceeds with his initial test shot, below:
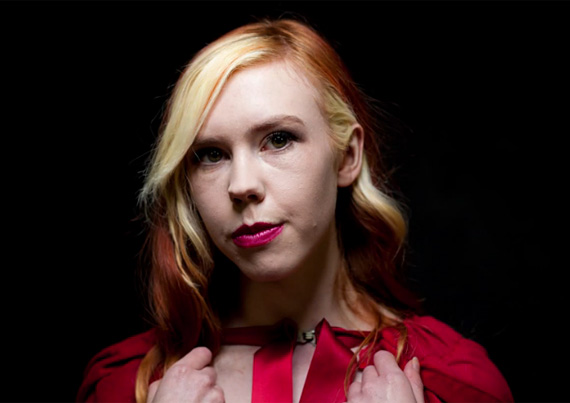
First test shot, f 2.8, 1/160th second, ISO 50.
Ack! Not so good, right?
Hoey notes that simply using an overhead flash yields a harsh, contrasty light with too many shadows and a completely black background. He recommends filling in the lower shadows with a Westcott Basics 40″ 5-in-1 Reflector. (Remember our article on butterfly lighting? Same concept here.) Using a reflector yields the correct light on the face, with the light from below filling in the harsh shadows:

Second test shot, using reflector to brighten up shadows.
Hoey notes that this has improved the model lighting situation, but that he wanted more detail showing in the grey backdrop that he set up.
To achieve this, he sets up a Flashpoint Streaklight 180 behind the model, pointing directly at the background. He takes a couple of test shots, determines that the background isn’t bright enough, and increases the background light by one f-stop using a remote. The following shot results:

Portrait shot with Flashpoint Streaklight 180 illuminating the backdrop.
This is a nice result, but Hoey explains that he’s going for a more “woodsy” effect to go with the costume and adds a gel filter to the Streaklight 180 in order to change the color of the light (and thereby the color of the backdrop):

Using a gel filter in front of the rear light changes the color of the backdrop.
Adding a gel filter changes the color, but also changes the amount of light coming out of the background flash, so Hoey ups it by another f-stop. This yields a good balance between the primary and background flashes.
For the final shot, the fun begins: Hoey has his assistant spray fake snow all over the place. (Read the instructions, and don’t spray this stuff in your kitchen, for obvious reasons.)

Final shot, with fake snow.
So we’re done with the photoshoot; next comes the Photoshop.
Tips for Editing an Indoor Snow Shoot in Photoshop
Spray snow is fun, but unruly. Hoey shows us how to deal with this in Photoshop.
- Use the spot cleaning tool to edit out undesired small snow bits.
- For larger pieces, use the patch tool. Select the area around larger pieces of snow, and move the selection by dragging it to view the patch selection sample.
- For large or complicated areas–in this case, a huge piece of fake snow on the model’s hair, Hoey recommends patching in a piece of texture from a prior shot without snow. He uses a rectangular marquee to make a rough selection in the snow-free shot, and pastes it into the main image. After pasting, Hoey reduces the opacity on the introduced layer and then uses a layer mask to hide the new layer. To “paint” the new layer in, Hoey sets the foreground color of the primary layer to the opposite of the second layer, and uses brushes of different sizes to “paint” in the correct snow-free texture.

More Snow!
Hoey wants more snow in the image, and has a neat little tool to share with us to do so. He’s created an “instant snow action” tool for Photoshop that you can download free of charge from his website.
Final Results
After using the instant snow action Photoshop tool, Hoey shows us his final result:

Final Result. Canon EOS 5D Mark II with Canon 50mm f/1.8 lens, f/2.8, 1/160 second, ISO 50.
Have you had any interesting photo shoots lately? Tell us about them in the comments!
Like This Article?
Don't Miss The Next One!
Join over 100,000 photographers of all experience levels who receive our free photography tips and articles to stay current:


Leave a Reply