A single flash used as an overhead light can deliver great results. However, if you work in a small home studio with limited ceiling height, it can pose a challenge. Photographer Gavin Hoey from Adorama shows you how you can place a softbox overhead to create an impact in your images:
The first important thing to keep in mind is about where you plan to have your model seated. If your home studio doesn’t have sufficient height for overhead lighting, you’re better off seating the model on the floor. This is exactly what Hoey does in his case. And, since a plain floor will look boring in the final images, a good idea is to have a floor that looks interesting. Hoey uses his old decking from the garden.
Lighting Equipment
Hoey uses a Flashpoint XPLOR 400 with a large softbox directed straight down to the floor for lighting the model. To demonstrate how the different light positions affect the image, he also ensures that the model is at the same distance from the background throughout the shoot.
Light in Front of the Model
Hoey starts off the shoot with a classic light positioning: light in front of the model. The model’s head is roughly in line with the back edge of the softbox.
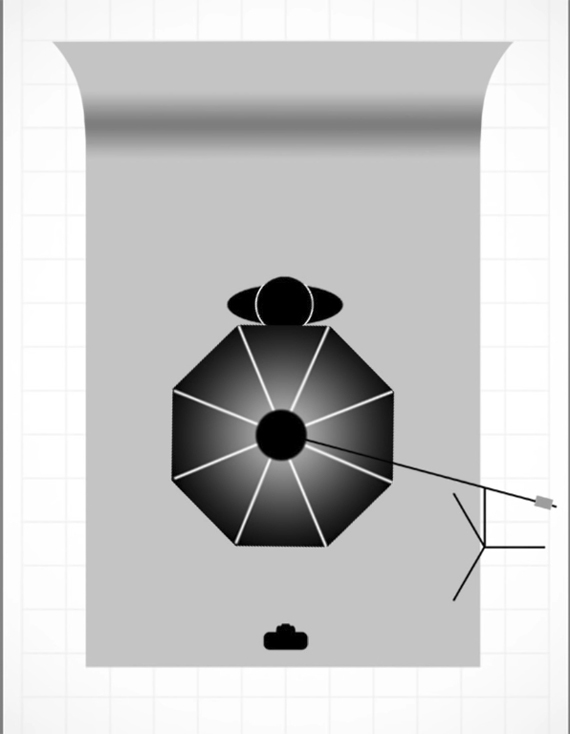
Then, to meter the light, he places the light meter in front of the model’s face with the dome pointed toward the light source. With the light metered at f/4, here’s what he comes up with:
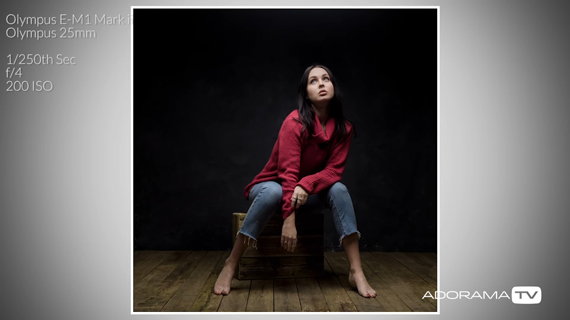
The model’s face is brightly lit while the background is completely dark. This totally makes sense as the background is far away from the softbox.
Light Over the Model
Next, Hoey adjusts the light so that it is directly over the model’s head.
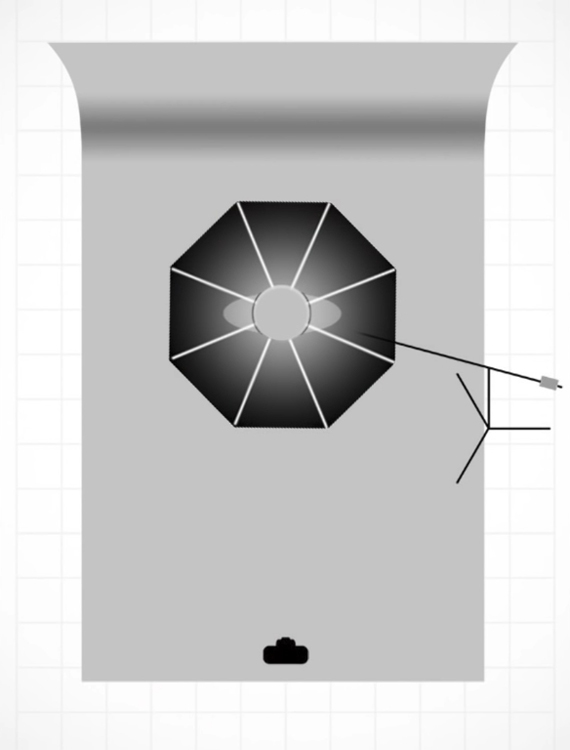
The adjustment might not seem significant, but it has a big impact on the final image. Since the softbox is now a bit closer to the background, you can expect some amount of the background to be visible in the shot. Conversely, as there is less softbox in front of the model’s face, you can also expect it to be less bright.
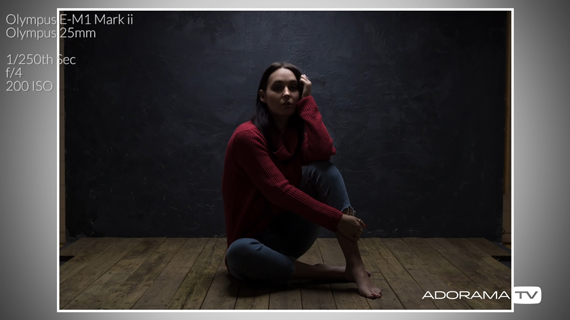
Hoey again meters the light at f/4, and here’s what he gets:

As you can see, when the model looks up toward the light, there is a nice balance between the illumination on the background and on the model’s face.
Light Closer to the Background
For the final setup, Hoey places the light even closer to the background. He lines up the front edge of the softbox with the front of the subject’s face.
In this position, you can expect the background to be properly exposed while the subject’s face is underexposed. Metering the light at f/4, here are some images that Hoey captured:
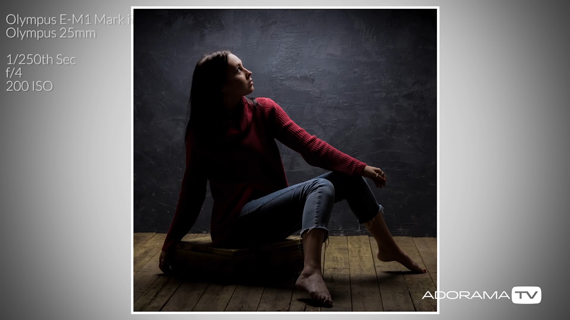
Again, when the model looks straight toward the camera, her eyes are in complete shadow, which isn’t flattering. But when she looks up toward the light, you get a well-lit image with a contrasty look.
“Overhead lighting in a small home studio is a bit more tricky to set up than side lighting. But if you can overcome the obstacles, it’s a really great way to light portraits.”
So how about giving overhead lighting a shot the next time you’re up for a portrait shoot?
Like This Article?
Don't Miss The Next One!
Join over 100,000 photographers of all experience levels who receive our free photography tips and articles to stay current:


I never use overhead lighting….mainly because it’s annoying to darg the boom and counter weights on shoots. Then I see photos like this and it reminds me why I should.