Lightroom has been an essential part of a photographer’s workflow for a long time. If you’re just starting out with Lightroom, you may get confused or even scared of all the features that this software has to offer. If that’s the case, you’ll enjoy this Lightroom masterclass that Mango Street has put together:
Getting Started
Creating Catalogs
When you start Lightroom up, it asks whether you’d like to open an existing catalog or create a new one. A good practice is to create a new one for every session. This also helps Lightroom perform better by keeping the catalogs from getting too bloated.
Installing Presets
If you’d like to get started with using presets, head on to Preferences > Presets.
- Click on Show Lightroom Development Presets to open the folder with all your presets.
- Copy the presets that you might have bought into this folder and restart Lightroom to install them.
Importing Photos
To start working with photos in Lightroom, you need to Import them.
- Start by creating a New Catalog.
- Then, you can import photos either by dragging and dropping photos into the new catalog or by going to File > Import Photos and Video.
- Select the images that you’d like to work with, and then click on Import.
You can even handle how Lightroom handles imports. You just have to make a few clicks on the right panel.
- Keeping Build Previews at standard works fine. Minimal and Embedded & Sidecar previews are temporary and Lightroom automatically builds better quality previews. 1:1 previews take the longest to build but allow you to zoom in with minimal lag.
- Enabling Smart Previews allows Lightroom to make edits to the files without your hard drive containing the raw files being connected to the computer. However, your Lightroom catalog and preview files need to be on the computer.
- If you have multiple sessions around the same theme, you can keep them organized by checking Add to Collection.
- To quicken your workflow, if you plan on applying any presets to your photos, you can do so by clicking on Develop Settings. And, you can add any metadata to the images upon import by clicking on Metadata.
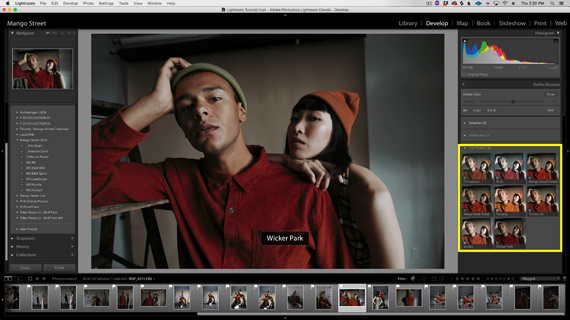
Library Module
Once Lightroom is done importing images, it will automatically take you to the Library module. This is where you can perform tasks like organizing, rating, labeling, and culling photos. You can also speed up your workflow by performing batch edits or adding a preset. You can also make basic adjustments to the images, like changing the white balance, exposure, and others.
- Hit “=” if you want to enlarge the size of the thumbnail. Press “-” (minus) if you want to reduce the size of the thumbnail.
- To go full screen, go to View > Zoom in.
- Culling the photos is to be done within the library module. You can use do that by pressing “P” to flag the photos. You can also rate them by pressing numbers from 1 to 5. Or, you can color label them by pressing numbers 6 through 9.
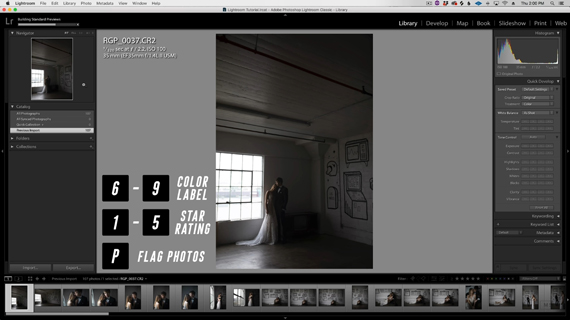
- To remove the flag from a photo, simply press “U”. And to remove a number rating, press “0” (zero). To get rid of the color label, press the number pad key for the respective color label.
Once you’re done culling the photos by following the method of your choice, you can filter them out to work with. Choose your filter by clicking where it says Filter Off, and click on your filter method.
Develop Module
The develop module is where you can make adjustments to your photos.
Navigator
The navigator is present at the top left corner of the develop module. Here, you can zoom in and out, fit and fill the window, and navigate around your photos.
Presets
Below the navigator is the presets section. All the presets that you buy or create can be found here along with some of the presets baked into Lightroom. Hovering over the presets will show you a preview of how they affect your image.
Snapshots
Snapshots come in handy when you want to compare your edits. Simply click on the “+” sign, label your snapshot, and hit “OK”. If you want to go back to a certain edit, just click on the respective label.
History
Working with the history panel is like going back in time. Every change that you make is documented in the history panel. If you want to go back to a certain step, find it here and click on it.
Collections
The collections panel help you stay organized by grouping related photographs together into one collection.
Copy and Paste
Use the Copy and Paste feature to copy all the adjustments that you’ve made to one photo and paste them onto another.
Histogram
On the upper right-hand side of the develop module is the histogram.
“A histogram is the graphical representation of the tones in your image.”
The left-hand side of the histogram represents the shadows, the highlights are represented by the right-hand side and the mid-tones by the middle section. By getting a hold of any of these sides of the histogram and moving it around, you can make changes to the respective sections in the image.
Tools
Crop Tool: Press “R” to access the crop tool. Use this tool to crop the image as per your liking. If you move slightly away from the border at any of the corners, you can rotate it to straighten your image. From the Aspect drop-down menu, you can choose a specific aspect ratio.
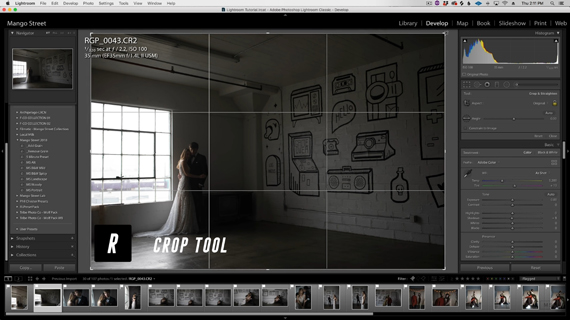
Click the ruler, and click and drag along a straight line to straighten the horizon of an image.
Spot Removal Tool: This tool works exactly like Photoshop’s Clone & Stamp tool. You can use this to get rid of unwanted spots from your images either in Clone or Heal mode. Using it in clone mode will create a duplicate of the source region, whereas, using it in heal mode will try to blend the spot automatically.
Red Eye Removal Tool: Use this to get rid of the red-eye effect that may appear in your images, especially when using flash in dimly lit areas.
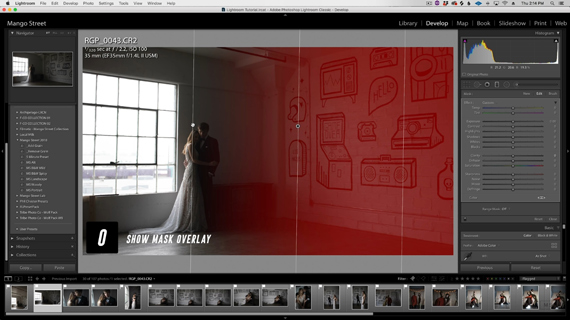
Graduated Filter: You can make a multitude of adjustments with the graduated filter. When using this filter, the effect slowly fades in opacity and becomes less prominent.
“Where you first click will have the strongest effect and how far you drag your mouse will determine how gradual the fall-off will be.”
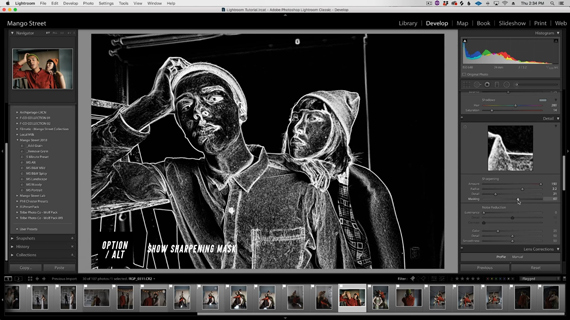
You can get a visual representation of the graduated filter mask by pressing “O”.
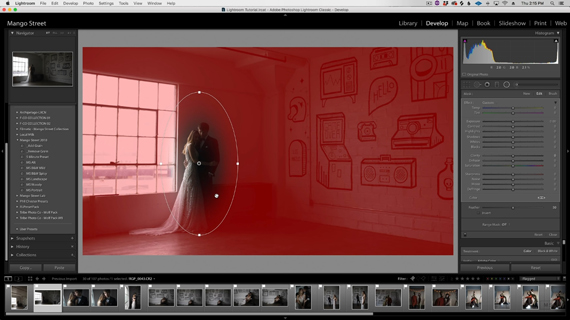
Radial Filter: This is similar to the graduated filter but differs in the sense that you’ll need to draw an ellipse instead of a line. You can choose whether you want to affect the inside of the ellipse or the outside.
Adjustment Brush: Grab the brush tool and paint over areas where you want your adjustments to affect the image.
“If you have Auto mask enabled, it will do it’s best to detect edges to keep you from painting outside the line.”
To erase parts of your mask, simply hold Alt (Option) and paint over the mask. This local adjustment tool comes in handy when you want to make minute adjustments to your image.
Basic Adjustments Panel
Treatment
Here you can select whether you want your image in Color or Black & White.
Profile
The profile panel allows you to choose the color profile for your images. When starting out it is recommended that you start off with Adobe RGB.
White Balance
Here you can adjust the color temperature and tint in your images. If your image appears too warm, slide the temperature slider toward the blue side. And if it’s too cool, slide it toward the warm yellow side. You can use the Eyedropper tool to automatically adjust the white balance. When using the eyedropper, click on areas that should appear white.
Tone Adjustments
The tone adjustments section consists of settings for Exposure, Contrast, Highlights, Shadows, Whites, and Blacks. It’s recommended that you make the highlights, shadows, whites, and blacks adjustments before heading on to the exposure adjustments.
If you want a starting point to make adjustments to your image, you can click on Auto and take over from there.
Clarity
The clarity tool affects the contrast in the mid-tones of the image. You can extract details from your image by increasing its value. Decreasing its value will make the image appear soft. Be careful when working with the clarity slider; it’s easy to get carried away.
Dehaze
Dehaze tool adds a punch to your image by improving contrast. This works best for landscape and astrophotography.
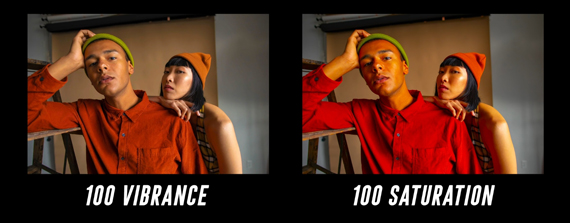
Vibrance and Saturation
Both these sliders affect the saturation of the colors. However, increasing vibrance affects the saturation of the muted colors in the image whereas increasing saturation affects all the hues equally.
Tone Curve
“The tone curve allows us to more intricately sculpt the contrast and tones of our photos.”
The bottom left of the tone curve represents the black point of the image, and the top right represent its white point.
“Lifting the black point and lowering the white point effectively crushes the dynamic range of the photo.”

You can also add points along the tone curve and lower or raise them to affect the tones in that range.
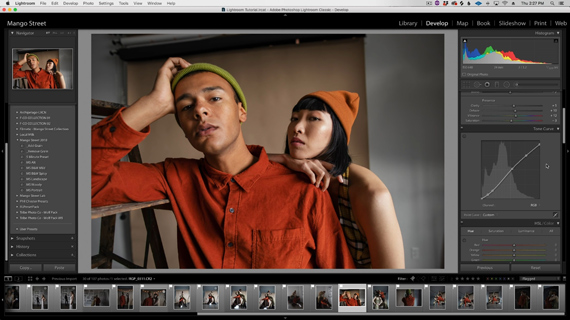
If working with points isn’t your cup of tea, simply switch over to the Parametric Curve. This will present you with sliders to work with different tones separately.
Hue, Saturation, and Luminance Panel
This panel is commonly known as the HSL panel and offers fine controls over parameters that affect the hue, saturation, and luminance of the colors in the image. For instance, in the hue panel, you can dictate how you want the reds in the image to be represented. If you want your reds to have more orange, slide it to the right. But if you want the reds to have more magenta, slide it to the left.
“If you’re sure which color’s slider you should adjust, use the target adjustment circle to identify the associated colors. Click on the circle and then click and drag up or down on your target area.”
The saturation sliders work in a similar fashion but affect how saturated the colors appear. Depending on whether you want an individual color to appear muted or pop, drag it to the left or right respectively.
As the name suggests, the luminance section lets you control the brightness of each of the colors. If any of the colors appear washed out, reduce the luminosity of that particular color. You can also do the same with your subject’s skin tones. But be sure not to overdo it.
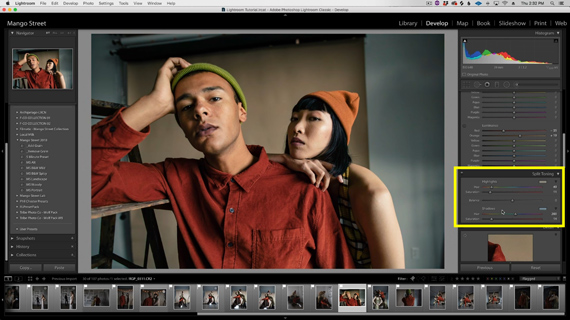
Split Toning
This panel allows you to add different color tones to the highlights and shadows regions for creative effects. Choose what color you’d like to add in the highlights/shadows by selecting from the hue slider. Then, choose the amount of color to add from the saturation slider. The balance slider determines the weight that you want to give the highlights and shadows.
Detail
Sharpening: This is where you can adjust parameters to sharpen your image. Generally, values between 20 and 50 work best for most images. Overdoing it introduces artifacts to the image.
Radius: The radius slider defines the size of the sharpening area in terms of pixels. Cranking it up almost never looks good. See what works best for you.
Detail: A lower value in the detail slider will sharpen only the well-defined edges. Increasing it will sharpen the finer edges as well. Hold Alt (Option) while dragging the slider to visualize the effect.
Masking: You may not want all the regions in your image to be sharpened equally. Increasing the masking value will limit most of the sharpened areas, while a zero value means that everything will be sharpened. Again, hold the Alt (Option) while dragging the slider around to see which areas are being sharpened.
Noise Reduction
There are two types of noise that can be introduced in an image: luminance and color.
“Color noise generally happens in shadowy areas and introduces multicolored pixels in areas that should be flat color.”
If you take raw photos, you will notice that Lightroom automatically applies some color noise reduction to the file. Depending on the amount of color noise, feel free to fine-tune the reduction amount.
“Luminance noise is monochromatic and appears grainy. “
To reduce the amount of luminance noise in your images, gradually increase the luminance slider. Its side effect is the loss of some amount of detail in the image. Applying too much noise reduction will make the image blotchy.
Lens Correction
Check the Remove Chromatic Aberration option to have Lightroom automatically fix the chromatic aberrations. Chromatic aberrations are more prominent on the edges of a backlit subject. They usually appear as pink or green lines along the high contrast areas.
Not all lenses are perfect. The images might have some sort of vignetting, and pin-cushion or barrel distortion which affect the images. By checking the Enable Profile Corrections option, Lightroom will automatically load the profile to correct such distortions.
If you are not happy with the auto corrections that Lightroom makes for you, feel free to explore the Manual tab and make the corrections by yourself.
It’s recommended that you enable these two corrections in the very beginning.
Transform
The transform tab has tools that help you get rid of perspective distortions. If you have images where the walls appear slanted, or the buildings appear as if they’re falling away from you, the transform tool is where you should come for the fix.
The Auto button will do the trick if your image has well defined vertical and horizontal lines. Otherwise, you will need to provide Lightroom with the reference so that it can do the needful.
Effects
The Post-Crop Vignetting option lets you add a vignette to your image. Play around with the Midpoint, Roundness, and Feather to change the position and shape of the vignette.
Head on over to the Grain panel if you like to add grains to your image. Here, you can adjust the Amount, Size, and Roughness of the grains to be added.
Calibration
“Camera calibration will affect the RGB values of each individual pixel.”
Using this panel, you can tell Lightroom how you want your colors to appear in the images.
Editing Faster in Lightroom
Copy and Paste
This tip comes in handy when you want to make similar edits across many different images.
- Once you’re done editing one photo, press Control (Command) + Shift + C. This will bring up the copy settings menu where you can uncheck the file specific edits such as crop, spot removal, transform, and local adjustments. Then, click on copy.
- Head on over to the image you want to paste the settings to. Press Control (Command) + Shift + V to paste the settings.
Previous
To apply the settings from the last photo to the current photo, hit the Previous button.
Synchronizing
Synchronizing is an efficient way to quickly apply settings across a batch of photos. Select a photo that you’ve already edited, hold Shift, and click on the last photo of the batch. Then click the Sync button or press Control (Command) + Shift + S. In the dialog box that pops up, only select those settings that you want to apply to the photos and click Synchronize.
Presets
“If you’ve developed an edit that you want to reuse time and time again, it’s best to save it as a preset.”
To create a preset of your own, click on the “+’ sign next to presets, and select Create Preset. Then, give a name to your preset, put it in a group, and choose only those settings that you want your preset to include.
“A general rule of thumb is to leave white balance and exposure unchecked as well as more photo-specific adjustments. This way your preset will work best across a wide range of photos.”
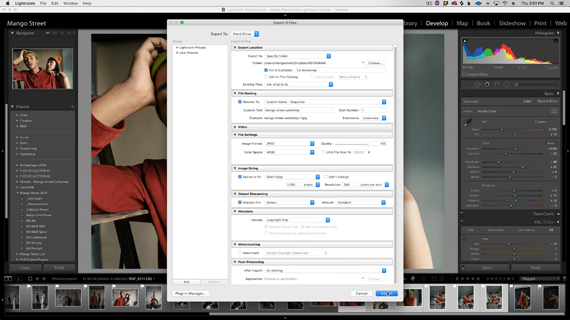
Exporting Photos
Once you are done editing your photos, it’s time to export them to be used for their purpose. However, ensure that all your photos appear consistent and that the settings are okay beforehand.
- Select the images you want to export and go to File > Export…
- Choose where you want to save your photos.
- You can create a file naming convention for the sake of consistency.
- If you have a restriction on file size or resolution, you can enter those parameters.
- If the images are going to be displayed digitally only, leave the Sharpen for option on Screen. If you’ll be printing them, you can optimize sharpening accordingly.
- In the Metadata section, choose which information you want to embed into the exported image.
- Choose your watermark file if you want to automatically add watermarks to your images when exported.
- Hit Export when done.
With this elaborate yet concise guide to getting started with Lightroom, we really hope that you gain the confidence to start using the software. This article doesn’t cover all the features that Lightroom has to offer, but it’s definitely a useful stepping stone!
Like This Article?
Don't Miss The Next One!
Join over 100,000 photographers of all experience levels who receive our free photography tips and articles to stay current:


Leave a Reply