What happens when we select a certain ISO value in our digital camera? What is the best ISO setting for our particular camera? Can we change it light-heartedly or does it deserve more careful consideration? Read on to learn how we can improve our photographs through the right selection of ISO settings.

“falling of the night” captured by MSkeet (Click Image to Find Photographer)
Let me give you the bad news first. Camera manufactures do not disclose strategic and sensitive information such as what happens internally when the user selects a certain ISO value. However, through sound reasoning and a little reverse engineering, we can speculate on it and come to meaningful conclusions. Reverse engineering is best performed on RAW files rather than JPEGs, because JPEG compression introduces artifacts and algorithms that complicate the process.
Native Sensitivity
For starters, we need a definition. Image sensors have a so-called native sensitivity. This is the innate or natural sensitivity of the sensor when compared to a standard film. For instance, if the native sensitivity of a certain sensor is 100 ISO, it means that it gives comparable results to a 100 ISO rated film when both are used at the same aperture and shutter speed. Native sensitivity cannot be changed, because it is inherent to a certain sensor. Therefore, when we change the ISO speed setting, something must occur involving the circuitry serving the photosensitive sensor. More specifically, things play out differently according to whether an ISO greater or lower than the native sensitivity is selected. Let’s see the two cases separately.
ISO setting > native sensitivity
We must know that the electronic charge created inside the photosensitive array of the image sensor is first sensed and transformed into an analog voltage by an amplifier and then an analog to digital converter (ADC) transforms this voltage into a digital number. The amplifier transforming the electronic charge into an analog voltage has a certain gain, meaning that to a given input corresponds a certain amplified output.

“Gas Fire 2” captured by Michael Edminster (Click Image to Find Photographer)
Put mathematically: output = gain * input. The greater the output, the brighter the image. When the photographer opts for an ISO speed greater than the native sensitivity, the gain of this amplifier is increased. That is, the microelectronic circuitry is designed to augment the gain of the amplifier. For instance, if the selected ISO is twice as much as the native sensitivity, the gain doubles. If the gain increases, then the output for a given input will be greater, thus leading up to a brighter photograph. Hence, the chain of events is the following. The photographer realizes that he is going to shoot a very dark scene, so he decides to select a high ISO setting. The photons hitting the sensor and thus leading to electron generation do not change, of course (i.e. the input is the same), but internally the electronic charge is magnified by increasing the gain of the amplifier, as if the amplifier sensed a greater number of electrons. All this leads to a brighter image.
Unfortunately, this is not magic. As the signal is increased, leading to a brighter image, the noise is increased as well, leading to a noisier image. That is why we should be careful when increasing the ISO speed in subdued light conditions. Only do this when no other option is available (e.g. a tripod).
In some cases, fiddling in RAW data may also appear to boost to very high ISO speed.
ISO setting < native sensitivity
If this is the case, then the camera’s circuitry adjusts the image data after the analog to digital converter, directly in the digitized form. For instance, if the selected ISO is half the native sensitivity, brightness values represented by each RGB channel are halved. This leads to a darker photo.
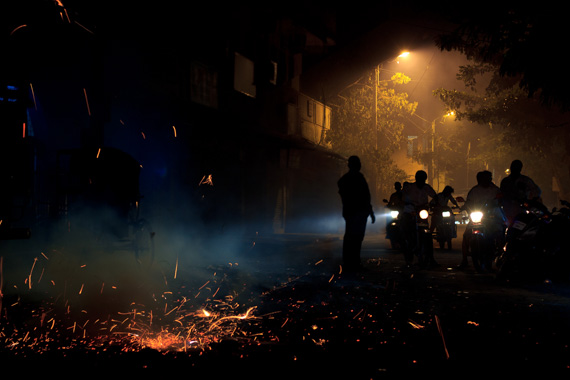
“Blast at Diwali Night” by Soumya Sumitra Behera (Click Image to Find Photographer)
This has a drawback, too. Indeed, a common ADC has 12 bits per RGB channel. When its numbers are halved, they can be represented by 11 bits (12-1). This means that the dynamic range is reduced and some information lost forever.
Conclusions
As we discussed, drawbacks arise using an ISO setting both higher and lower than the native sensitivity. So, it is best to shoot at the sensor’s native ISO whenever possible. That said, this is not a technical characteristic camera manufacturers divulge. Consequently, you have two options to know the best ISO setting for your camera: sift through the numerous forums on the web or, better yet, experiment by yourself with your specific camera.
More articles about photography at ilghila.com.
PictureCorrect Comment: Many professional photographers use an external light meter to get more insight on what ISO speed would work the best for a particular situation.
Like This Article?
Don't Miss The Next One!
Join over 100,000 photographers of all experience levels who receive our free photography tips and articles to stay current:


This is a very clear explanation. But another post on another page leads me to this question. Is the gain constantly variable so that it is continuous. Or is it more of an interval scale. The post I read or watched seemed to imply that the gain was interval and if an ISO other than the the “Native” ISO were selected it should be an ISO setting also needed to match this gain interval in order to avoid additional noise beyond that normally associated with higher ISO’s and gain. The post used ISO’s of 100, 200, 400 etc for Canon Cameras and 160, 320, 640 etc for Nikons. He argued that say if you set ISO on a Canon 10 ISO 150 the noise would be higher than at ISO 200 because 200 matches the innate interval of Canon’s native ISO interval. Is he making stuff up?
As a beginning photographer, I have been insanely curious about exactly what happens when I choose a different ISO on a digital camera. I figured that the sensor must have a set sensitivity that cannot change. So what happens? It was a puzzle that I was obsessing over and I have been researching ISO, Gain, Pixels, Photons, Electrons, ADUs, etc. for about a week. My head was spinning. I learned a lot, but still could not get the answer I was seeking.
Your article connected all the right dots and I think I get it now. Gain is what was throwing me. I could not understand where/how the gain was being applied. Thanks again! Very informative! My mission now will be to try determining my camera’s native sensitivity.