RAW photo files contain a lot of data that can be optimized through photo editing. With powerful RAW processing tools you can easily transform a boring RAW file into a vibrant and detailed photograph, ready for whatever stylistic enhancements you would like to add.
Luminar 2018 has been significantly improved over previous versions, particularly for those who shoot in RAW. RAW handling is faster and has been improved to reveal more details in the shadows and highlights, display color more accurately, and reduce noise.
One of most powerful new filters added in Luminar 2018 is RAW Develop. This tool allows the user adjust tone, perform lens corrections, and transform to correct perspective issues.
The RAW Develop Filter
Once you’ve opened your RAW file in Luminar, navigate to the Add Filter Button and click on RAW Develop in the ESSENTIAL category.
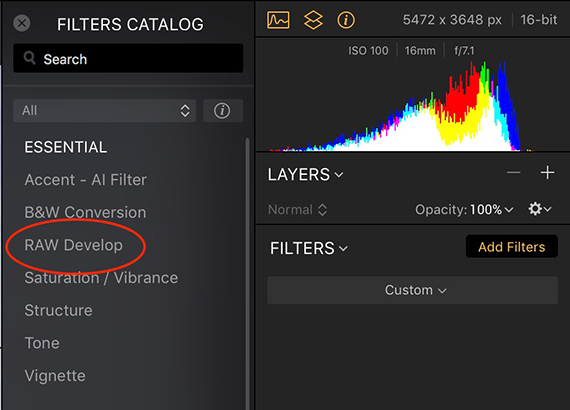
The RAW Develop Filter has three powerful tools: Adjust, Lens, and Transform. The intuitive layout suggests the order in which to make your adjustments:
- Adjust white balance, exposure, and contrast
- Fix lens distortion, chromatic aberrations, and vignette
- Transform to correct perspective
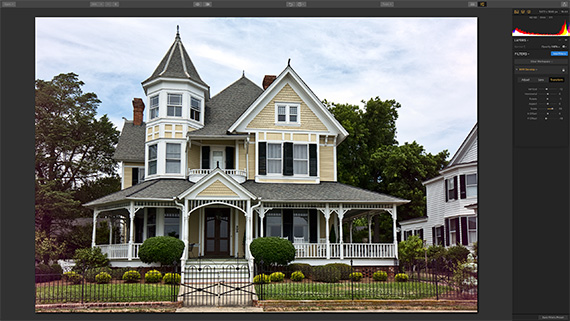
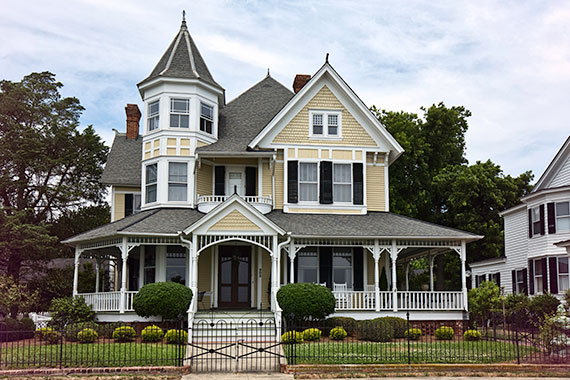
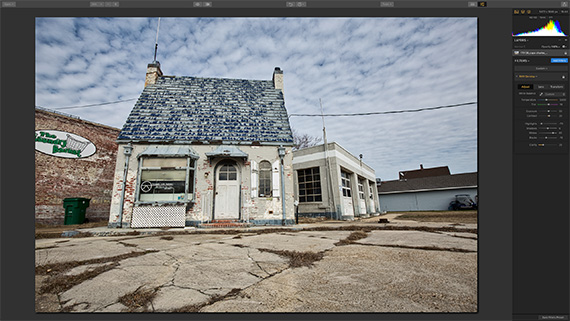
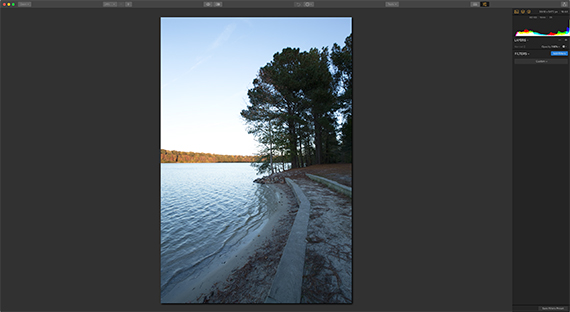
Example 1
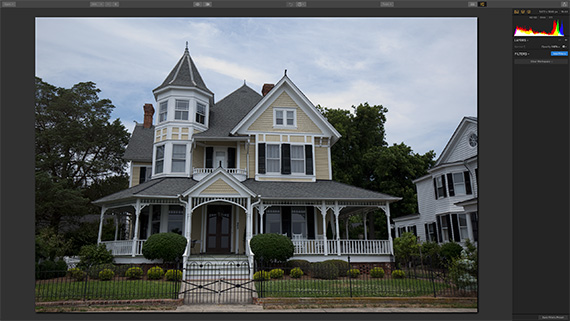
Unedited RAW
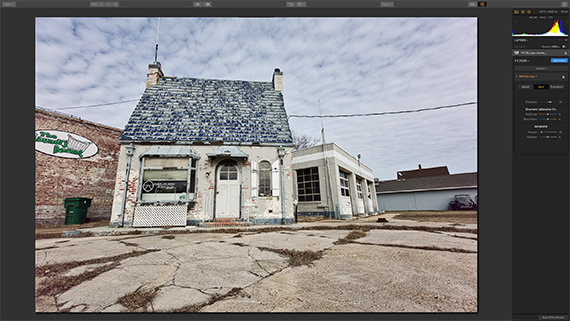
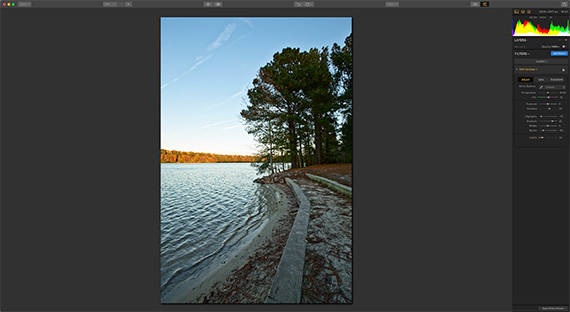
Adjust
Step 1 – Adjust white balance, exposure levels, and contrast.
Quick Tip: Toggle the J key on the keyboard to show highlight and shadow clipping in your photograph.
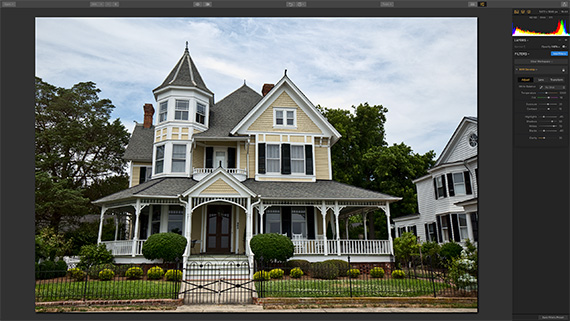
Adjust
Notice that the colors become more vibrant and the contrast more pronounced. There is also more detail in the highlight and shadow areas.
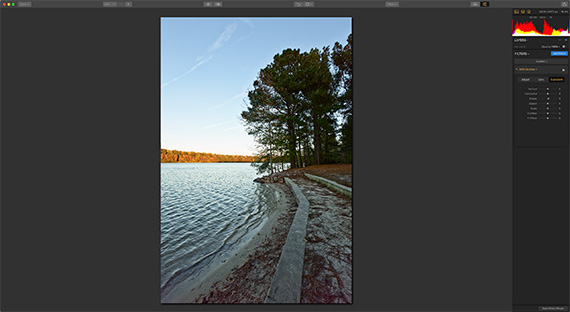
Lens
Step 2 – Fix lens distortion, chromatic aberrations, and lens vignette.
Lens
The small amount of lens distortion and edge vignetting are easily fixed with the lens correction tools.
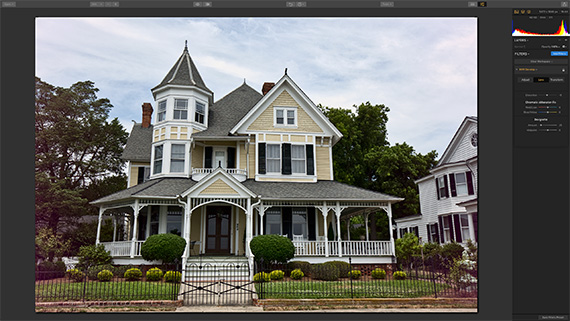
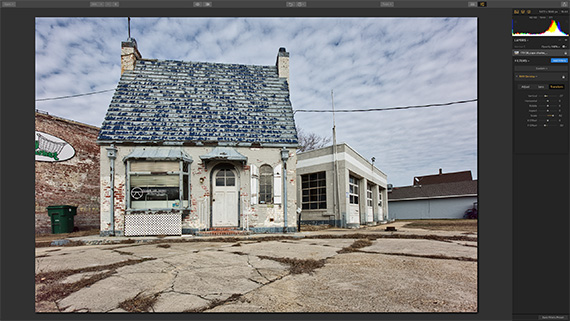
Transform
Step 3 – Transform to correct perspective.
Transform
The transform tool makes it simple to correct for the slight upward angle at which the photo was captured by visually straightening the vertical and horizontal lines of the house.
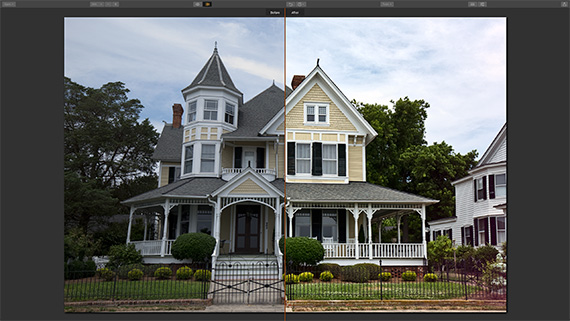
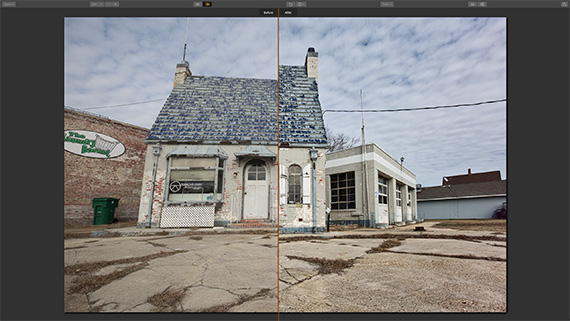
Minor changes to correct white balance and tone and addressing lens defects and perspective issues altered the photograph from dull and lifeless snapshot into a detailed and vibrant photograph, ready for further stylistic processing (if desired).
Example 2
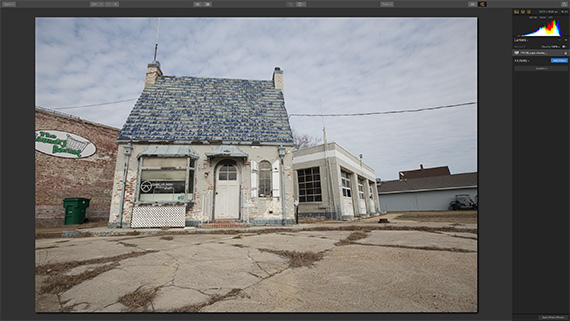
Unedited RAW
Adjust
Step 1 – Adjust white balance, exposure levels, and contrast.
Adjust
White balance and tonal adjustments to this abandoned building brought out the details in the concrete, structure and clouds.
Lens
Step 2 – Fix lens distortion, chromatic aberrations, and vignette.
Lens
The Lens correction tool quickly fixed the lens distortion and edge vignetting.
Transform
Step 3 – Transform to correct perspective.
Transform
The transform tool made quick work of correcting for the upward angle at which the photo was captured.
Adjusting the white balance and tone, addressing lens defects, and perspective issues made the details of this abandoned building stand out.
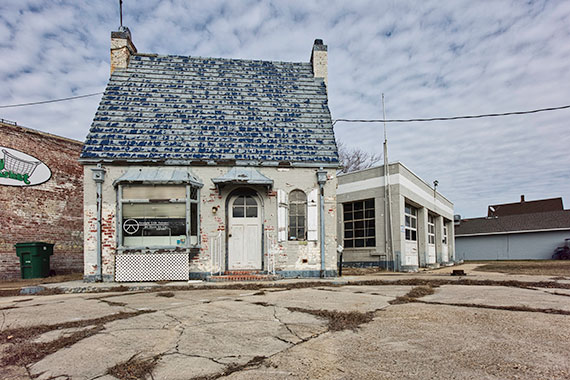
Example 3
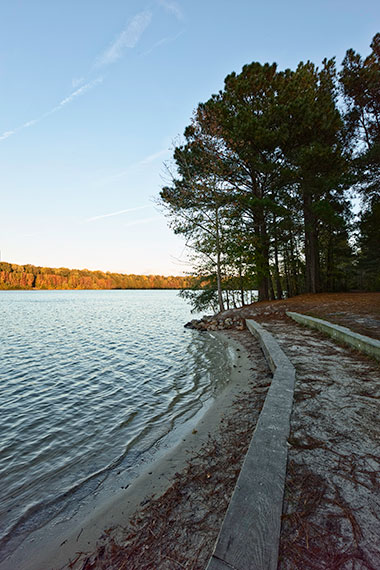
Unedited RAW
Adjust
Step 1 – Adjust white balance, exposure levels, and contrast.
Adjust
White balance adjustments enhance the fall colors in the background while tonal adjustments darken the blue of the sky and reveal detail in the foreground and trees.
Lens
Step 2 – Fix lens distortion, chromatic aberrations, and vignette.

Lens
There was minimal lens distortion in the image which was easily corrected with the lens correction tool.
Transform
Step 3 – Transform to correct perspective.
Transform
Very little was needed from the transform tool in this instance, just a slight rotation to straighten the horizon.
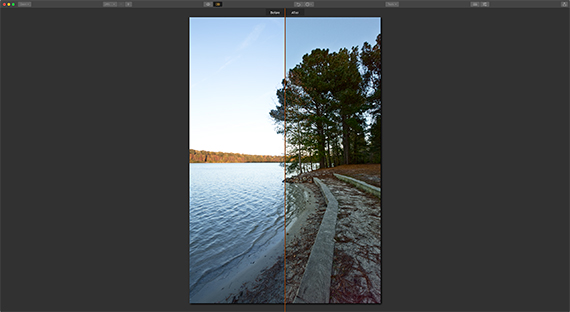
The Tonal adjustment made the biggest difference in this landscape photo by darkening the highlights and opening up the shadows.
Final Image
Each of the examples above show the power of Luminar 2018’s RAW Develop Filter. A RAW file contains a plethora of information, but it takes a skilled photographer and a capable RAW processor like Luminar 2018, to turn those files into beautiful photographs.
About the Author
Angela Andrieux is a photographer, blogger, and photography coach living in Chesapeake, VA with her US Navy husband, and their cat, Pumpkin. She will photograph just about anything but her love of travel tops it all. Angela also enjoys helping other photographic artists find their creative voice. Whether through her blog, group workshops, or one-on-one coaching, her students’ excitement to learn keeps her inspired.
All of the photos above are processed from .CR2 RAW files from a Canon 6D. All photos Copyright © Angela Andrieux.
How to Get the Current Luminar:
The new Luminar 2018 photo editor delivers a breakthrough photo editing experience for photographers on Mac & Windows with new filters, tools, non-destructive editing, major speed boosts, and a digital asset management platform.

New: Luminar 2018 Photo Editor
Luminar 2018 has been updated to offer everything a modern photographer needs for photo editing, including new filters powered by artificial intelligence, major speed improvements, and a dedicated RAW develop module. And, importantly, Luminar now works on both Mac and Windows-based desktop computers.
Found here: Luminar 2018 Photo Editor
Like This Article?
Don't Miss The Next One!
Join over 100,000 photographers of all experience levels who receive our free photography tips and articles to stay current:


Raw develop only shows when you are using a Raw image file
Basic, but still interesting. However, in my Luminar 2018 (Windows) there is no RAW develop filter, just Develop, and there is no pipette for manually choosing WB. Furthermore, the software is very unstable.
Summary: unusable