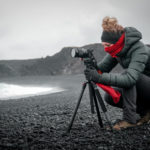
While every photographer would love to capture the perfect image with every shot, it’s just not realistic. Thankfully your vision doesn’t have to end just because the natural lighting didn’t pan out for the day. Using Adobe Lightroom or other photo editing software, you can perfect your images to fit your artistic idea. To help learn how to master your photography, professional photographer Joshua Cripps offers these helpful intelligent raw photo processing tips using Lightroom:
According to Cripps, while you’re in the field your focus shouldn’t necessarily be on trying to get the best looking image; it should be on trying to get the best possible data into your image. Then you can always turn it into a great looking image using Lightroom.
3 Keys to Getting a Good RAW File
- Don’t blow out the image.
- Avoid clipping highlights or shadows.
- Capture the best contrast and saturation possible.
When editing, your process should be a further extension of your artistic vision. Remember, there was a reason you took the photo; something in the photo had to have caught your attention. Your process should be designed around your idea and finding ways to enhance it.
Before starting any editing to your image in Lightroom, do the following:
- Make sure your Camera Calibration is set to Camera Flat or Camera Neutral, instead of using the presets.
- Check Remove Chromatic Aberration under the Lens Correctness tab.

Lightroom work space featuring before and after images of the editing adjustments
Other Helpful Lightroom Tips
- You can use Haze to bring out the details of an image.
- Grain can be smoothed out by going into the Details tab and adding Noise Reduction on the Luminance channel.
- Work with your settings (Exposure, Shadows, Clarity, etc.) to customize your gradient for Graduated Filters (Grad Filters); and make sure to use new Grad Filter for each feature element.
- Use the Adjustment Brush to build texture by increasing contrast and increasing exposure. Plus if you have already have an adjustment dialed in, you can hover over the control point and hold ‘Alt’ or ‘Option’, and it will bring up a left or right arrow. By moving to the right, you can strengthen the adjustment; by moving to the left, you will weaken it.
- To add global contrast, use the Tone Curve. This tool will allow you to target the exact tonal ranges you want to adjust, helping to add that extra punch and contrast you’re looking for.
- Add a Vignette using the Effects tab. This creates a nice dark ring around the edges of your image, helping to pull your viewer’s eye to the center of the image.
What other tips do you have for processing files in Lightroom?
Like This Article?
Don't Miss The Next One!
Join over 100,000 photographers of all experience levels who receive our free photography tips and articles to stay current:


Leave a Reply