Every couple is unique. Unfortunately, that doesn’t always translate to them being skilled at naturally interacting between themselves and relaxed posing during the engagement session.
If you regularly shoot engagement sessions you likely look forward to sessions with attractive couples that pose so naturally you wonder if they work as models in their spare time.
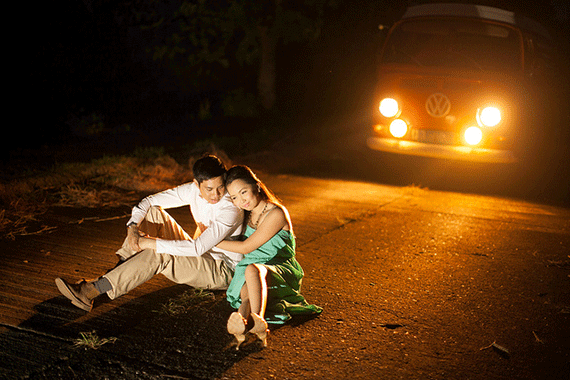
Photo by -=shutterbug=-; ISO 1250, f/1.2, 1/80-second exposure.
But then reality sets in. As you gently guide and pose your next couple they willingly and cooperatively follow every instruction and direction — but end up looking unbelievably uncomfortable and tremendously tense!
What is the Key?
Unfortunately, there is no magic bullet! I all it took was a squeaky toy everyone would already be using it. There is not a “one size fits all” pose that every couple will perfectly fall into position with.
However, there are some tips you can keep in mind as you approach your next engagement session.
Professional Thoughts
Engagement photos from a professional can be very expensive. Many of the top pros charge a session fee in addition to very expensive reprint rates (I’ve seen some photographers that charge $50 or more for an 8×10).
I don’t blame the photographers: most of them are good enough to charge such rates. And I know, from having shot engagement sessions before that the sessions can take quite a bit of time. For me, an average session would take about 6 hours of total time (initial contacts/communications with the couple, driving to the photo site, taking the photos, downloading/processing the raw images, and then processing the couple’s order).

Photo by JN Photographer.
A money-saving tip: some professionals offer the engagement photos as a part of their wedding package. If your wedding photographer offers such a service – take advantage of it! Even if you don’t order a lot of reprints it will give you and your fiancée an excellent opportunity to see how well you interact with your photographer.
If you can’t afford (or don’t want to spend the money on) a professional photographer: don’t throw out the idea of engagement photos!!
Friend Alternatives
Find a friend that owns a DSLR and a zoom lens. The DSLR cameras are the digital cameras with interchangeable lenses. Such camera prices are falling (often one can be purchased for about $700) and their popularity is increasing.
See if your friend has a good zoom lens. Such a zoom lens will often go from 100mm out to about 200mm or even 300mm. If your friend doesn’t have such a lens perhaps they could be talked into buying one. I’ve seen a consumer-version Nikon (and Canon) 75mm-300mm zoom lens for about $100!
While you probably won’t get photos that are good as professional, you can get very nice photos from such a setup. And I’m going to give you two huge bits of advice that will make a world of difference in those results.
Tip #1 – The Zoom
If you want a nice, blurred, background in your engagement photos, you’ll need to have them taken with a zoom lens. Using a 200mm zoom lens will beautifully blur out the background behind you. And don’t stand too close to your background: I’d recommend being at least 15-20 feet away from any background. If your friend knows what the camera’s aperture is (the f-stop), have them set it to be as wide open as possible (the lowest Aperture number available – perhaps F4.5 or even F2.8).

Photo by allie mullin; ISO 320, f/3.5, 1/250-second exposure.
Tip #2 – Evening Shade
Don’t go out on a bright sunny day at noon and expect to get beautiful photos! While you may stumble upon some good photos, it is actually harder to take nice images in the bright sun due to the harsh lighting, dark shadows, and squinty eyes.
I recommend you take your engagement photos on a sunny day – but start the photo session about an hour before sunset. Try to find a park that has beautiful green grass and trees. I generally try to find areas that have a large amount of shade. At that time of the evening a hill will often provide a large area of gently-lit shade.
You will be amazed at the quality of light that is available at such a time!
To be honest, as a working professional who has shot a number of engagements, the vast majority of my images are taken in that exact lighting with ZERO modifications (no reflectors, strobes, etc.).
Are You Serious?
If you are — don’t be! When you go out to have your engagement photos taken by a friend, you need to have a good time. Focus solely on your fiancé and your love for them. Enjoy spending time with them! Too many people focus on the camera and get nervous and uptight: and it shows in the photos.
Hopefully your fiancé is the only person in the world that can help you forget about everything else – which would include the camera…

Photo by raymondsy; ISO 125, f/3.2, 1/100-second exposure.
Do Your Homework
Planning for an engagement session will usually improve the quality of the results. Here are a few steps I would suggest you take as you begin planning:
Run Google searches for “engagement photography” and “engagement photos.” Look for images that you think you and fiancé could imitate. Print off about 20 of your favorite images. Go over them with your fiancé and narrow the list down to the ones that both of you really like and think will be possible. Then, show those to your friend who will be taking your pictures. Whittle the samples down even further based upon their thoughts and feedback. Try to end up with 5 or 10 sample images that everyone is excited about.
Look closely at those sample photos to see what types of location are being used and what the lighting looks like. A lot of engagement photos are taken in either a park or city location. I would suggest driving around and scouting possible photo locations for the session. But don’t just do a “drive-by scouting”! Get out of your car with your camera and take actual photos inside each park of the locations you think would work best. Compare your snapshots with the sample photos you printed off.
You can also do internet research by looking at the web sites of local wedding photographers. While your previous search for engagement photography would have returned nation-wide results, the goal of this research is to see where the local wedding pros are shooting their engagement sessions. You’ll likely recognize some of the parks and buildings that they are working in and near.
Lots of Photos
Hopefully your friend will be using a digital camera. That way they can take lots of images without worry about film expense. Sometimes the difference between an average photo and a great photo is simply changing the angle and perspective of the camera!
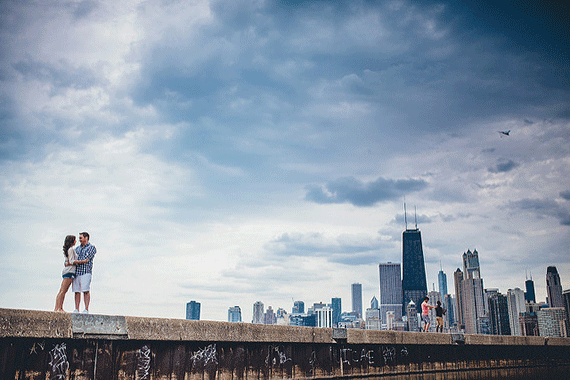
Photo by Christopher; ISO 64, f/1.4, 1/8000-second exposure.
This point was really driven home to me with some recent engagement photo sessions I have done. I am in the process of creating an eBook to help couples take top-notch engagement photos. I had another photographer help me out with several engagement sessions. Together, we shot about 600 photos during each two-hour engagement session. During the session, I would often setup and take photos of the couple. While I was doing so my assistant would be moving around and photographing the same scene at different angles. Afterwards, I would look at the photos I took and also some of the side-angles my assistant shot at those same times–and there is often a night and day difference between the two. The couple didn’t move or change their pose; the only difference was the angle at which the image was taken!
So, once you have found a good location for your photo session and you and your fiancé are in position — let your photographer snap away! Don’t limit the shots they’re taking!
Have the Proper Mindset
This seems basic, but the realization that some couples will be easier to work with and some harder is a good first step. Models are usually paid for their time and services. Since you aren’t paying the couple for their time: don’t expect too much of them! Just be grateful for the “natural posers” when they show up!
First Impressions DO Count
When you greet the couple, do it with a friendly smile and by warmly shaking each of their hands. Be genuinely happy to see them. If you demonstrate nervousness or awkwardness as you get to know the couple, they will immediately pick up on it — even if it is subconsciously — and it will increase THEIR nervousness during the photo shoot.
Social Skills 101
Forgive me if this is too basic. Chances are you already do this. But, just in case, I feel a need to make sure the base is covered: make sure you carry on a pleasant conversation with the couple from the very beginning throughout the whole photo session. Their tension will increase if the only time you talk to them is to give them terse instructions “Move slightly to the side – now tilt your heads together – more – more – no – too far!” Most couples love to talk, and their favorite subject will likely be themselves.
You shouldn’t have to pretend to be interested in them! I really enjoy finding out details about the couples I photograph. Details such as: how they met, when the proposal took place, when the wedding is scheduled, how the wedding plans are coming along, etc. etc.
Warm Ups
Plan the first part of your photo session with the idea of relaxing the couple. Don’t try for your best shots during the first 15 or 20 minutes. If the only thing you achieve during that time is to completely put the couple at ease with you, the camera, and each other (the last one should be easy) — you will get much better photos during the remainder (majority) of your session.
During that first segment I would recommend using easy, basic, simple poses. Keep talking and interacting with them. Let them know it is OK to forget about the camera. Try not to give them too many specific directions and instructions. Encourage them to be themselves – even if the resulting photos aren’t that great! Once they are at ease you can gently give more instructions. The first goal has to be putting them at ease!
Unexpected Photos
This method doesn’t work with every couple because it totally depends upon how naturally they interact with each other when they aren’t expecting you to be taking their pictures. Some couples will chat while aimlessly starring off into the distances – others will have an animated and happy conversation while looking into each other’s eyes and occasionally laughing (those are the moments you’re trying to capture!).
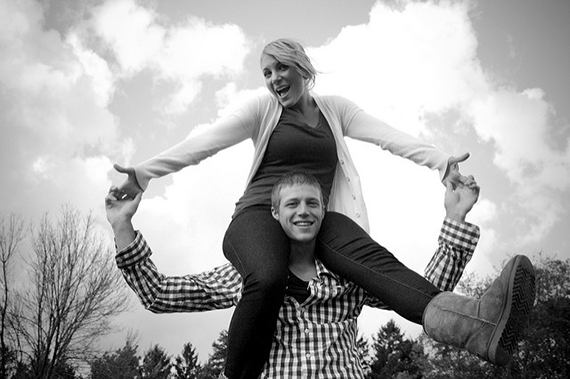
Photo by Wesley McCullough; ISO 800, f/8.0, 1/1250-second exposure.
The goal: Taking a few photos when the couple is relaxed and not expecting you to be taking their picture.
The method: For me, the best timing is usually when I need to change memory cards. I’ll let the couple know that I need to change cards and they can relax for a few minutes. I then rummage around in my bag for the new card, all the while watching them out of the corner of my eye.
The challenge: Taking the photos without standing at the camera and pressing the button. Sometimes a wireless shutter release can be used. Other times I’ll have an assistant with me and will have them take a few of these shots while I’m rummaging in the camera bag. Occasionally the couple so completely forgets about the camera and me that I can actually go back to the camera and hit the shutter release without them noticing!
Hopefully, these tips, combined with your personality and experience, will help you put couples at ease (while still giving you the freedom to offer natural posing suggestions) so you get take some incredible engagement photos!
DON’T Lose Images
If you are not careful with your digital work-flow you can easily end up losing images. This is NOT an option for a professional photographer. The good news with engagement sessions is that if you happened to (somehow) lose a number of the images from an engagement session — you can (likely) redo the session! Weddings, on the other hand, are practically impossible to redo.
If you should happen to encounter data corruption while photographing the couple, or while downloading the images — do not panic! If it occurs in-camera, take the card out and move on to another card. I have had this happen several times over the years and have only lost the 1 corrupt image and however many images were in the buffer at the time I had to switch to a new memory card.
The more common corruption has occurred when I am downloading the images to my computer. There are a number of software tools you can run on the memory card to restore the images. I don’t have room in this article to write in-depth about recovering lose/corrupted/deleted images, but I would recommend you purchase “Photo Rescue” version 3 (a Google search will find the software). I held off on buying the software until I had a need, and when I had a need (an entire memory card from a family photo session that had become corrupted during the download process), the $29 price was well worth it! Since buying the software I have used it a number of times to recover deleted or corrupted files from a memory card.

Photo by Paris on Ponce & Le Maison Rougel.
Safeguard the Images
The first thing I do when I get back from a photo session is download all of the images to my computer.
I then do some basic checking to make sure there are no images missing from the session. I will check the file number of the first image and last image from the session — subtracting the two to find out how many images were shot. Then I will check the actual files on my computer to make sure it matches.
Such a double-check would catch any images missing from the middle of the session, but you’ll notice it wouldn’t detect images that were missing from the very beginning or end of a session.
That is why I will also sort the images by “date” or even file number and scroll through the time stamps to make sure all of the time that I was shooting images resulted in actual files.
Once the “checking” process is done I will burn all of the images to DVD. Actually, I create two copies of the files on DVD’s. One DVD is stored on-site and the other DVD is stored at an off-site location. I also have an Excel file that functions like a database: I enter basic information about the photo session into Excel and assign a number to the DVD so it can found (easily) later on.
Removing “Secondary Photos”
After ensuring the raw image are safely backed up I will start into my post-production process. The first step involves removing bad photos. I used to call them rejects. Now I simply call them “Secondaries”.
I create a folder called “Secondaries” and I move any photos that have problems to that folder. Any images that are embarrassing to the couple (catching an odd look, or a blink, etc.) or have mistakes that I made (motion blur, out-of-focus, blown highlights, bad compositions, etc.) end up in the “Secondary” folder.
I want to keep as many photos for the couple as possible, so I try not to eliminate too many shots. Although, I remember one engagement session where I took more than 1,300 photos. For that session I very freely moved images “Secondary” folder!
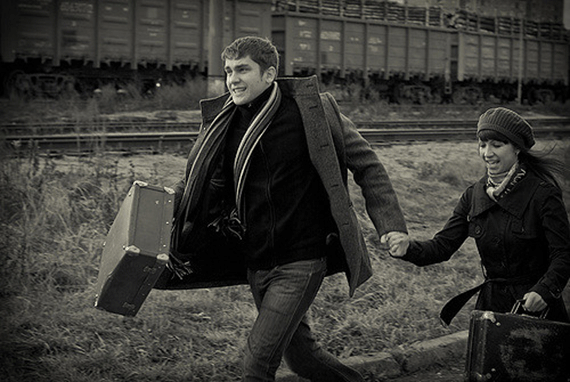
Photo by Konstantin Lazorkin; ISO 100, f/4.0, 1/200-second exposure.
If the photo session resulted in a smaller selection of images or if the “pose” in question only had a few shots, I’ll try to leave as many from that session or “pose” as possible.
The Renumbering Decision
Let’s say your photo session started with 250 images. 50 of them moved to the “secondary” folder. You’re left with 200 photos. There are gaps in your photographic file numbers.
Some couples will not notice or care about the gaps. Your photo numbers are probably not going to be 001-250 (with 50 missing). They are more likely going to something like 6918- 7168 — and the missing numbers will not very obvious. But it still would be possible for a discerning couple to run the math and figure out that 50 images are missing — or to notice, as they click through the images, that the numbers occasionally “skip”.
You will need to decide whether it is worth the time to renumber your “select” images. I use the freeware RName-It version 3.1 (a Google search will find the software) to renumber my images, but most Image Editing software can also handle the renumbering of images.
I normally do not renumber the images. I don’t think I have ever had a couple ask me for missing images. If they were to do so, I would explain the types of images I remove, and if they were really interested in seeing them I would likely send them over. I have found that if you provide a large amount of top-notch photos, couples don’t seem to worry about the 5%-10% that are not included.
There’s a lot more to my after-photo-session work-flow, but I’ll have to cover that in another article!
About the Author:
Christopher Maxwell is a professional photographer based near Kansas City. He has created a number of practical resources to help beginning photographers Learn Engagement Photography, as well as providing information about Learning Wedding Photography.
Like This Article?
Don't Miss The Next One!
Join over 100,000 photographers of all experience levels who receive our free photography tips and articles to stay current:


Great content shared by you.. really helpful and useful article.
aperture to the max … aperture to the max … bah !
Do your homework at first. For a portrait shoot everything in the frame should support the person(s) so just take very good care of your background if it may reach this goal or change location. Seek for lines and patterns, contrasts, light … Wide aperture just for the sake of it in most cases is the weakest thing to be done. Amateurish.
My 2Ct
I like the look of evening shade shots, like you mentioned. My wife and I had our engagement photos done in the evening in the mountains and they came out great. I’ll have to use the rest of your helpful tips for the rest of my photography shoots as well since they apply to a lot of different scenarios. Thanks for the helpful advice.
Thanks for sharing those thoughts…. I love that silhouette frame with balloons!
A wonderful set of tips and advice for the highest quality photos. Thank you for taking the time to write an in depth and instructional article.
This article is great, he is not speaking only about tehnique, but his workflow is great. I relly learn something about this !
Mihnea (www.mhnpictures.com)
Great article! , Great information for Photographer and clients as well , well done
Good article. Except i would never suggest printing a bunch of photos off and showing them to the photographer — horrible idea. When you do this, you’re try to recreate another photographer’s style. Since it’s a different photographer, different couple, different personalities, you’re going to screw up the photo and not get anything natural. Instead of the photographer trying to ‘make’ a photo, you should be letting the people make the photo. It’s about the couple, the way they specifically interact, and the style of photography from the photographer they chose.
Too many times do I get asked, “can you do something like this?!” Just because they see a cool photo and want their photo to be just as cool. Stay original, capture a moment that is actually there — do not try to create the emotion. When you try to create it, that’s when people get nervous because they’re trying to be someone else.
Great ideas and info. I much prefer engagement to wedding work – it allows much more freedom.
This is an excellent article, not only useful and insightful, but discusses the topic from both sides (photographer/client) as well :D
Dave (www.davidleetong.com)
Great article, interesting to read and full of brilliant tips. Thanks.
But… zoom has nothing to do with blurred background… it’s all about the aperture… or the fstop.