Photographing inanimate objects is easier than photographing people, right? In reality, that’s not always the case; there are a lot of steps involved. Photographer Chrissie White with COOPH presents this tutorial on still life photography in which she explains her creative process:
Finding Props
For the purpose of this video, White looks for objects in COOPH’s old storeroom. If you happen to have a collection, look for objects that work well together, have an interesting texture, and great colors. White ends up finding a crystal ball, marbles, a mirror, and some gravel. With these objects, she plans to work on an outer space scene.
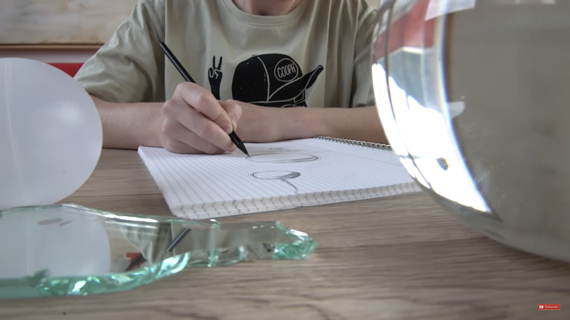
Draw the Scene First
After choosing props, White suggests that you sketch out the scene before doing anything else. This will help you figure out how the objects will look in relation to each other to tell a story.
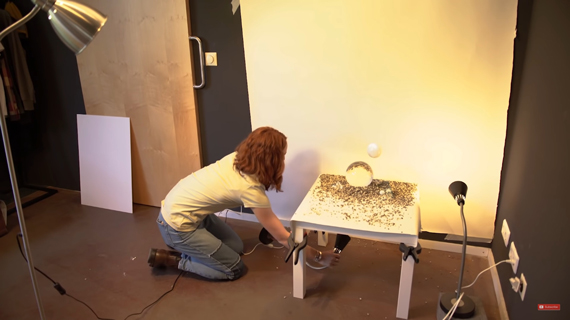
Set Up a DIY Studio
If you already have a studio to work with, that’s great. But for those of us on a tighter budget, you can easily set up a DIY studio. Get some white chart paper and tape it to the wall. Next, put a table in front of the wall and cover it with another piece of white paper.
Setting Up the Composition
White suggests that you set up the scene by placing the largest object on the table first. Then, you can place all the smaller objects around it. White spreads the gravel on the table first and then places the large crystal ball on it. Using the crystal ball as a reference, she then places the smaller marbles around it.
The fun side to still life photography is that the photographer has complete control over the scene and can manipulate it as required. So, be sure to constantly monitor how your images are coming out and set the scene up as you go. Once you find a composition that you feel works the best, the next step is to set up the lights.
Light With Lamps
To work with still life, it’s not necessary that you have high-end lighting equipment. White demonstrates how you can use simple lamps. To light up the scene, she uses one lamp as a fill light to fill in any shadows. She then uses another lamp as a backlight to create a separation between the orb and the background. It also creates an illuminating effect on the orb. Finally, she uses a third lamp to fill in unwanted shadows.
Check the White Balance
Lamps give out light that has a warm temperature. To neutralize the warm look, White uses the tungsten white balance setting. If you shoot in RAW, you can conveniently change white balance during post-processing.
Editing Still Life Images
To make the image stand out, White does some post-processing using Lightroom. You can do the same using Adobe Camera RAW.
- Crop and straighten the image.
- Adjust the exposure using the exposure slider.
- Use a local adjustment tool like the brush tool to adjust exposure in selected areas of the image. Make sure that the local adjustments match the overall tone of the image.
- Adjust the saturation of selected colors using the saturation tab of the Hue Saturation Luminance panel.
- Add some clarity to make the image pop.
Once done with the basic adjustments, White opens the image in Photoshop for some minor tweaks in the details. She uses the patch tool to remove fingerprints and the fishing line she used to suspend the marble.
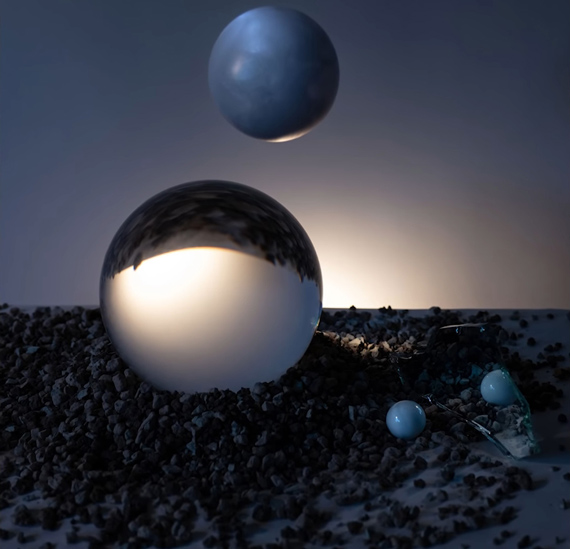
Final Image
“When you’re working with still life, it’s all about the tiny details.”
So what are you waiting for? Have a look around your home for some interesting objects and put your creative mind to work.
Like This Article?
Don't Miss The Next One!
Join over 100,000 photographers of all experience levels who receive our free photography tips and articles to stay current:


I loved the images used in this post. Your explanation is simply superb covering all the details.
Thanks,