Depth of field (DOF for short) is usually associated with the aperture, which is often used interchangeably with the word f-stop. The aperture controls the amount of light that passes through the lens and onto the film–or in the digital world, onto the sensor inside the camera. This amount of light is determined by the size of the lens opening (the aperture) inside the lens. On the older, traditional 35mm cameras, the settings on the outside of the lens that controlled this function were called f-stops. That’s why even though, technically, they are two different things, many writers use the words aperture and f-stop as if they were one and the same. It’s like calling the door knob a door. You do use one thing to affect the other, but they are NOT one and the same.
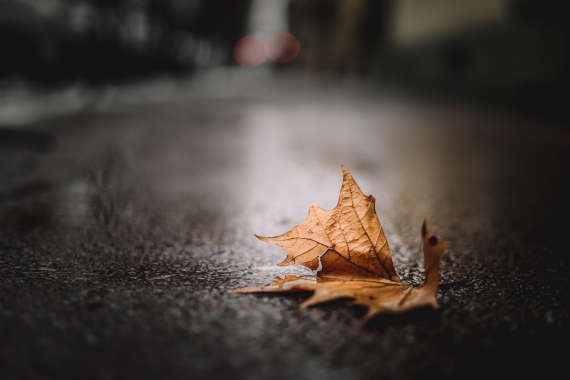
Photo by Tommaso Pecchioli/Unsplash
The greater amount of light the aperture allows in, the narrower the depth of field is, and visa versa. The less amount of light the aperture allows inside, the wider the depth of field. Many beginning students get confused by this. Since the f-stop is what controls this light, the easiest way to remember it is:
Small number = small f-stop (f/1.8) = small amount of picture in focus
Large number = large f-stop (f/32) = large amount of picture in focus
Shutter Speed
The shutter also affects this same light. Whereas the aperture controls how much, the shutter controls how long. If the shot is exposed for too long, the photograph appears washed out. If the shot is exposed for too short a time, the photograph appears too dark. This is commonly referred to as over exposure and under exposure. The shutter speed (how long things are exposed) can be used to freeze things in midair (with a fast speed), or it can be used to intentionally blur something like water (with a slow speed).
As a general rule, if you want to freeze something, you want a shutter speed of 1/500 of a second or faster. If you want to blur something (on purpose), you would use a slow shutter speed like 1/30 of a second or longer. Just remember that, generally, you only want part of the picture as a blur, so when you do use slower speeds, also use a tripod.
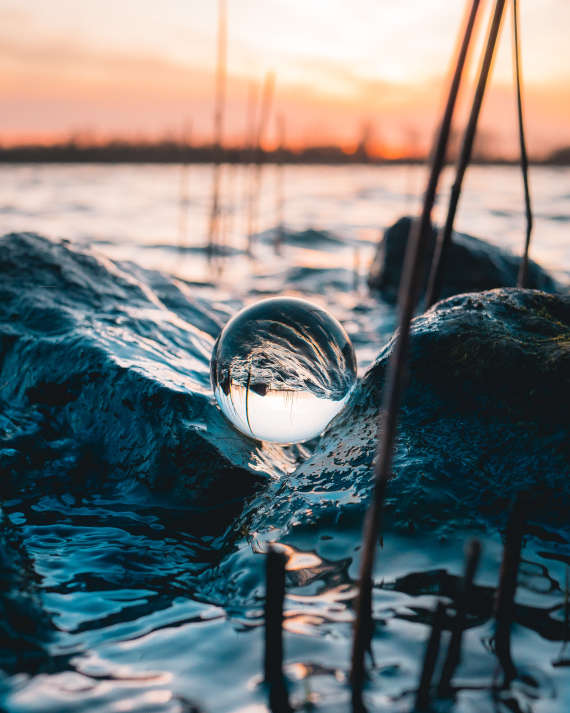
Photo by Tim Huyghe/Unsplash
Focal Plane
Wherever you focus your lens within a given image, there will be an area that is in focus and other areas that are out of focus. The area that is in focus is referred to as the focal plane. The important thing to remember is that 1/3 of this focal plane is in front of whatever you focused on, and 2/3 of the focal plane is behind whatever you focused on. By deliberately focusing 1/3 of the way into your landscape shot and using a high number f-stop (like f/16 or f/22) you capture the greatest amount of the photograph in sharp focus.
Hyperfocal Distance
Some people have the mistaken idea that if you just set your focus to infinity that it would do the same thing. The infinity setting that looks like an 8 turned on its side will give you an indication that says anything from ten feet back will be in focus. So what happens if you want to include something that is less than 10 feet away? That’s where the hyperfocal distance comes into play. When you use the hyperfocal distance, you focus on something that is half of what the front infinity setting indicates. In this case, that would be five feet. Since we know that 1/3 of the area in front of your picture will be in focus, it gives the illusion that every part of your picture is in equal focus. Whether you use the 1/3 in rule or set the hyperfocal distance, they both give you a greater sense of a large depth of field, which is good for both landscapes and scenic shots.
Exposure Value
If you always trust your camera meter and use what it tells you, you are using what we refer to as a standard exposure value. Exposure values are those numbers that refer to the combinations of f-stops and shutter speeds that can give you an accurate exposure under a given light situation. Keep in mind that meters do not see in color. In order to make up for this the meter will average your scene and give you a reading for 18% grey. All meters do this; it’s not their fault. That’s how they were designed. But what happens if you actually want a white wedding dress to look white? Or what happens if you want that great black stallion to actually look black?

Photo by Inspirationfeed/Unsplash
Bracketing
Just as many pictures look better after you take them into Photoshop and increase or decrease the brightness or contrast settings, many images actually look much better if they are exposed slightly more or less than what the meter suggests. This process of shooting above, directly at, and below what the meter indicates is referred to as bracketing. If you are in an especially difficult lighting situation or a location that is in and of itself very hard to get to . . . use bracketing. If your camera batteries are getting low, use bracketing. In short, if you have any doubts in your mind at all, use bracketing.
Most photo books strongly cover the subjects of f-stops and shutter speed. These are important, but there are other subjects, that many of them just skim over. Understanding the focal plane, hyperfocal distance, exposure values, and bracketing will all greatly increase the tools you can use to make a better image.
About the Author:
Award winning writer / photographer Tedric Garrison has 30 years experience in photography (better-photo-tips.blogspot.com). As a Graphic Art Major, he has a unique perspective. His photo eBook “Your Creative Edge” proves creativity can be taught. Today, he shares his wealth of knowledge with the world through his website.
Like This Article?
Don't Miss The Next One!
Join over 100,000 photographers of all experience levels who receive our free photography tips and articles to stay current:


From article above:
“Small number = small f-stop (f/1.8) = small amount of picture in focus
Large number = large f-stop (f/32) = large amount of picture in focus”
Oh so wrong!
Aperture is measured as a fraction (iris diameter/focal length), so f/1.8 = 1/1.8 ratio & f/32 = 1/32 ratio.
Therefore, f/1.8 is a LARGE aperture, and f/32 is a SMALL aperture.
Every so often the engineer in me gets really upset by analogies used to explain things that well are wrong. Worse yet I think that a real explanation might make something that seems strange and complex simple to most. An f stop and the aperture are terribly related and are not two different entities used together like a door and knob. The aperture is the opening provided by a diaphragm behind or in between elements of a lens which determines the effective diameter of the opening and therefore how much light is passed. The size of the opening is measured using a number known as an f stop. The f stop can be determined on a simple lens by dividing the focal length of the lens by the diameter of the aperture opening. For example if we have a 50 mm focal length lens with a 25 mm aperture opening the f stop would equal 50/25 or f2. If we close the aperture down to 12.5 mm then the opening would be f4. Because the amount of light a lens passes is proportional to the area of the opening and not the diameter we find that reducing the aperture diameter by a factor of 2 reduces the amount of light passed by a factor of 4. (yes F4 is two stops less than f2 and lets 1/4 the light pass.) If you think back to your days in middle school the area of a circle is given by Pi times the radius squared. The amount of light passed is proportional to the square of the (diameter/2).