Lens flare is a double-edged sword. If you use it correctly you get a fantastic looking shot. But when used improperly, it can be an eyesore. It’s important to have good control over this optical feature. Photographer Mark Wallace from Adorama explains how you can use lens flare to create an atmospheric effect:
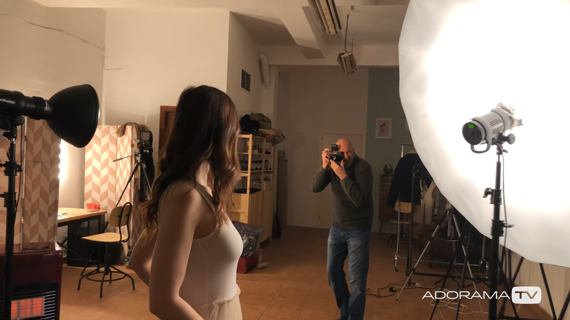
Wallace sets up a light with a Magnum reflector pointing toward the camera. This creates a big wash of light on the lens causing the final image to look faded. Normally, you’d get rid of this by using a lens hood, but Wallace demonstrates how you can use this flaw as a feature.
Without using any other light, the flare acts as a layer of effect in front of the model. Wallace’s objective is to use that extra layer creatively in post-production.
To make the model show up better in the final image, Wallace sets up a large Profoto deep-white umbrella with diffusion in front of her. This adds a nice soft light on the model.
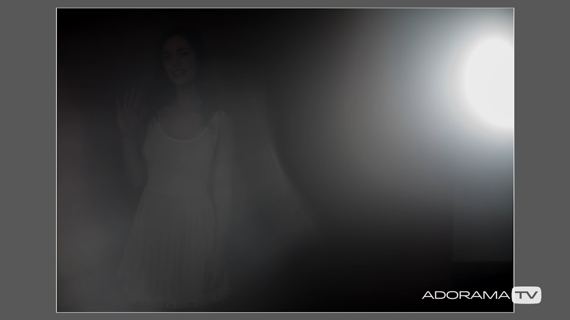
With this setup, Wallace shoots a couple of images and then moves on to post-processing using Lightroom, Photoshop, and Nik software collection. Here’s the image before any post-processing:
Unedited
Post-Production Process
The way you retouch your photo is a matter of taste. For demonstration purposes, Wallace starts off with Lightroom where he makes the following adjustments:
- He sets the tonality of the image by choosing a profile that complements the images and matches the idea that he has for the image.
- He then adds some haze by sliding the Dehaze tool to the left. This gives the image an ethereal look.
- Next, he crops out the unnecessary sections of the image from the sides.

Once happy with the basic adjustments that he made in Lightroom, Wallace opens the image in Photoshop.
Using Photoshop, Wallace adds some motion effect to the model’s dress:
- He creates a duplicate of the background image.
- To add motion blur to the dress, he goes to Filter > Blur > Motion Blur… and selects an angle of -86 degrees. This makes everything in the image blurry.
- Using a layer mask, he leaves the blur just on the dress.
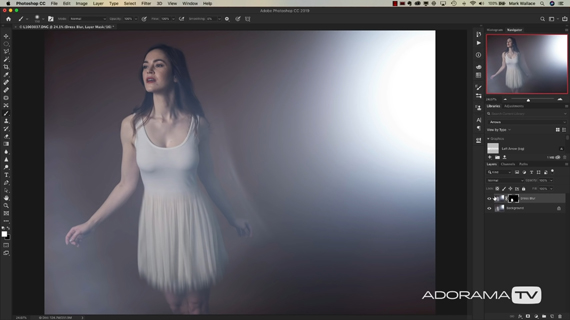
With these steps, Wallace is able to make the dress look like it was moving. To add in some more texture and effects, he uses the Nik Collection plugin:
- By pressing Shift + Option + Command + E (Shift + Alt + Ctrl + E in Windows), he creates a single layer for the background layer and the layer with the blur. He then goes on to work with this single layer.
- Next, by using the Analog Effex Pro 2 filter from the Nik Collection (Filter > Nik Collection > Analog Effex Pro 2), he adds some grain and a film look.
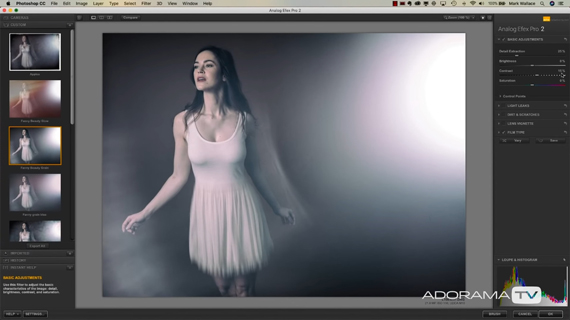
In the final step, Wallace fixes the aspect ratio of the image to 16:9. Here’s how he does it:
- He selects the crop tool and chooses 16:9 aspect ratio with the “Content aware” box checked. With the content aware option checked, Photoshop will attempt to fill in areas in the image that don’t exist.
- He then stretches the crop tool to include the model. This leaves some empty space on the left and the right for the content aware tool to fill up automatically.
- Since the content aware tool had some difficulty at the corners of the image, he touches it up manually using the clone tool and the patch tool.
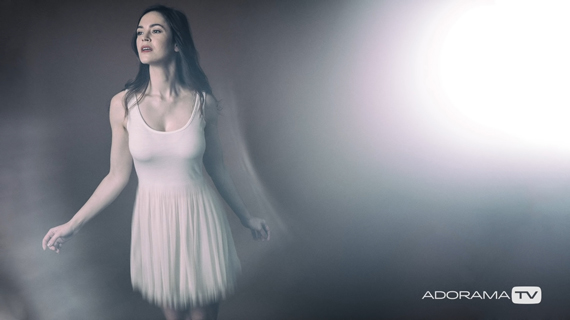
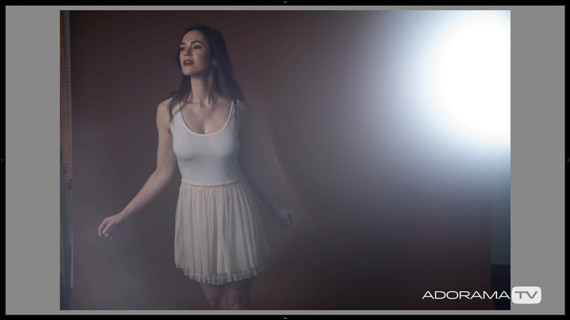
With some post-production, Wallace has given an ethereal feel to an image that previously looked washed out because of the flare. This is a beautiful example of how you can make the most out of challenging lighting situations.
Like This Article?
Don't Miss The Next One!
Join over 100,000 photographers of all experience levels who receive our free photography tips and articles to stay current:


It seems a lot of effort to create a poor quality photograph.