On your next trip, wouldn’t you like your digital photos to look just like the scenes did with your eyes?
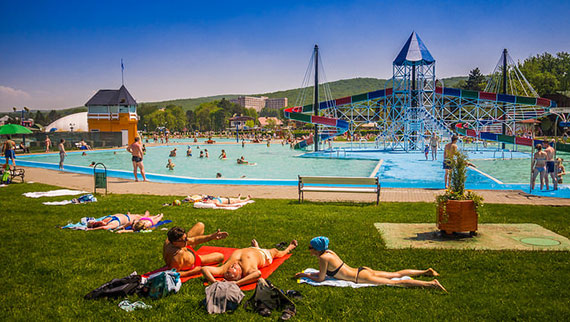
Photo by Vasile Hurghis; ISO 100, f/3.6, 1/2500-second exposure.
The good news is they can! There are several things you can do to improve your vacation photos. Even with today’s auto-everything cameras, you must still control the camera to get perfect photos.
Most problems with photos can be tied back to three things:
- poor color
- over or under exposure
- blurriness
Color
One technical flaw seen quite often is images with either washed-out color or a color cast to them. There are a couple of things you can do to control both.
First, if your subject is outdoors, such as a landscape, use a polarizer filter. It will “punch” up colors, darken the blue sky, remove reflections, and lighten haze—all things that will improve your photos.
If you are experiencing a color cast, then you need to match your camera’s white balance setting to the ambient light color. Many times the Automatic White Balance (AWB) setting on your camera will render colors accurately, but during those times when it doesn’t, know how to change your white balance.
Exposure
Your camera strives to make the perfect exposure, but it does so thinking everything is middle-tone or 18% gray—which everything isn’t. When faced with an overly bright scene, such as white snow or a white sand beach on a sunny day, your camera will over compensate and your whites will be a light gray. To correct this, you have to add exposure. You can do this by either slowing down the shutter speed one stop or using the next smaller number f-stop. Both will add the same amount of light.
For extremely dark subjects, such as the black coat of a dog, your black color will be more of a dark gray. In this case, you have to take light out to make the black color look black. To do this, either adjust your shutter speed to one stop faster or change your f-stop to the next larger number. Either will take out the same amount of light, thereby darkening your black color.
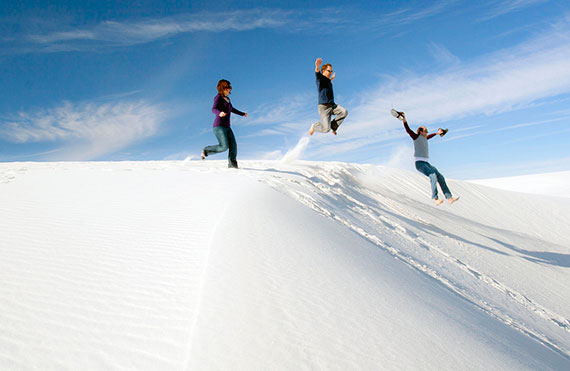
Photo by Scott; ISO 100, f/10.0, 1/250-second exposure.
A great tool that most DSLR cameras have for checking exposure is a histogram. It is nothing more than your exposure shown as a graph, but many photographers do not understand how to use it.
Your aim on the graph is to not “clip” off the falling slope line on the right and left side of the graph. Each slope line at the ends of the graph should meet the left and right bottom corner of the graph at the horizontal line. If either slope is cut off part way up either vertical line, then you have clipping and are losing exposure data. If your clipping is on the left side, then add exposure. If clipping occurs on the right side, remove exposure. Keep adjusting until the clipping is gone.
Blurriness
Blurriness is caused by one of two things: improper focusing or too slow a shutter speed. If the whole scene is blurry, then the culprit was camera shake, meaning you tried to handhold the camera using too slow of a shutter speed. Correct this next time by either mounting your camera on a tripod or shooting at a faster shutter speed.
If your subject is blurry, but there are parts of the scene in focus, then your point of focus was not on your subject. This can easily happen when using the Rule of Thirds. You have your subject off to the side, but your camera takes the point of focus from the middle of your scene.
To remedy this, put your subject in the middle of your viewfinder and press your shutter button half-way down. With your shutter button still halfway down, swing the camera putting your subject back in the proper position. Now press the shutter button all the way to take the picture.

Photo by NGÁO STUDIO; ISO 100, f/2.0, 1/1600-second exposure.
Many DSLRs have multiple focus points. In this case, select the focus point on the side where your subject is located. Move the camera until the focus point is on your subject. Now press the shutter button.
About the Author:
Ron Kness is a digital photography specialist from Sunlight Media. You can find his website at Digital Photography by Ron Kness for more digital photography tips and technique articles.
Like This Article?
Don't Miss The Next One!
Join over 100,000 photographers of all experience levels who receive our free photography tips and articles to stay current:


@Andra: On DSLR you have three ways to control the exposure:
– ISO SPEED – keep a lower value – 100-400 ISO for daylight, 400-800 ISO for cloudy,etc. Over 800 just when you need it and usually it depends on how your camera controls noise at higher ISO speeds.
– APERTURE – lower value – more light passes to the sensor (so you’ll need a faster shutter speed on same ISO), bigger value – less light (slow down shutter speed on same ISO). The aperture gives the possibility to control the depth of field (DOF), usually more visible on larger diameter lenses (DSLR, etc).
– EXPOSURE – how much time the sensor “sees” the image – seconds (1,2,4,8,15,30) or fractions of a second (1/2,1/4,1/8,1/15,1/30,1/60,1/125,1/250,1/500,1/1000,etc.). Higher speeds (smaller exposure value) = less light and lower speeds = more light, if we compare with what happends when adjusting aperture.
If the scene is too bright you need to reduce the light for a correct exposure.
So, if the scene is overly bright you can, in this order:
1. Lower ISO speed.
2. Close the aperture (8-16). If you need shallow DOF leave the aperture open (2-5.6).
3. Set a higher speed for the shutter.
If the scene is too bright you need to r
Short question about the exposure, to make sure I got it right…
When faced with an overly bright scene, you can either slow down the shutter speed one stop (which allows more light to come into the scene) or “using the next smaller number f-stop” – you said. Is this correct? The next smaller number (a negative one) doesn’t darken the scene? Shouldn’t this be the next larger number (a positive value)?
Thank You!