Wedding photographer Ryan Brenizer popularized a method wherein he was able to take very high resolution images of his clients with a very shallow depth of field. The Brenizer method involves taking and stitching multiple frames to get a result with incredible bokeh. It feels as if the image with taken with a lens with an f-stop less than one. In this video, photographer David Bergman with Adorama guides you through the Brenizer method to get a wide-angle image with shallow depth of field:
Using a longer lens at a wide open aperture setting is already a convenient way to blow out the background and draw attention to the subject. Why would you need the Brenizer method? Consider this: you want to shoot wider to show the environment the subject is in while still maintaining focus on the subject. For this, you can back up a little and shoot at a wider aperture or use a fast wide angle prime lens. But both of these methods will have the subject, the foreground, and the background in focus; the subject will not be isolated.
The Brenizer method is the perfect solution. It can give you with a shallow depth of field while still providing a wide angle field of view just like a medium format camera would do. You can follow these steps to take photos with the Brenizer method using your conventional lens wide open:
- Set your focus and exposure to manual to ensure that no settings change throughout the process.
- Lock your focus on the subject and take the first photo with a shallow depth of field.
- Ask the subject to stay as still as possible until you’re done taking photos.
- Move the camera in all directions and take multiple overlapping photos. The aim is to cover a much wider area than you would be able to see from the lens’s perspective.
- Make sure that you are quick while taking shots with the subject in the frame. This is to avoid any movement of the subject that can get problematic while stitching.
- Load all the images to your computer and use a tool like Photoshop’s Photomerge (File > Automate > Photomerge…) to stitch all the photos together.
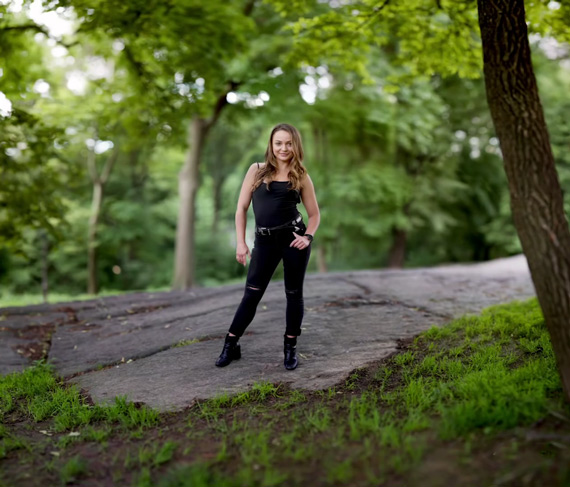
Once done with the process, you will get an image that has a wide angle and medium format look. So what are you waiting for? Head out and give this artistic method a try.
Like This Article?
Don't Miss The Next One!
Join over 100,000 photographers of all experience levels who receive our free photography tips and articles to stay current:


It is not necessary to keep the subject in place after the first picture