Remote TTL flash systems are nice and slick but they are expensive. Each flash can cost hundreds of dollars plus there is the cost of stands, umbrellas or soft boxes and more. But, what if we could achieve something similar without a huge outlay of cash? We can build such a system and it could cost less than a single flash unit of the branded variety.

“Valentine lll” captured by Christiaan Botha using 3 Vivitar 283’s and a Nikon SB28
First I’d like to get us all on the same page about what to expect. There is no free lunch here, but what we will discuss is a viable alternative for many photographers. This system is a blend of old technology and new and will likely involve purchasing some used equipment.
Further, the expensive branded systems have all of their remote flashes set and controlled from the camera position master unit; our on-the-cheap system will require the photographer to alter settings on each flash manually. This system is not TTL; the camera’s meter isn’t used at all to achieve exposure.
Many years ago Automatic Flash was the preferred system of flash exposure. The flash was mounted on the camera and exposure was determined using a scale and calculator on the back of the flash. After using the calculator, settings were made to the camera and flash. A sensor on the front of the flash measured the flash output and quenched it when the proper amount of light had been emitted. It was a simple system and it worked very well for decades.
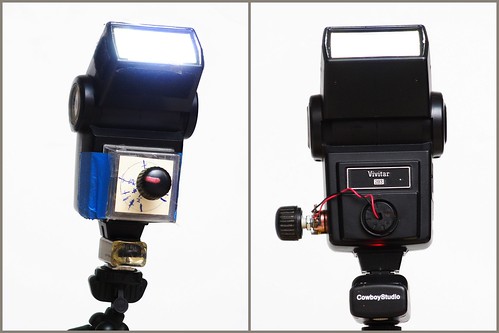
Our flash system is made up of three parts. First, we need three flash units and they must be Automatic Flash-capable. It’s time to get those Vivitar 283 and 285 flashes out of mothballs. They are ideal for this system. If you can’t find yours try buying them off your buddy, they generally bring less than $50 each. Key here is to find flash units with Guide Numbers at or greater than 89 feet at 100ISO.
“photo by Shaun Battick
Next we need a set of flash triggers. For the triggers I like the Promaster 4-Channel Flash Trigger set. Here is the fun part: The expensive branded TTL multi-flash systems only work when they are all in line of sight. However the Promaster 4-Channel trigger is radio frequency operated. Line of sight not required! Our system will need one trigger and three receivers with a total cost of under $100.
Last, we need some stands or tripods to hold the three flash units. Here we have lots of latitude, anything that has a 1/4X 20 threaded post will do. Look for supports that can hold the light anywhere from a foot off the floor to several feet above the subject. If the photographer chooses to use standard light stands they will probably cost about $25 each.
That’s it, for about $300 we now have a three-flash remote lighting setup. All that’s left is learning how to use it!
It will take some practice to develop the skills needed to use this system, but it won’t be terribly hard. Most of the skills will be involved with learning lighting patterns and there are dozens of books on the subject. What concerns us however is discovering the settings we need to use with our new system.
Let’s assume that we have a basic three-light setup: a fill light near camera position, a main light to one side of the subject and a hair light on the other side. The first thing we need to do is determine the setting for our main light. We use the calculator on the back of the flash and find the correct aperture for our camera. We set the flash sensor for this as well. Next we set the camera at the calculator’s f-stop and the shutter speed to 1/90 second. Now we have a good exposure setting for our main light.
Next we take the settings we calculated for our main light and set our fill flash’s sensor to expose one stop less. This is a little counter-intuitive because we are setting the shut off point of the flashes not the exposure point. If the main light is set for f/5.6 our fill light could be set one stop less, f/4.0 for example. We want one stop less light so the fill flash has to turn off faster than the main flash. The third flash, the hair light, we want to have one stop more exposure so we set it to shut off at f/8.0.
We are ready for a test. The camera shutter is tripped and the main flash pumps out enough light to expose at f/5.6, the correct exposure for the subject. The fill light has been fooled to turn off at an exposure of f/4.0 so it will supply one less stop of flash than the main. The hair light has been told to expose for f/8.0 so it will pump out one stop more light than the main flash.
![78/365 - 12/14/09 [365 Days @ 50mm] - Vivitar 285 vs SB-25 vs SB-600](http://farm3.staticflickr.com/2577/4186192231_8473cca200.jpg)
“Vivitar 285 vs SB-25 vs SB-600” by Shardayyy
It will take some practice to determine the correct working distances between flash and subject. Further, if light modifiers such as umbrellas or soft boxes are used we need to make sure that the flash unit’s sensor is still able to “see” the subject. I would strongly suggest that all three flash units be the same brand and model; it will help reduce any inconsistencies from one use to the next.
Experiment with different combinations of f-stop settings on the flashes. Try bouncing the flash to reduce the stark quality of the light or shoot through a handkerchief. Once the photographer has mastered the basics of this three-light system it can serve as a useful skill for years.
About the Author
Stu Eddins is a blogger, instructor, and merchandiser, and is generally in charge of a lot of things for Porter’s Digital Cameras and Imaging (digital camera accessories). Years of experience over the counter and in classrooms have turned Stu into an evangelist for image preservation, capturing and sharing memories, and helping people understand digital cameras.
Like This Article?
Don't Miss The Next One!
Join over 100,000 photographers of all experience levels who receive our free photography tips and articles to stay current:


This automatic exposure with flash units the industry could have brought this out years ago. When the came with exposure meters build in cameras . It also could have been done with flash units.They had the technology. John