Focusing on Aperture
The primary purpose of the aperture setting is to regulate the amount of light that passes through the lens. Along with the shutter speed, it determines the quantity of light that reaches the camera’s sensor (or film) and forms a third of the ‘exposure triangle’. But, of more interest to most photographers is the creative potential of the aperture and shutter speed settings. I wrote about shutter speed in the past and today I’m going to explore some ways of making the most out of aperture.
Using aperture as a creative tool
Aperture and Depth of Field
I realize many readers are aware of this already, but let’s recap. The creative aspect of aperture is that it controls depth of field:
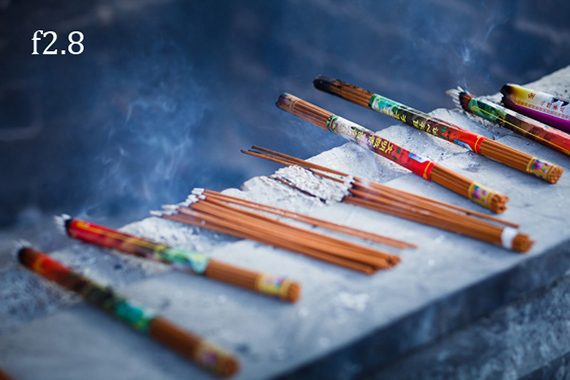
- A wide aperture setting (such as f/2 or f/4) reduces depth of field.
- A narrow aperture setting (such as f/11 or f/16) increases depth of field.
There are other factors that affect depth of field, too. Keep them in mind as you read the article and you will start to see how they have affected the photos that illustrate it:
- The closer you get to your subject, the less depth f field you get. This is probably the biggest single factor.
- Focal length. The longer the focal length of the lens, the less depth of field there is at any given aperture. This is partly to do with the perspective of the lens and the size of the subject within the frame, but it holds true most of the time.
- The larger your camera’s sensor, the less depth of field there is at any given focal length and aperture. That’s why photos taken with full-frame cameras tend to have limited depth-of-field while photos taken with compact cameras (most of which have very small sensors) have lots of depth of field.

Wider apertures give a shallow depth of field.
Portraits
Now, let’s take a look at how you can put these principles into action. One of my favorite techniques is to use a wide aperture to throw the background out of focus when I’m taking portraits.
This is called ‘selective focus’. The idea is to focus on the subject’s eyes, select a wide aperture so that the eyes and part of the face are in focus and the rest goes out of focus.

Selective focusing draws the eye to the subject and gives a nice bokeh effect.
These two photos show the effect of using wide apertures. The one on the left was taken with an aperture of f/5.6. This is the widest aperture available on most kit lenses. I used an 85mm lens on a full-frame camera. If you have an APS-C camera and a kit lens you’ll get a similar result by using the 55mm end of your lens.
The photo on the right was taken with the aperture set to f/1.8, the widest available on my 85mm prime lens. You can see there is a big difference. It explains why 85mm prime lenses are so good for portraits. The focal length gives a flattering perspective and the wide aperture lets you take photos with lots of lovely bokeh (this word describes the quality of out of focus areas in the photo).
Primes have wider maximum apertures than zoom lenses. If you don’t own any prime lenses it’s worth considering buying one for this reason alone; the creative potential of those wide aperture settings will open your eyes to a new way of seeing and taking photos. If you’re on a budget, then most manufacturers have an inexpensive 50mm prime lens available.
I love my 85mm lens for taking portraits. A 50mm prime lens on an APS-C camera is also a great portrait lens.
If you have a zoom lens, you can still get good bokeh with this tip:
Get in as close to your subject as you can, and move them as far away from the background as possible. This will help you keep depth-of-field as shallow as possible with your lens.

When using a zoom lens, move in close to the subject to help separate it from the background.
Close-Up Photography
You may remember that depth of field decreases as you get closer to your subject. This has real implications for close-up and macro photography. Depth of field is so narrow when you get up close that it’s unlikely (fancy post-processing techniques such as focus stacking aside) you will not be able to get the entire frame in focus even at f/22.

When the camera is close to the subject it becomes difficult to keep the entire subject in focus.
That’s okay. I prefer it that way as it lets me take photos with lots of out of focus areas. I even like using wide aperture settings so that only a small part of the subject is sharp. The two photos above were both taken with prime lenses for this reason (the top one with an 85mm lens and the bottom with a 40mm lens).
Alternatively, you can stop down to create images with more depth of field.

Use a narrow aperture if you want more of the background to stay in focus.
Landscape Photography
In landscape photography you often take the opposite approach to focal length and aperture selection. Most landscape photographers use wide-angle lenses and narrow apertures such as f/11 or f/16 to ensure that the entire scene is in focus.
This has an interesting side effect when you consider that the best landscape photos are taken in low light (the quality of the light is better) and with low ISOs (for maximum image quality). This invariably means that you need a slow shutter speed to obtain the correct exposure (and a tripod to support the camera).
Slow shutter speeds are also a great way to get creative (the photo above was taken with a shutter speed of 400 seconds). The aperture selection isn’t very exciting, but the potential of what you can do with shutter speed is. Don’t forget, you can read more about using shutter speed creatively here.
Aperture Priority
As we’ve seen, aperture is about far more than controlling the amount of light that passes through the lens. It’s a creative tool that good photographers use to create beautiful images.
A good exercise is to consider the effect of using different aperture settings when you take a photo. With digital cameras it’s easy to experiment with different aperture values and look at the results right away on the LCD screen. This helps you decide which setting is most effective for the subject that you’re shooting.

Aperture Priority Mode
The easiest way to control aperture is to use the aperture priority mode on your camera (represented by the initials Av on the Mode dial of my EOS camera). This is the one I use whenever I am taking portraits, landscapes or close-up photos. In aperture priority, you set the aperture and ISO, and the camera sets the shutter speed for you automatically (if you need a faster shutter speed, you can raise the ISO).
Hopefully, this article has helped you appreciate the creative potential of the aperture setting.
About the Author:
For further training, Andrew Gibson’s ebook, Mastering Photography: A Beginner’s Guide to Using Digital Cameras, introduces you to digital photography and helps you make the most out of your digital camera. It covers concepts such as lighting and composition, as well as the camera settings like Programmed Auto you need to use to become a creative photographer.
Like This Article?
Don't Miss The Next One!
Join over 100,000 photographers of all experience levels who receive our free photography tips and articles to stay current:


Well spotted, Kt. That’s another difference between aperture settings. There is usually quite significant vignetting at the widest aperture of any lens. It gradually disappears as you stop down. I may have darkened the edges a little more in post too.
What’s with the vignette on the portrait? The 1.8 is much darker on the edges.
Good article, I especially appreciate you giving details for an APSC camera as well as full frame. So many articles do not indicate whether their sensor is full frame or APSC.