HDR, or high-dynamic range, photographs have become very trendy—especially among photographers who enjoy creating surreal effects in their images. However, this technique can be used for photo-realism to combine multiple exposures into the ideal image.
This video explains the step-by-step process necessary to create HDR images using Photoshop:
Creating HDR Images Using Photoshop
Huges recommends starting with 3 to 5 exposures of the same image to create an HDR photograph. He outlines the following steps to combine the exposures into the ideal composite:
1. Import the images into Photoshop. Go to the Automate menu (File > Automate > HDR Pro) and choose Merge to HDR Pro.
2. Change to 32-bit. Photoshop will give you all your images along with one of two dialogs. The first, more simple dialog means you’re in 32-bit, while the second, busier one indicates you’re using 16-bit.
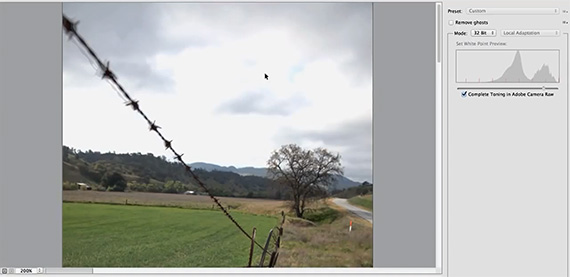
The simple dialog box on the right lets you know you’re in 32-bit mode.
3. Remove Ghosts. Layering multiple exposures, especially in situations where some of the content in the image is moving, will result in ghosting between the images. Simply click on Remove Ghosts, and Photoshop will correct the image.
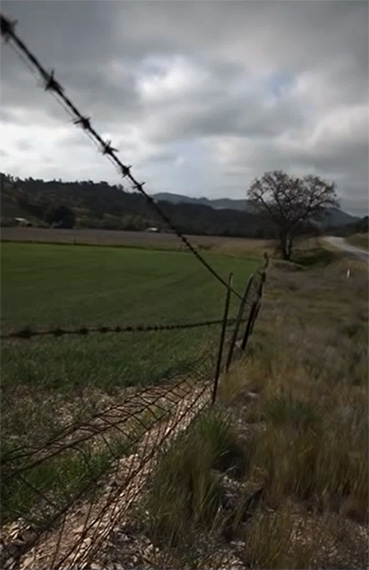
Ghost trails appear along the edges of any objects that were moving in the original images.
4. Tone the image. Use Camera RAW for toning. If you use Photoshop CC, simply click “Tone in ACR”. If you use Photoshop CS6 or Lightroom 5, save a 32-bit .tif file, then go into Photoshop’s file handling preferences and tell Camera RAW to open those .tif files. Now, you can use your familiar controls to adjust the exposure, open shadows, introduce clarity, add warmth, and make any other adjustments you desire.
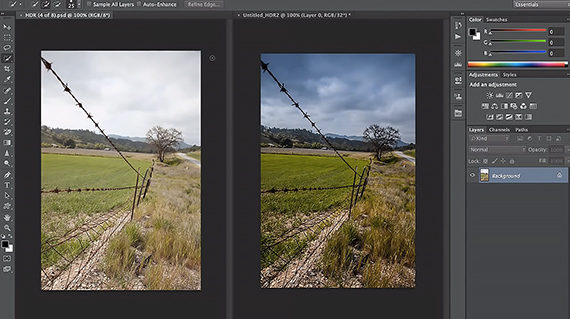
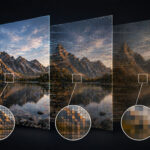
Comparing Original Image to HDR
Bryan O’Neil Hughes compares his HDR image to the mid-range single capture. He notes that the HDR is much more vibrant, detailed, and shows a great dynamic range. Add this tool to your editing repertoire to add depth and detail to your best photographs.
Like This Article?
Don't Miss The Next One!
Join over 100,000 photographers of all experience levels who receive our free photography tips and articles to stay current:


Photoshop is an essential tool for any photographer. The ability to quickly create HDR images and adjust them to your liking is equally important. Thanks for sharing.
Great blog nice n useful information , it is very helpful for me.
Can you use 3-5 copies of the same image or do they need to be of different exposure values. In other words, can I copy the original image 3-5 times.
I just wanted to take a thumbs up for this great article. I found the Camera Raw with Photoshop CC. Spending hours watching the process with single exposure photos. This is awesome. The photos came out beautiful. I just want to think twice to go or make something more realistic.