Between lenses, cameras, and basic accessories, the act of making images can be expensive. In order to survive, photographers have to learn to be resourceful. But resourcefulness doesn’t necessarily mean having to cut corners. As COOPH demonstrates, even something as simple as cardboard can be used to completely transform your images:
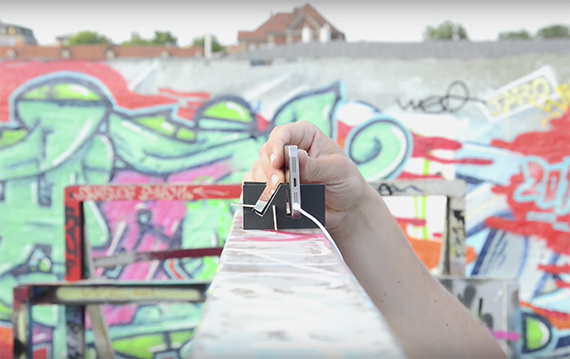
1. Light Stenciling
Most of us have experimented with light painting at one point or another. But did you know that you can employ the same techniques to do a bit of creative stenciling in your images?
- Find an old shoebox. Take an inkjet print of the shape you’d like to stamp and lay it on top of the box. Use an X-acto knife to trace around the edges of the shape and into the box.
- Once you’ve cut out your desired shape, line the box with wax paper. If desired, you can also add cellophane to give the stamp some color.
- Create a long exposure with your camera. While the camera is recording, have an assistant step into the scene with the shoe box. Using an LED flashlight, quickly shine light through the box, with the shape pointed directly at the camera’s lens.
- Instruct your assistant to change their position and distance in relation to the camera while shining the light to create a greater sense of depth in the final image.

2. Smartphone Tripod
Want to go the extra mile with your selfies? Look no further than the cardboard scraps sitting in your recycling. This handy little tripod can certainly be of service to just about any photographer.
- With a pencil, sketch out a small rectangle approximately the size of your smartphone’s edge. The rectangle can either come straight down at a 90 degree angle, or come in at an angle if you’d like your phone to rest slightly tilted.
- Use an X-acto knife to remove the sketched section, creating an opening for the phone to fit into. Use the first piece of cardboard to create an equal, identical second end piece.
- Cut a small slit at the bottom corners of each cardboard piece.
- Using scraps of leftover cardboard, connect each end of the tripod together.
- Set the camera in place. If desired, you can use a pair of headphones with an adjustable volume mechanism as a remote shutter by pressing the “+” button to snap a shot.
3. Shaped Bokeh
Believe it or not, it’s possible to transform your bokeh into just about any 2D shape that you can imagine. Better yet, it only takes cardboard, scissors, and a few minutes to accomplish.
- Cut out a circular piece of cardboard, measured to fit over the front of your lens.
- Once the circle is cut, cut whatever your desired shape happens to be out of the center.
- Using a few pieces of tape, secure the circular piece of cardboard onto your lens of choice.
- Use a wide open aperture to accentuate the bokeh effect within your final image.
4. Smartphone Pinhole
Pinhole images have been around since the invention of the camera obscura in the 16th century. Use this hack to bring this ultra-vintage look to life with your ultra-modern smartphone camera!
- Find (or cut down) a piece on cardboard just an inch or two in length and width.
- Use a thumbtack to create a pinhole in the center of the piece of cardboard.
- Hold it in front of your smartphone’s camera lens. Right away, you’ll be able to preview the pinhole effect.
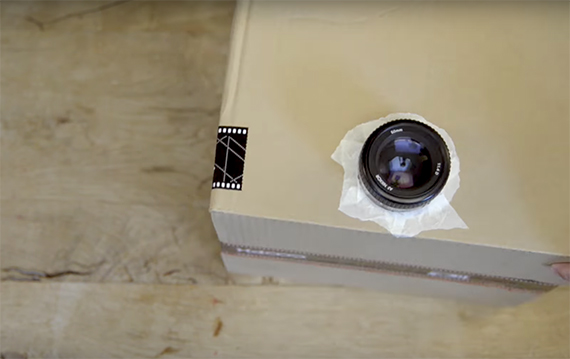
5. Makeshift Macro Lens
There’s no arguing the fact that macro photography is absolutely fascinating. Top-of-the-line macro lenses can cost thousands of dollars. Luckily, it’s easy to piece one together using materials sitting around the house.
- Choose a lens that you’d like to try out. Tape a toilet paper roll in a position such that the cardboard surrounds the glass element.
- Tape the other half of the toilet paper roll directly to your DSLR, making sure that it’s securely in place.
- Begin taking pictures without the lens actually being attached to the camera itself. You’ll find that lens focusing will continue to function as normal, and that your end image will be drastically magnified.
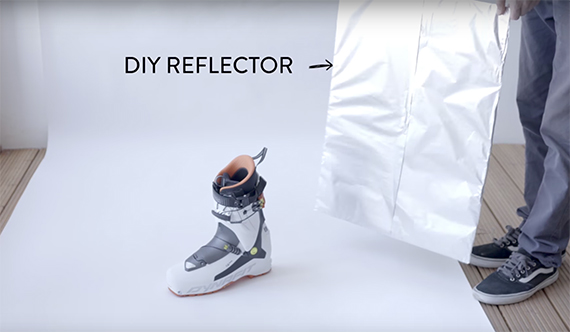
6. DIY Reflector
A reflector is one of the single most important tools that a photographer can have. Reflectors help redirect existing light to fill in the darkest corners of a subject. In a pinch, you can make one in just under two minutes.
- Procure a large, sturdy piece of cardboard. Wrap the board in aluminum foil, avoiding wrinkles as much as possible.
- Move the board as desired on set. You’ll find that holding the board at different angles will consequently alter the angle and amount of light that comes into a photographic scene.
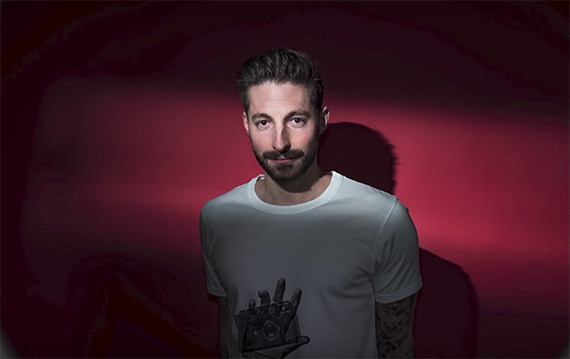
7. Modified Flash
Bare-bulb flash photography can be flat, harsh, and at times, a bit boring. Why not try out this tip to make your shots a bit more interesting?
- Measure the dimensions of your speed light’s lighting element. Cut four pieces of cardboard, making sure that each piece’s width corresponds with the speed light measurements.
- Make the height of the larger rectangles about an inch longer than the height of the shorter rectangles. Fold the extra material on the longer rectangles over to create adjustable flaps.
- Take the cardboard pieces and tape them together to create a prism that fits over the flash’s lighting element.
- Adjust the flaps as you shoot to broaden or narrow the amount of light coming into your scene.
8. Budget Projector
While it’s not quite a photo hack, who doesn’t want a super cool projector to show off their work? If you have a spare lens lying around, repurpose it to create one of your own!
- Find an old shoe box. Trace the perimeter of a lens or magnifying glass on one side of the box. Cut out the circle you traced, then fit the glass into the opening.
- Fasten your lens in place using tape.
- Place a smartphone into the box in a way such that the screen’s display is upside down. Use the DIY tripod to ensure that the phone remains upright.
- Tape the box down and turn off any lights in the room in which you’ll be using the projector.
- Position the projector so that the projected image displays on a blank, simple surface that won’t interfere with your image.
Have you tried any of these cardboard hacks?
Like This Article?
Don't Miss The Next One!
Join over 100,000 photographers of all experience levels who receive our free photography tips and articles to stay current:


Leave a Reply