Restaurants depend on beautiful images of their food to draw in customers. This is one of the reasons why food photography is hugely popular in the industry. Food and travel photographer Skyler Burt presents six effective food photography tricks to satisfy hungry eyes:
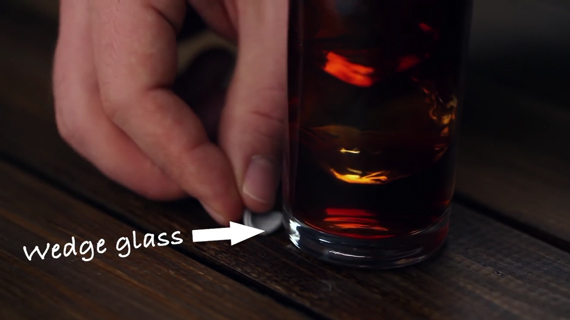
1. Fix Tilted Glasses
Sometimes you might notice that a drinking glass is not straight. It may be due to the table itself not being level, or maybe the base of the glass isn’t even. You can simply fix it by using some modelling clay as a wedge.
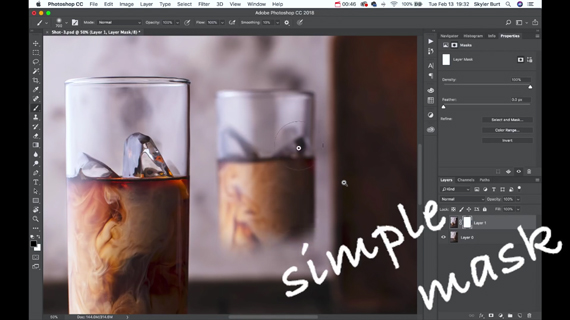
2. Multiply Your Props
If you have limited resources to photograph, simply take multiple photographs of the prop by placing it in different positions, and use the mask tool in Photoshop to multiply it.
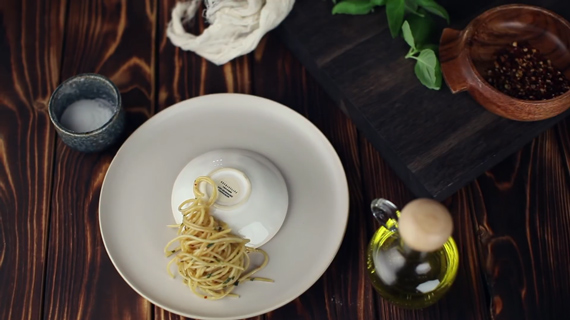
3. Use an Inverted Bowl
This trick works especially well with spaghetti. To ensure that the spaghetti looks well presented, place an inverted bowl (small size) on a plate and then cover it with spaghetti all around. This helps the food maintain good structure while it is being photographed.
4. Make a Beam of Light with Two Gobos
Gobos can be anything that obstructs the light and forms various patterns of light and shadows over the subject. To give a more dramatic look to your food photos, you can use two boards as gobos to create a slit. The light passing from the slit will create a beam which you can use to put emphasis on the food being photographed.
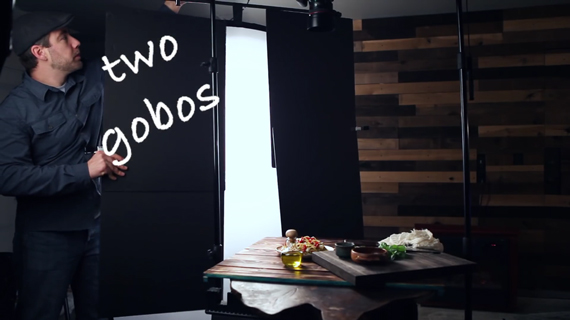
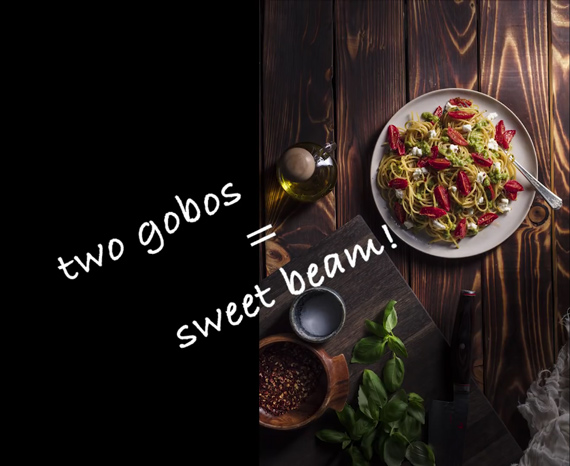
Notice the beam of light created by two gobos.
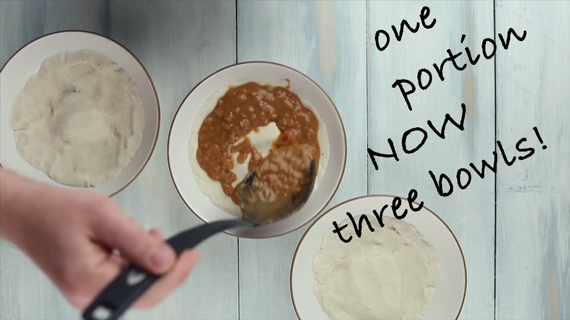
5. Create a False Bottom
As Burt demonstrates in the video, you can knead some water and corn flour and use it in your bowls to create a false bottom. This will allow you to fill up more bowls with smaller portions.
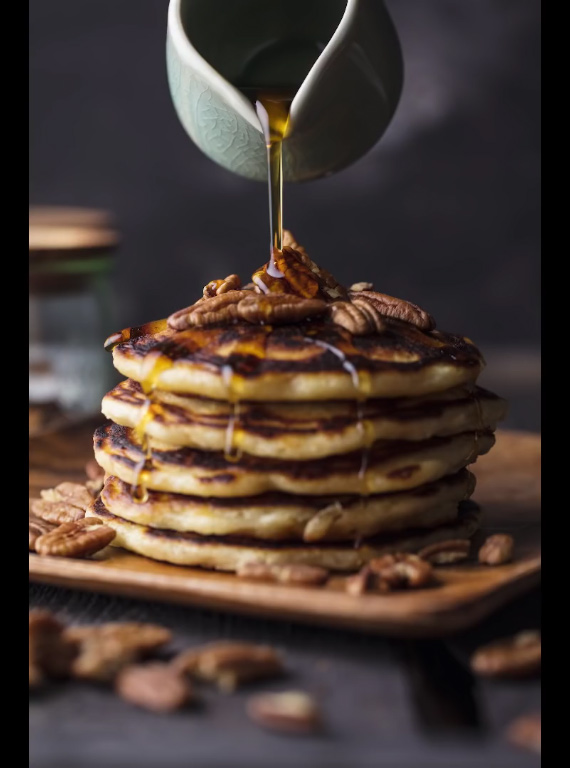
6. Get the Perfect Pour
You must have seen those commercials where they pour syrup over pancakes, making you drool. To create such shots, start by taking a photo with just the food; don’t touch anything else. Next, take multiple photos of the pour that you make. Later, stack the images all up in Photoshop and use a layer mask to create that perfect pour.
With these easy to follow tips, we sure hope that your next food photos turn out great no matter how they taste.
Like This Article?
Don't Miss The Next One!
Join over 100,000 photographers of all experience levels who receive our free photography tips and articles to stay current:


Leave a Reply