Getting your blog post or video noticed on social media isn’t always easy, and an a eye-catching photo as your featured image or video thumbnail can make all the difference. With that in mind, commercial fashion photographer Mark Wallace has created this simple five step tutorial that can make even drab, uninteresting photos catch a viewer’s eye:
The main idea behind Wallace’s editing flow in this video is to make the subject stand out from the background in a dramatic way. Now, of course, it’s always best to try to get the best shot you can in-camera, but let’s face it, when blogging or uploading videos, we don’t always have the shot we want.

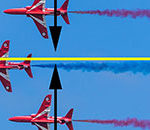
Reducing the lighting of the background and bumping up the contrast make the focal point crystal clear.

A more subtle effect.
Of course, Wallace’s technique is a bit “in your face.” The shots have very clear editing marks and even the “subtler” shot of the motorcycle has a definite halo, so it won’t be to everyone’s taste. Even so, it’s certainly one way to get the job done. Here’s how he does it.
How to Make Your Photos Pop
- Take care of all of your global tonal adjustments: white balance, color corrections, shadows, highlights, etc.
- Use Lightroom’s Radial filter to set the focus and reduce the exposure outside the focus area.
- Fine tune with adjustment brushes: spot removal, object de-emphasizing and removal, adjustments specific to small, localized areas of the photos. (Most folks would find this easier in Photoshop.)
- Add a vignette.
- Add any finishing touches. For Wallace, this means bumping up the clarity considerably.

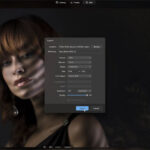
Using the adjustment brush in Lightroom
Most of the changes Wallace makes to the photos could have been prevented by having decent lighting or composing the image more carefully (e.g. remove the bottles before you shoot), but if you’re like most of us, you probably have plenty of “snaps”. That is, photos taken on the fly, and if you’re a blogger and it’s the only photo you’ve got, well you have to do something with it.
While boosting the contrast and balancing the exposure is probably the ideal way to go about getting this type of effect, Wallace’s workflow will certainly work for drawing interest to thumbnails and featured images.
So what do you think? Do Wallace’s final images for getting social media thumbnails and featured images? Would you use them? Or would you do something different? Perhaps you have your own technique for drawing in the viewer’s focus. Let us know in the comments below.
Like This Article?
Don't Miss The Next One!
Join over 100,000 photographers of all experience levels who receive our free photography tips and articles to stay current:


Leave a Reply