Feeling overwhelmed or frustrated with Lightroom? We often hear from photographers that learning to edit is one of their biggest challenges.
That’s why we’ve compiled five of our best suggestions to get you on your way to editing like a pro.
1. Crop to Enhance Your Story
Don’t underestimate the power of cropping your photo. Lightroom makes it incredibly easy to remove unnecessary portions of your images so you can tell a powerful story. Even if this is the only skill you master now, it’s a very useful one.
2. Use Key Tools Such as Adjustment Brush and Graduated Filter
There are numerous tools at your disposal, but some will have a greater impact on your photos or can serve you for an endless variety of enhancements.
That’s why it is important that you get to know these key tools, including the Adjustment Brush and the Graduated Filter.
The Adjustment Brush gives you tremendous control over a number of settings, including Exposure, Highlights, Shadows, and Clarity. This tool lets you make local changes only to the areas you select. This means you don’t have to change the Exposure level of your entire image. For example, you can make micro changes to selected areas, brightening or darkening areas as you wish.
The Graduated Filter is also located at the top of the Develop panel, underneath the histogram. Like the Adjustment Brush, the Graduated Filter lets you adjust a variety of settings.
Instead of “painting” on changes with a brush, this tool uses three linear lines to make adjustments over large areas.
For example, the Graduated Filter would make it easy to change the exposure on the left side of an image, while leaving the rest of your photo untouched.

Graduated Filters and Adjustment Brush
3. Get to Know the Hue/Saturation/Luminance Tab
Hue affects the tonal range of each color in your image. Saturation determines the intensity of color, while Luminance controls the brightness of color.
By adjusting these sliders to the right or left, you can make minute or enormous changes to your photos.
4. Try Distraction-Free Image Viewing
If you’d like a distraction-free view of your image while editing, press the “L” key for Lights Out mode. If you hit the L key once, it dims the Lightroom interface; press it again to isolate your image on a black screen. Hit the L key a third time to reset the view.
5. Try Presets
Lightroom comes with presets along the left hand side of the screen that you can apply to your image. This is helpful when you’re learning to edit because a preset instantly makes many changes and displays those adjustments in each panel while in Develop mode.
Once you figure out which types of presets you like best, note similarities in settings once you apply the preset and learn to make the adjustments yourself!
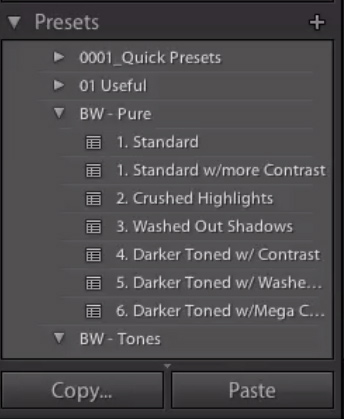
Presets
If you’re looking for one or two tools that can make a big difference instantly, we’d recommend learning about the Adjustment Brush and the Gradient Filter first.
Gaining confidence in using the tools we’ve outlined here will take your editing skills from ho-hum to amazing. You’ll be editing like a pro in no time.
Like This Article?
Don't Miss The Next One!
Join over 100,000 photographers of all experience levels who receive our free photography tips and articles to stay current:


Leave a Reply