Many beginner photographers find working with flash daunting. In practice, if you just pay attention to a few basic concepts, things aren’t so complicated. Whether you’ve recently got yourself a simple speedlight or a proper flash, photographer Gavin Hoey with Adorama is here to show you how you can set up your first light in three easy steps:
Whenever working with flash in a studio, you’ll want your image to be affected only by the light from the flash. Hoey shows how to adjust your camera’s shutter speed and f-stop to accomplish this. The next step is to control how the light illuminates the subject.
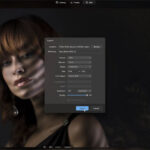
As Hoey demonstrates, a good practice is to illuminate the subject by placing the flash very close to them. Of course, you wouldn’t want the light to creep into the frame. This way, you can ensure that the light is as soft as possible. Then, with your camera settings untouched, simply adjust the flash power until you nail that exposure.
“Remember, the key to this lighting setup is keeping the surface of that softbox as close to your subject as you possibly can. The closer you get, the softer the light will appear and the more contrast you’ll get in your pictures.”
If you have an interesting background, you may want to show that off, too. You can do this either by moving the light closer to the background or by using the feathering method while keeping the distance between the light and the subject constant. If you’re not sure what feathering is, be sure to watch the full video. It’s nothing complicated, yet it makes a major difference.
Like This Article?
Don't Miss The Next One!
Join over 100,000 photographers of all experience levels who receive our free photography tips and articles to stay current:


Leave a Reply