Cameras come with factory settings that manufacturers think are “right.” But factory settings aren’t ideal for everyone. Moreover, there are some settings that are better off disabled. Photographer Tony Northrup recommends that you change the following 10 camera settings for a better experience:
Note: Camera settings menus vary by camera model and brand. Be sure to refer to your camera manual.
1. Turn Off That Beep
By default, cameras make a beeping sound when they lock focus. While it’s a satisfying sound, it can quickly get annoying at events like weddings or speeches.

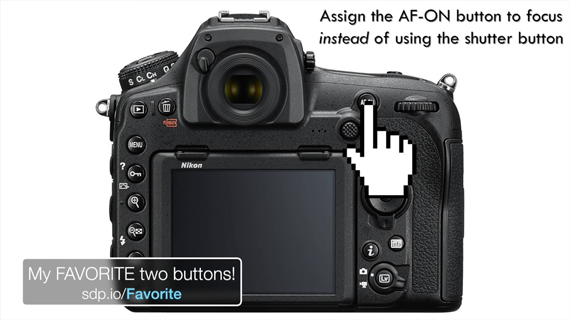
2. Turn On Back-Button Focus
Enabling the back button focus decouples the focus function from the shutter release button, and instead assigns focusing to a button on the back of the camera. It’s usually the button labeled AF-ON that gets assigned with the focusing function.
There are opposing views on whether or not you should do this, but the main advantage of using this method is that you don’t need to keep on refocusing in situations where the focal plane isn’t changing. Focus once using the back button, and take photos with the shutter release button.
3. Enable Raw File Format
Most cameras come with the default setting of shooting JPEGs. And since JPEGs are compressed file formats they don’t have the extended flexibility when it comes to post-processing. On the other hand, raw files store uncooked data and have a greater latitude when it comes to post-processing. You can recover a good amount of shadow and highlight details with raw files, which isn’t possible with JPEGs.
“If you’re shooting into the sun or other high contrast situations, it can really save a shot.”
If your camera has dual card slots, you can even configure the camera to save the raw files in the first slot and JPEGs in the second.

4. Adjust Extended Auto-ISO
Camera manufacturers always boast the higher ISO performance of cameras but limit it when using auto-ISO. If you use this function often and you need to shoot in low light conditions, make sure that you go into the camera menu and set the lower and higher ISO values manually to the greatest extent. After all, a noisy image is still better than a dark/blurry image.

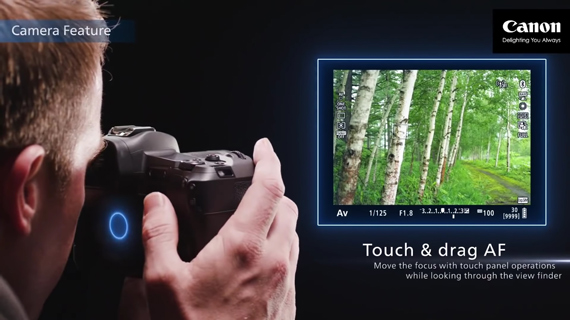
5. Configuring Focus Points
To make the photographer’s work easy, manufacturers default the camera settings to let it choose its own focus point. But if you’re really serious about your photography, you need to have control over where the camera focuses. Be sure to use the single point AF function, and move the focusing point around using the touch screen, joystick, or the dial on the back.
6. Use Continuous Auto Focus (AF-C)
Cameras come with single point auto focus (AF-S) as the default. Using this setting, the camera focuses on the subject once and locks focus. However, the auto-focus system in modern cameras is so good that by leaving it to auto-focus continuous (AF-C), you can tell the camera to keep tracking the subject by pressing the focus button. This way, if the camera or the subject happens to move a bit, the image will still be in focus.
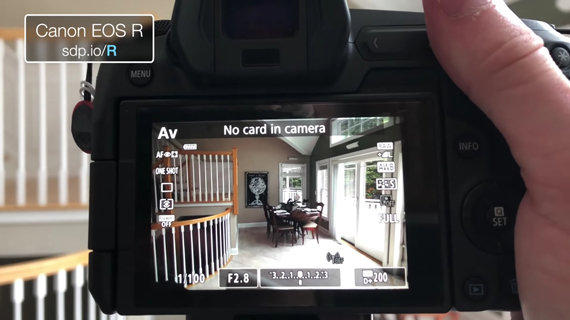
7. Keep the Camera From Shooting Without an SD Card
Why do cameras let you take pictures without inserting a memory card anyway? Keeping this setting enabled can run the risk of you taking photos only to realize later that you’ve been taking photos without an SD card. Be sure to disable this function so the camera will prompt you to insert a card before taking any photos.
8. Enable 4K Video
4K videos give you the extra space to crop in if you’re publishing in 1080p. Also, if you downsample 4K files to 1080p, they appear extra detailed than when directly shot in 1080p. It is thus a good idea to enable 4K video recording in your camera if you’re into shooting videos.
9. Customize My Menu
Almost every camera has a menu that you can customize. Doing so allows you to move your frequently used menu settings within easy reach. Identify the settings that you use frequently or those that you find hard to locate in the camera menu, and place them in “My Menu” for greater efficiency.
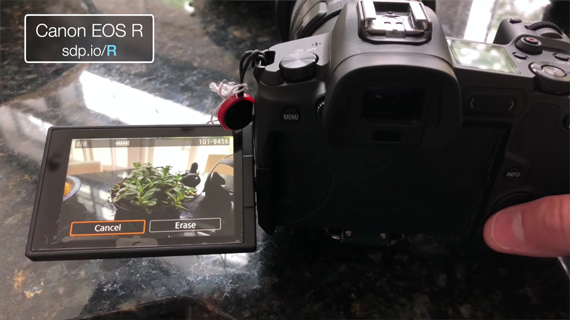
10. Prompt “Delete” Instead of “Cancel”
When reviewing images, you may find the need to delete the shot that you’ve just taken. Most cameras default to the “Cancel” button first when reviewing an image, which means you have to move the selection every time you want to delete an image. To make deleting files easier, set your camera to default to the “Delete” option. This will save you a button press when deleting an image.
“This can save you time and make you a productive photographer.”
Are there any settings on your camera that have been bugging you?
Like This Article?
Don't Miss The Next One!
Join over 100,000 photographers of all experience levels who receive our free photography tips and articles to stay current:


Leave a Reply